Homebrew Computer Is 16 Bits Of Awesome

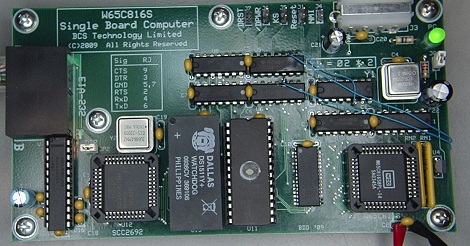
We’ve seen our share of homebrew computers over the years. Usually, these bare-bone systems use a small, early 80s-era microprocessor such as the Z80 or 6502. These little 8-bit machines are awesome, but somewhat limited in their capability. [BigDumbDinosaur] sent in a computer he’s been working on for a few years now featuring the infamous 65816 CPU – the same CPU found in the Apple IIgs, the Super Nintendo, and [Jeri Ellsworth]’s C-ONE computer.

The 65816 is a direct descendant of the venerable 6502 CPU found in the Commodore 64, Apple II, and just about every 80s microcomputer of note. [BigDumbDinosaur] chose the 65816 for its backwards-compatibility with the fun to program 6502 and the ability to use high clock rates and tons of address space for a very cool design.

After a ton of careful design and consideration, [BigDumbDinosaur]’s computer included a real-time clock, a watchdog timer, a serial port, 256kB of ROM, and 128kB of RAM.

It’s a really wonderful build, but [BigDumbDinosaur] isn’t done with this project yet. He’s working on version 2 of a 65816 computer that will use programmable ‘glue’ logic, a lot more RAM, have a SCSI interface (for a hard drive), and have preemptive multitasking.

An awesome job, and it’s wonderful to see the wonderful 65816 make its way into another homebrew computer. Now if only we could find a 68000-based homebrew computer…

ATmega324 Acts As A GPU For Homebrew Computer

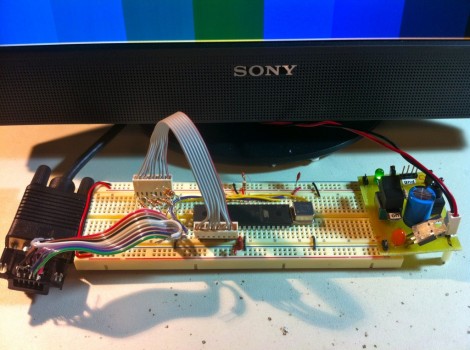
[Quinn Dunki’s] homebrew computer project is moving up another evolutionary rung. She needs a more versatile user interface and this starts with the data output. Up to this point a set of 7-segment digits has served as a way to display register values. But her current work is aimed at adding VGA output to the system.

She starts off her write up by justifying the protocol choice. Although composite video would be easier to get up and running (we see it in a lot of AVR projects) [Quinn] doesn’t have a screen that will display composite video. But there’s also a lot of info out there about VGA signal generation. She delved into the specifics and even found a great AVR-based example over at Lucid Science.

The version seen above uses the 40-pin ATmega324. It’s a lot bigger than necessary for the example she put together, but in the future she plans to add video memory and will be glad to have all of those extra I/O pins. When it comes to video sync, timing is everything. She wrote the code to drive the display using assembly. In this way, she was able to look up the cycles used for each command to ensure that the loop is running with near perfect timing.

Wire Wrap Odyssey: A 7400-series Homebrew 8-bit Computer

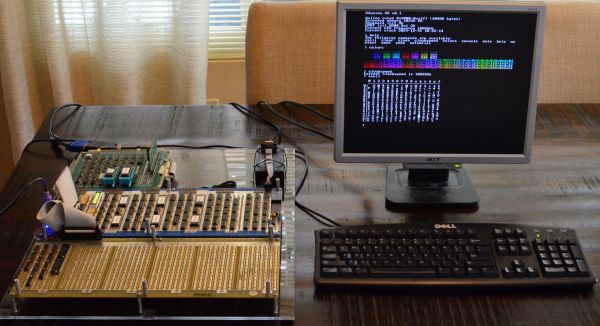
The Wire Wrap Odyssey's first Hello World from the CPU module, here hooked up to a logic analyzer in July of 2020. (Credit: Paul Krizak)
The Wire Wrap Odyssey’s first Hello World from the CPU module, here hooked up to a logic analyzer in July of 2020. (Credit: Paul Krizak)

As part of his computer science curriculum at Texas A&M University in the early 2000s, [Paul Krizak] took a computer architecture course on the basics of their functioning. This and being exposed to dozens of homebuilt computer projects inspired him to begin building his own 8-bit computer in 2010, which eventually grew into the Wire Wrap Odyssey. This name covers both the primary construction method chosen around 2019 in the form of wire-wrapped connections, as well the harrowing journey to reach this point with a functioning computer system despite many choices and setbacks.

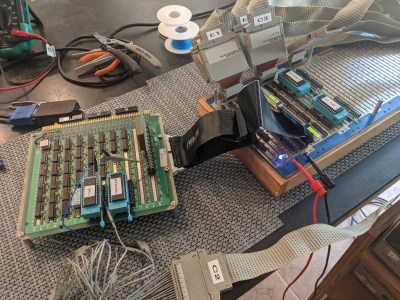
The Odyssey CPU is an 8-bit microcoded design with 16-bit address bus, using mostly 74HC-series logic. A VGA graphics card is also part of the design, which can output a 640×480 text display, with character glyphs read from the system ROM (32 kB AT28C256). As for the RAM, this is an extravagant 32 kB dual-port SRAM (Renesas 7007), which also allows both the CPU and video card to use the same SRAM. Currently the system has four peripherals: a PS/2 keyboard controller, an RTC and timer (DS1511Y+), 82C52 UART and 1 MB of extended RAM, but an ATA port and parallel port are in development.

Perhaps the most impressive part about this product is the level of documentation, from the early stages including paper doodles to the current state of the system, including the GitHub repository for the software. [Paul] was also an exhibitor at the Vintage Computing Festival (VCF) SoCal recently with his Wire Wrap Odyssey, where he was able to show off the progress so far. Next year he hopes to visit VCF SoCal again, with the remaining planned peripherals implemented.

Mystery 1802 Computer Was A Homebrew Project

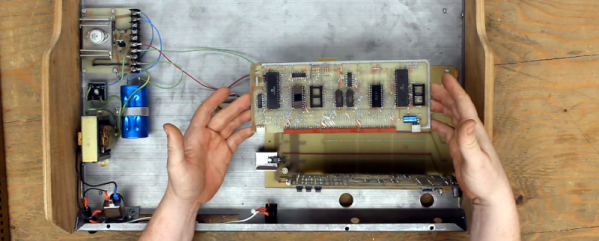
[CelGenStudios] has an impressive collection of vintage hardware. One that really struck us came from a thrift store in Canada, so the original provenance of it is unknown. It looks like someone’s handmade interpretation of a SOL-20. There’s a wooden and sheet metal box containing a keyboard looted from an old dedicated word processor (back when a word processor was a machine, not a piece of software). Inside? Some vintage-looking hand-drawn PC boards, including a backplane with two boards. One contains an RCA 1802 and a little bit of memory. There’s also a video card with more memory on it than the CPU.

We loved the 1802, and we disagree with [CelGenStudios] that it “wasn’t that popular.” It was super popular in some areas. The CMOS processor was popular in spacecraft and among homebrew builders. There were a few reasons for that. Unlike some early CPUs, you didn’t need much to bootstrap a system. It would run on 5V and had a “DMA” mode to key data in with just a few simple switches and buttons. You didn’t need a ROM-based monitor to get the system to work. In addition, the design could be low power, and the static design meant you could slow or stop the clock for very low power compared to many other systems of the day.

Continue reading “Mystery 1802 Computer Was A Homebrew Project”

SCAMP runs SCAMP/os

Homebrew 16 Bit Computer Reinvents All The Wheels

Building your own computer has many possible paths. One can fabricate their own Z80 or MOS 6502 computers and then run a period correct OS. Or a person could start from scratch as [James Stanley] did. [James] has invented a completely unique computer and CPU he calls SCAMP. SCAMP runs a custom OS called SCAMP/os which you can check out in the video below the break.

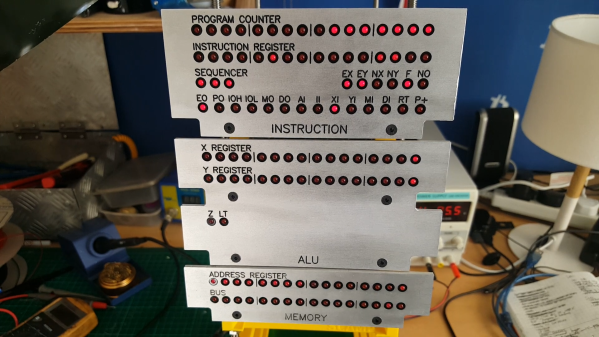
[James] describes the CPU and computer as purposefully primitive. Built out of discrete 74xx series logic chips, it runs at a fast-enough-for-homebrew 1 MHz. Plus, it has a lot of blinking lights that can’t help but remind us of the original Imsai 8080. But instead of a panel of switches for programming, the SCAMP/os boots to a shell, which is presented through a serial terminal. Programs are written in a bespoke language with its own compiler. The OS is described as a having a Unix-like feel with CP/M-like functionality. That’s quite a combination!

What we love most about the build, other than its clean looks and blinkenlights, is the amount of work that [James] has put into documenting the build both on his blog and on Github, where the source code and design is available. There’s also an open invitation for contributors to help advance the project. We’re sure he’ll get there, one bit at a time.

While [James] is using a Compact Flash card for storage currently we can’t help but wonder if a Cassette Tape storage system might be a worthwhile future upgrade.

Continue reading “Homebrew 16 Bit Computer Reinvents All The Wheels”

Homebrew ROM Reader Saves Data From A Vintage Minicomputer

Have you ever heard of a Centurion minicomputer? If not, don’t feel bad — we hadn’t either, until [David Lovett] stumbled upon a semi-complete version of the 1980-ish mini in all its wood-trimmed, dust-encased glory. And what does a hacker do with such an acquisition but attempt to get it going again?

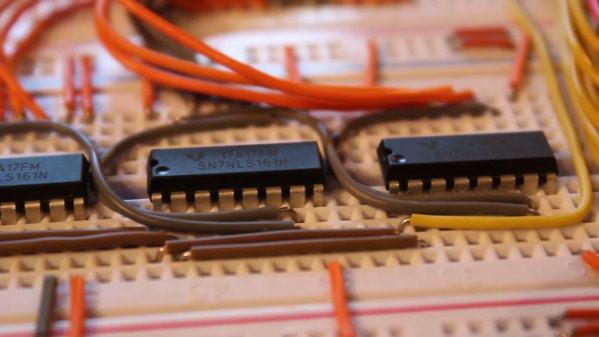
Of course, getting a machine from the Reagan administration running is not without its risks, including the chance of losing whatever is on the machine’s many ROM chips forever. When finding a commercial ROM reader supporting the various chips proved difficult, [David] decided to build his own. The work was eased considerably by the fact that he had managed to read one chip in a commercial reader, giving him a baseline to compare his circuit against. The hardware is straightforward — a 12-bit counter built from a trio of cascaded 74LS161s to step through addresses, plus an Arduino Nano to provide clock pulses and to read the data out to the serial port.

The circuit gave the same results as the known good read, meaning results would be valid for the rest of the chips. The breadboard setup made supporting multiple ROM pinouts easy, even for the chips that take -9 volts. What exactly the data on the ROMs mean, if anything, remains a mystery, but at least it’s backed up now.

Before anyone notes the obvious, yes, [David] could have used a 555 to clock the reader — perhaps even this one. We’d actually have loved that, but we get it — sometimes you just need to throw an Arduino at a job and be done with it.

Continue reading “Homebrew ROM Reader Saves Data From A Vintage Minicomputer”

VGA From Scratch On A Homebrew 8-bit Computer

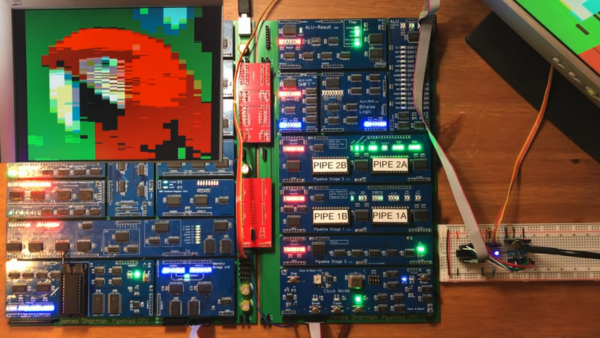
[James Sharman] has built an impressive 8-bit homebrew computer. Based on TTL logic chips, it has a pipelined design which makes it capable of Commodore-level computing, but [James] hasn’t quite finished everything yet. While it is currently built on its own custom PCB, it has a limiting LCD display which isn’t up to the standards of the rest of the build. To resolve this issue, he decided to implement VGA from scratch.

This isn’t a bit-bang VGA implementation, either. He plans for full resolution (640×480) which will push the limits of his hardware. He also sets goals of a 24-bit DAC which will allow for millions of colors, the ability to use sprites, and hardware scrolling. Since he’s doing all of this from scratch, the plan is to keep it as simple as possible and make gradual improvements to the build as he goes. To that end, the first iteration uses a single latching chip with some other passive components. After adding some code to the CPU to support the new video style, [James] is able to display an image on his monitor.

While the image of the parrot he’s displaying isn’t exactly perfect yet, it’s a great start for his build and he does plan to make improvements to it in future videos. We’d say he’s well on his way to reproducing a full 8-bit retrocomputer. Although VGA is long outdated for modern computers, the standard is straightforward to implement and limited versions can even be done with very small microcontrollers.

Thanks to [BaldPower] for the tip!

Continue reading “VGA From Scratch On A Homebrew 8-bit Computer”