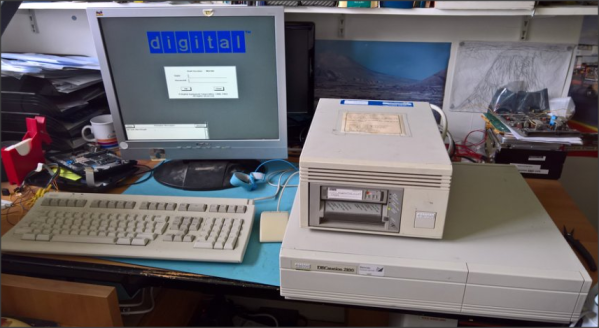
DEC microVAX with tape drive

Bake It To ReMake It: Cooking Old Magnetic Tape To Recover Data

Those of us old enough may remember the heyday of the text adventure game genre from the first time around. London-based Magnetic Scrolls was an early pioneering company producing titles for the first Amiga and Atari ST platforms. Fast-forward to 2017 and [Hugh Steers], the original co-founder and core developer for Magnetic Scrolls has formed an initiative to revive and re-release the original games on modern platforms. Since the 1980s-era DEC MicroVAX used originally for development is not particularly rare in retro computing circles, and media containing source code was found in someone’s loft space, reviving the games was not a tall order.

First, he needed to recover a copy of the original source code from the backup tapes. But there was a problem, it turns out that the decaying tapes used a unstable polyurethane-based binder to stick the oxide material (which is what stores the data) to the backing tape, and this binder can absorb water over the years.

Not much happens until you try to read the tape, then you trip over the so-called sticky-shed syndrome. Secondly you may find that a small amount of the oxide layer sheds from the tape, coating the read head, rollers and guides inside the complicated tape mechanism. This quickly results in it gumming up, and jamming, potentially chewing up the tape and destroying it permanently.

This was further exacerbated by the behaviour of the DEC TK50Z tape drive, which needed to shuttle the whole length of the tape as part of its normal operation.

A temporary solution was to bake the tape in an oven to drive out the moisture and reduce the stickiness enough to run it through the drive safely. Then only the oxide-shedding problem remained. The TK50Z drive was swapped for a TZ30 which shuttles the tape less, but also critically with a simple hack, would allow the heads to be cleaned with IPA between read passes. This was enough to keep the gumming up at bay and allow enough data to be read from the tapes to recover several games worth of code, ready for the re-releasing process.

The video after the break shows [Rob Jarratt] working through the process of the data recovery.

Continue reading “Bake It To ReMake It: Cooking Old Magnetic Tape To Recover Data”

A 3D Printer With An Electromagnetic Tool Changer

The versatility of 3D printers is simply amazing. Capable of producing a wide variety of prototypes, miscellaneous parts, artwork, and even other 3D printers, it’s an excellent addition to any shop or makerspace. The smaller, more inexpensive printers might do one type of printing well with a single tool, but if you really want to take a 3D printer’s versatility up to the next level you may want to try one with an automatic tool changing system like this one which uses magnets.

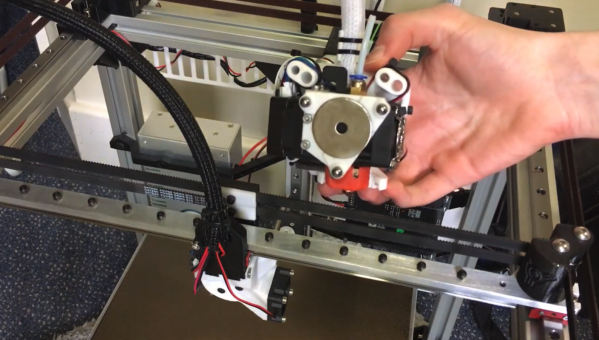
This 3D printer from [Will Hardy] uses an electromagnet to attach the tool to the printer. The arm is able to move to the tool storage area and quickly deposit and attach various tools as it runs through the prints. A failsafe mechanism keeps the tool from falling off of the head of the printer in case of a power outage, and several other design features were included to allow others to tweak this design to their own particular needs, such as enclosing the printer and increasing or decreasing the working area of the Core-XY printer as needed.

While the project looks like it works exceptionally well, [Will] notes that it is still in the prototyping phase and needs work on the software in order to refine its operation and make it suitable for more general-purpose uses. It’s an excellent design though and shows promise. It also reminds us of this other tool-changing system we featured a few months ago, albeit with a less electromagnetic twist.

Continue reading “A 3D Printer With An Electromagnetic Tool Changer”

Review: What On Earth Is An Electromagnetic Radiation Tester And Why Would I Need One?

One of the joys of an itinerant existence comes in periodically being reunited with the fruits of various orders that were sent to hackerspaces or friends somewhere along the way. These anonymous parcels from afar hold an assortment of wonders, with the added element of anticipation that comes from forgetting exactly what had been ordered.

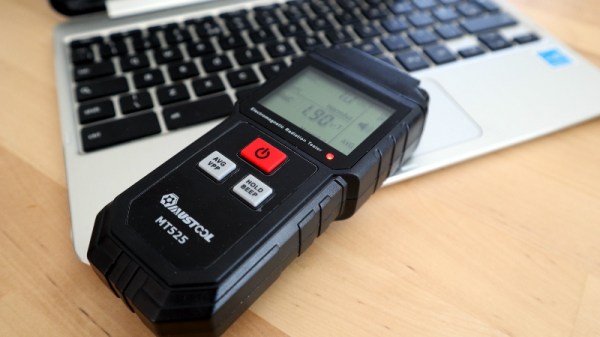
So it is with today’s subject, a Mustool MT525 electromagnetic radiation tester. At a cost not far above £10 ($13.70), this was an impulse purchase driven by curiosity; these devices claim to measure both magnetic and electric fields, but what do they really measure? My interest in these matters lies in the direction of radio, but I have never examined such an instrument. Time to subject it to the Hackaday treatment.

Continue reading “Review: What On Earth Is An Electromagnetic Radiation Tester And Why Would I Need One?”

Soviet Core Memory Experiments

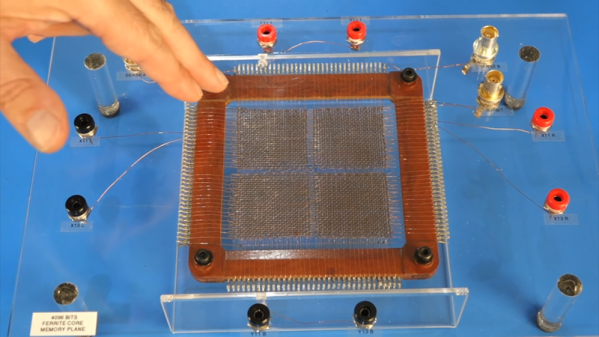
What do you do when you’ve bought some old Soviet core memory modules on eBay? If you are [CuriousMarc], you wire it up to some test connectors and use your test bench to see if the core memory still works. Spoiler alert: it does.

While it seems crude by today’s standard, there was a time when these memory modules would have been the amazing miniature tech of their day. Each little magnetic torus represents a bit and the modules have 1,024 and 4,096 tiny little donuts strung together in a grid.

Continue reading “Soviet Core Memory Experiments”

Hoverboard Grows Up, Becomes Magnetic Drill Press

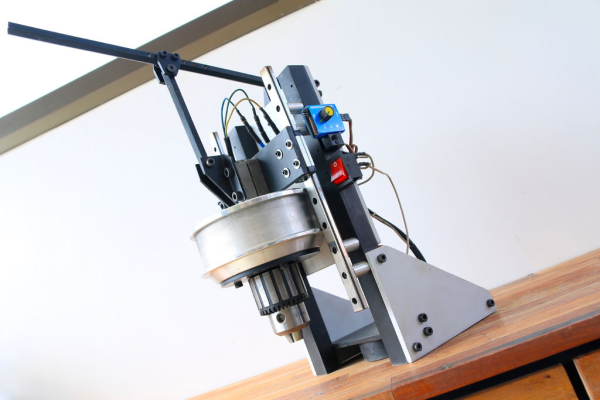
If you need to drill metal in tight places, the magnetic drill press, or mag drill is your BFF. The idea here is that a drill press with an electromagnetic base can go anywhere, and even drill horizontally if need be. If you don’t need to use one often, but want one anyway, why not build one out of e-waste?

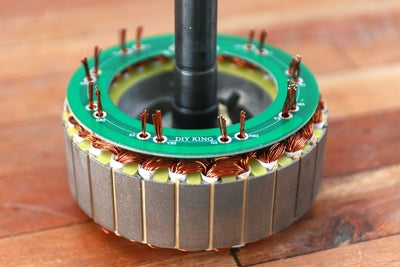
[DIY KING 00] built this mag drill starting with the motor from a hoverboard. While these three-phase brushless motors have a lot of torque to offer reuse projects like this, they’re not designed to be particularly fast.

He was able to make it about three times faster by cutting the windings apart and reconnecting them in parallel instead of series. He designed a simple PCB to neatly tie all the connections back together and added an electronic speed control (ESC) from an R/C car.

Reluctant to give up the crown, he made his own three-coil electromagnetic base, using a drill to wind magnet wire around temporary chuck-able cores. The coils are then potted in epoxy to keep out dust and drilling debris. Everything runs from two large LiPo batteries, and he can get about 15 minutes of high-torque drilling done before they’re dead. Can you feel the electromagnet pulling you past the break to check out the build and demo video?

Depending on what you’re doing, you might get away with a magnetic vise instead.

Continue reading “Hoverboard Grows Up, Becomes Magnetic Drill Press”

Interactive Core Memory Shield Helps Explains The Past

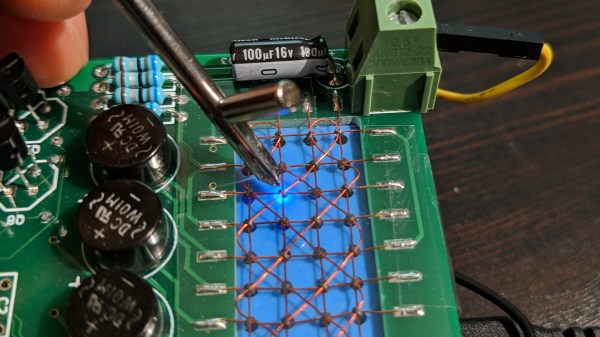
[Andy Geppert] sends in his incredibly clever interactive core memory shield. 

In a great display of one hacker’s work being the base for another’s, [Andy] started out with [Jussi Kilpelainen]’s core memory shield for Arduino.  As he was playing with the shield he had a desire to “see” the core memory flipping and got the idea to add an LED matrix aligned behind the individual cores.

The first iteration worked, but it only showed the state that the Arduino believed the core memory to be in. What he really wanted was a live read on the actual state. He realized that an Adafruit Featherwing 8×8 matrix display also fits behind the core memory. Now the LEDs update based on the read state of the core memory. This allows him to flip the individual bits with a magnetic stylus and see the result. Very cool.

You can see a video of it working after the break.

Continue reading “Interactive Core Memory Shield Helps Explains The Past”

Core Rope Memory Makes One Of The Oddest LED Flashers We’ve Ever Seen

If you’ve heard of core rope memory, it will probably be in the context of vintage computing equipment such as Apollo-era NASA hardware. A string of magnetic cores and sense wires form a simple ROM arrangement, which though long-ago-superceded by semiconductor memory remains possible to recreate by the experimenter. It’s a path [Nicola Cimmino] has trodden, as he’s not only made a few nibbles of core rope memory, but incorporated it with an Arduino as part of one of the most unusual LED flashers we’ve ever seen. The memory holds a known sequence of bits which is retrieved in sequence by the Arduino, and the LED is kept flashing as long as the read values conform to those expected.

The memory itself is simple enough (and not to be confused with magnetic core memory). The cores are ferrite rings that form a sequence of small transformers that become the bits of the memory. Individual bits are set high or low by either passing a sense wire through a core to create a primary, or bypassing it. Multiple sense wires can be used for separate nibbles in the same cores, so for example his four nibbles all share the same four cores. Pulses are sent down the wires, either passing through a core or not, and equivalently picked up or not on sense lines.

In this case the sense wire is driven directly to ground by Arduino pins which means that the circuit is relying upon the current limiting of the ATmega328 to avoid destroying itself, it’s possible we’d add a driver transistor. The bits are read meanwhile from the secondary windings through a diode rectifier and capacitor to an Arduino analogue pin.

Core memory has been paired with an Arduino before on these pages, though of the RAM variety.