3D Printed Lens Gears For Pro-grade Focus Pulling

Key Grip, Gaffer, Best Boy – any of us who’ve sat through every last minute of a Marvel movie to get to the post-credits scene – mmm, schawarma! – have seen the obscure titles of folks involved in movie making. But “Focus Puller”? How hard can it be to focus a camera?

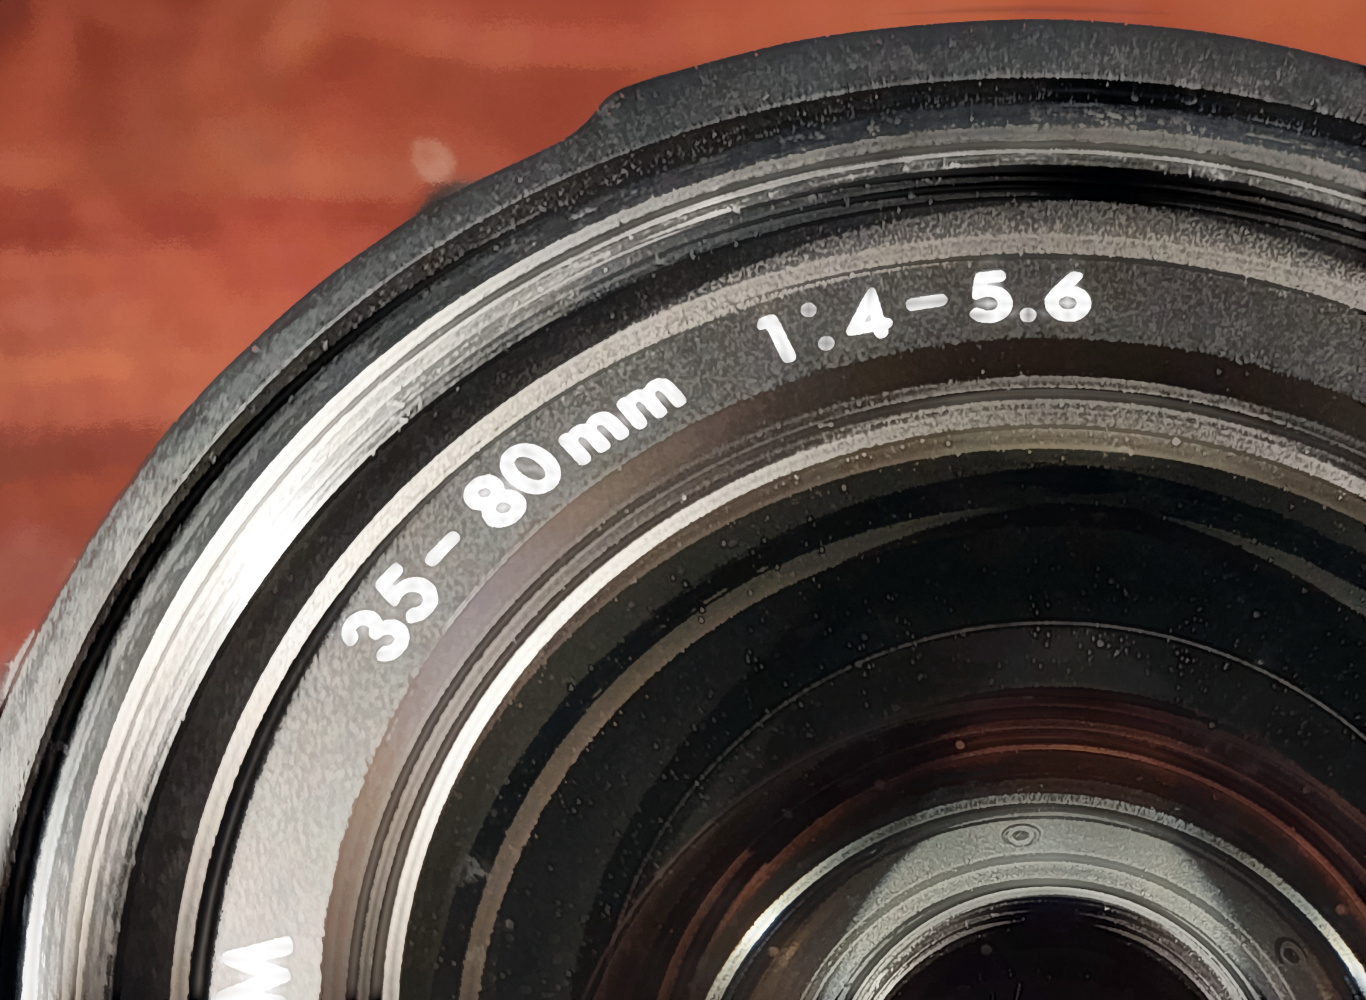
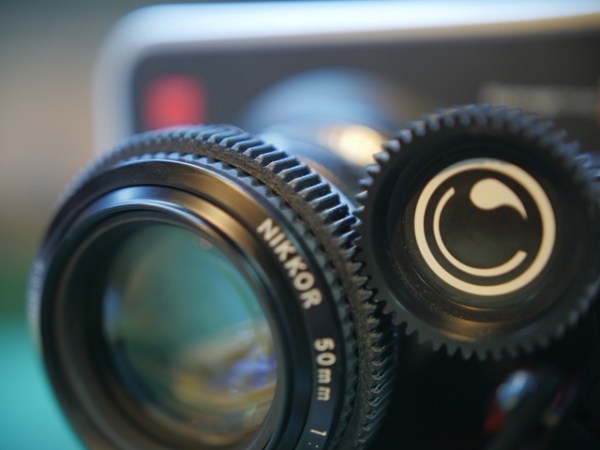
Turns out there’s a lot to the job, and in a many cases it makes sense to mechanize the task. Pro cinematic cameras have geared rings for just that reason, and now your DSLR lens can have them too with customized, 3D printed follow-focus gears.

Gear_Selection_01_full_render_preview_featured
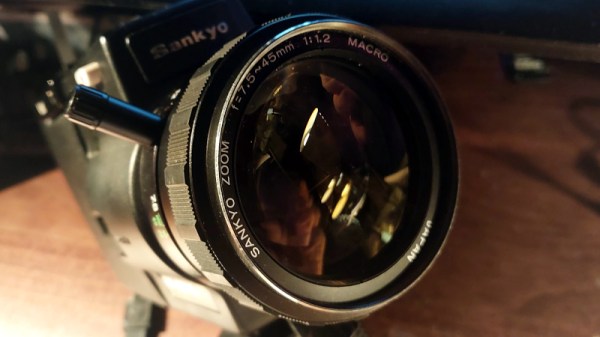
Unwilling to permanently modify his DSLR camera lens and dissatisfied with after-market lens gearing solutions, [Jaymis Loveday] learned enough OpenSCAD to generate gears from 50mm to 100mm in diameter in 0.5mm increments for a snug friction fit. Teamed up with commercially available focus pulling equipment, these lens gears should really help [Jaymis] get professional results from consumer lenses. 

Unfortunately, [Jaymis] doesn’t include any video of the gears in action, but the demo footage shown below presumably has some shots that were enabled by his custom gears. And even if it doesn’t, there are some really cool shots in it worth watching.

And for the budding cinematographers out there without access to a 3D printer, there’s always this hardware store solution to focus pulling.

Continue reading “3D Printed Lens Gears For Pro-grade Focus Pulling”

3D Printed Eyeglasses, VR Lenses

[Florian] is hyped for Google Cardboard, Oculus Rifts, and other head mounted displays, and with that comes an interest in lenses. [Floian] wanted to know if it was possible to create these lenses with a 3D printer. Why would anyone want to do this when these lenses can be had from dozens of online retailers for a few dollars? The phrase, ‘because I can’ comes to mind.

The starting point for the lens was a CAD model, a 3D printer, and silicone mold material. Clear casting resin fills the mold, cures, and turns into a translucent lens-shaped blob. This is the process of creating all lenses, and by finely sanding, polishing, and buffing this lens with grits ranging from 200 to 7000, this bit of resin slowly takes on an optically clear shine.

Do these lenses work? Yes, and [Florian] managed to build a head mounted display that can hold an iPhone up to his face for viewing 3D images and movies. The next goal is printing prescription glasses, and [Florian] seems very close to achieving that dream.

The last time we saw home lens making was more than a year ago. Is anyone else dabbling in this dark art? Let us know in the comments below and send in a tip if you have a favorite lens hack in mind.

3D Printed Lens

3D Printed Lenses Open Up Possibilities

Now this is some seriously cool stuff. The folks over at FormLabs decided to try a little experiment to test the optical clarity of their clear resin. It’s pretty damn clear.

Using their own slicing software, PreForm, [Craig Broady] printed the lens piece in an orientation that would maximize resin flow around the lens to help prevent defects, keeping it as smooth as possible. While the printed part looks quite clear, all lenses require some form of polishing to become optically clear. It was printed with a 50 micron resolution, and [Craig] used a power drill to sand the lens down from 220 grit to 2000 grit sand paper.

Continue reading “3D Printed Lenses Open Up Possibilities”

Print Your Own Adjustable Lenses

[Christopher] is really going the distance with his liquid-filled 3D printed lens project. The idea is to create a bladder out of two pieces of clear plastic. It can then be filled with liquid at a variable level of pressure to curve the plastic and create an adjustable lens. He was inspired by the TED talk (which we swear we already covered but couldn’t find the post) given by [Josh Silver] on adjustable eyeglass lenses.

Don’t miss the video after the break. [Christopher] shows off the assembly process for one lens. Two 3D printed frames are pressure fit together to hold one piece of plastic wrap. Two of those assemblies are then joined with JB weld and some 3D printed clips that help to hold it. A piece of shrink tubing is used as a hose to connect a syringe to the bladder. By filling the lens assembly with water he’s able to adjust how it refracts light.

Continue reading “Print Your Own Adjustable Lenses”

3D Printed Adapter Helps You Eat Chicken Nuggets On The Highway

So often, we see 3D printers used to create some nifty little tool for a tricky little job. Maybe it’s to lock cams together for a timing belt change, or to work as a jig for soldering some complex device. However, some hacks are even simpler than that. [maker_guy] realized that eating nuggets in the car could be easier than ever with a little printed adapter.

The print is simple. It’s a round caddy for the nugget sauces given out by Chick-fil-A restaurants. Why round? Because it lets the nugget sauce sit neatly in your car’s cupholder at an accessible height. Put the sauce tub in the adapter, peel it open, and you can dip to your heart’s content.

So simple, yet a game changer all the same.

No more delicately balancing Zesty Buffalo by the gearstick while you try and chow down. Nor will your seat covers be tainted with Honey Mustard!

“Not a hack!” you scream. “It’s frivolous nonsense!” To that I say, are you a nugget eater or not? I myself partake, and I can absolutely see the value in this. You see, us journalists work hard. We’re often stuck eating substandard food in our cars on the way from one thing to another, like so many others in busy professions. If a smart little 3D-printed adapter can make mealtime easier and save some mess, I’m calling that a win.

You should never be afraid to use your creativity to make tools to improve your life. Parts are on Thingiverse if you need to print your own. Mod it to suit McDonald’s product if you need. Heck, print in black and it’d look like a stock part of the car!

You don’t have to like this simple adapter, but you can’t deny its utility! Share your own nifty little adapter ideas in the comments.

The F Number On A Lens Means Something? Who Knew!

The Raspberry Pi has provided experimenters with many channels of enquiry, and for me perhaps the furthest into uncharted waters it has led me has come through its camera interface. At a superficial level I can plug in one of the ready-made modules with a built-in tiny lens, but as I experiment with the naked sensors of the HD module and a deconstructed Chinese miniature sensor it’s taken me further into camera design than I’d expected.

I’m using them with extra lenses to make full-frame captures of vintage film cameras, in the first instance 8 mm movie cameras but as I experiment more, even 35 mm still cameras. As I’m now channeling the light-gathering ability of a relatively huge area of 1970s glass into a tiny sensor designed for a miniature lens, I’m discovering that maybe too much light is not a good thing. At this point instead of winging it I found it was maybe a good idea to learn a bit about lenses, and that’s how I started to understand what those F-numbers mean.

More Than The Ring You Twiddle To Get The Exposure Right

lose-up of the end of a lens, showing the F-number range
The F-number range of a 1990s Sigma consumer-grade zoom lens.

I’m not a photographer, instead I’m an engineer who likes tinkering with cameras and who takes photographs as part of her work but using the camera as a tool. Thus the f-stop ring has always been for me simply the thing you twiddle when you want to bring the exposure into range, and which has an effect on depth of field.

The numbers were always just numbers, until suddenly I had to understand them for my projects to work. So the first number I had to learn about was the F-number of the lens itself. It’s usually printed on the front next to the focal length and expressed as a ratio of the diameter of the light entrance to the lens focal length. Looking around my bench I see numbers ranging from 1:1 for a Canon 8mm camera to 1:2.8 for a 1950s Braun Paxette 35 mm camera, but it seems that around 1:1.2 is where most 8 mm cameras sit and 1:2 is around where I’m seeing 35 mm kit lenses. The F-stop ring controls an adjustable aperture, and the numbers correspond to that ratio. So that 1:2 kit lens is only 1:2 at the F2 setting, and becomes 1:16 at the F16 setting.

Continue reading “The F Number On A Lens Means Something? Who Knew!”

Stereoscopic Macro Lens Shows Two Is Better Than One

You’d be forgiven if you thought [Nicholas Sherlock’s] new lens design was a macro lens that was 3D printed. In fact, it is, but it is also a macro lens that takes 3D images using two different cameras. If you have a pair of Sony E/FEs, you can 3D print your own copy today. If you don’t, you might have to adjust the design or wait for future releases. In any event, you are sure to enjoy the example photos, and there’s a video review of the device you can watch below.

The design merges two 4x microscope lenses to provide a 2X stereo image with a 5mm baseline. As you might expect, the secret is a prism in the assembly that allows one camera to shoot directly at the subject and the other to shoot with a 5mm offset. This is trickier than you might think because the cameras shift the image some, also.

Continue reading “Stereoscopic Macro Lens Shows Two Is Better Than One”