Friendly Webcam Robot Keeps An Eye On Privacy

Wouldn’t it be nice if every webcam had a hardware switch? Especially for those built-in webcams like the one in your laptop. Since they don’t have switches yet, we’re just stuck trying to remember to turn them off or re-apply the sticker after every meeting. [Becky Stern] was tired of trying to remember to blind the all-seeing eye, and decided to make a robot companion that would do it for her.

Essentially, a servo-driven, 3D-printed eyelid covers the eye’s iris and also the web cam directly underneath. At first, we though [Becky] had liberated the business parts of a cheap webcam and built it into the eyeball, but this is far less intrusive. The eyeball simply sits atop the monitor, and [Becky] can control the eyelid two ways: she can set a timer with the potentiometer to close it automatically after some number of minutes, or else do it on demand using the momentary button. We’d love to see it tied directly to Zoom and or whatever else [Becky] uses regularly. Be sure to check out the build and demo video after the break to see it in action.

We love this cute and friendly reminder that the camera could be watching us. It’s way less creepy than this realistic eyeball webcam that looks around and blinks.

Continue reading “Friendly Webcam Robot Keeps An Eye On Privacy”

Webcam Heart Rate Monitor Brings Photoplethysmography To Your PC

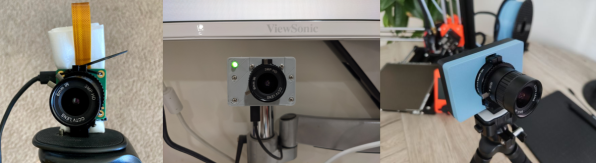
It seems like within the last ten years, every other gadget to be released has some sort of heart rate monitoring capability. Most modern smartwatches can report your BPMs, and we’ve even seen some headphones with the same ability hitting the market. Most of these devices use an optical measurement method in which skin is illuminated (usually by an LED) and a sensor records changes in skin color and light absorption. This method is called Photoplethysmography (PPG), and has even been implemented (in a simple form) in smartphone apps in which the data is generated by video of your finger covering the phone camera.

The basic theory of operation here has its roots in an experiment you probably undertook as a child. Did you ever hold a flashlight up to your hand to see the light, filtered red by your blood, shine through? That’s exactly what’s happening here. One key detail that is hard to perceive when a flashlight is illuminating your entire hand, however, is that deoxygenated blood is darker in color than oxygenated blood. By observing the frequency of the light-dark color change, we can back out the heart rate.

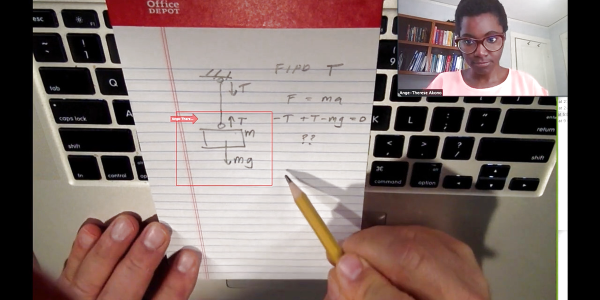
This is exactly how [Andy Kong] approached two methods of measuring heart rate from a webcam.

Method 1: The Cover-Up

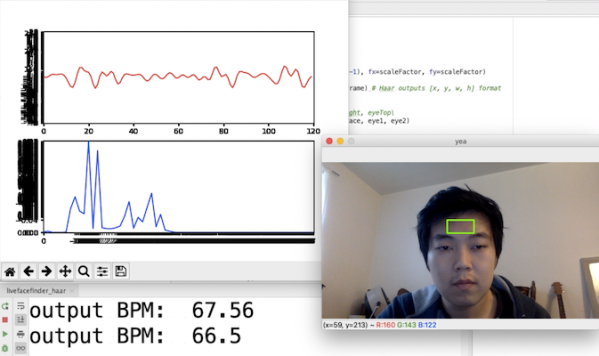
The first detection scheme [Andy] tried is what he refers to as the “phone flashlight trick”. Essentially, you cover the webcam lens entirely with your finger. Ambient light shines through your skin and produces a video stream that looks like a dark red rectangle. Though it may be imperceptible to us, the color changes ever-so-slightly as your heart beats. An FFT of the raw data gives us a heart rate that’s surprisingly accurate. [Andy] even has a live demo up that you can try for yourself (just remember to clean the smudges off your webcam afterwards).

Method 2: Remote Sensing

Now things are getting a bit more advanced. What if you don’t want to clean your webcam after each time you measure your heart rate? Well thankfully there’s a remote sensing option as well.

For this method, [Andy] is actually using OpenCV to measure the cyclical swelling and shrinking of blood vessels in your skin by measuring the color change in your face. It’s absolutely mind-blowing that this works, considering the resolution of a standard webcam. He found the most success by focusing on fleshy patches of skin right below the eyes, though he says others recommend taking a look at the forehead.

Every now and then we see something that works even though it really seems like it shouldn’t. How is a webcam sensitive enough to measure these minute changes in facial color? Why isn’t the signal uselessly noisy? This project is in good company with other neat heart rate measurement tricks we’ve seen. It’s amazing that this works at all, and even more incredible that it works so well.
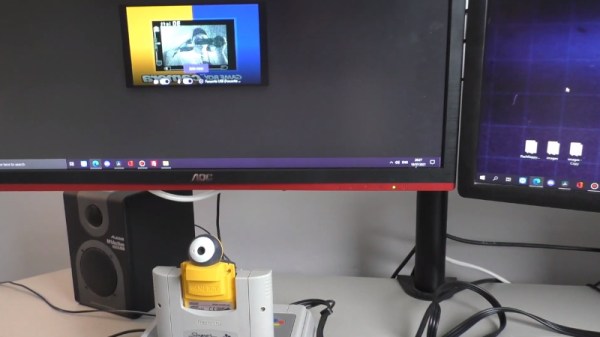
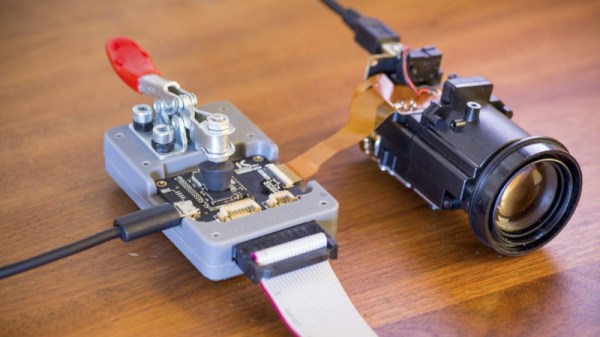
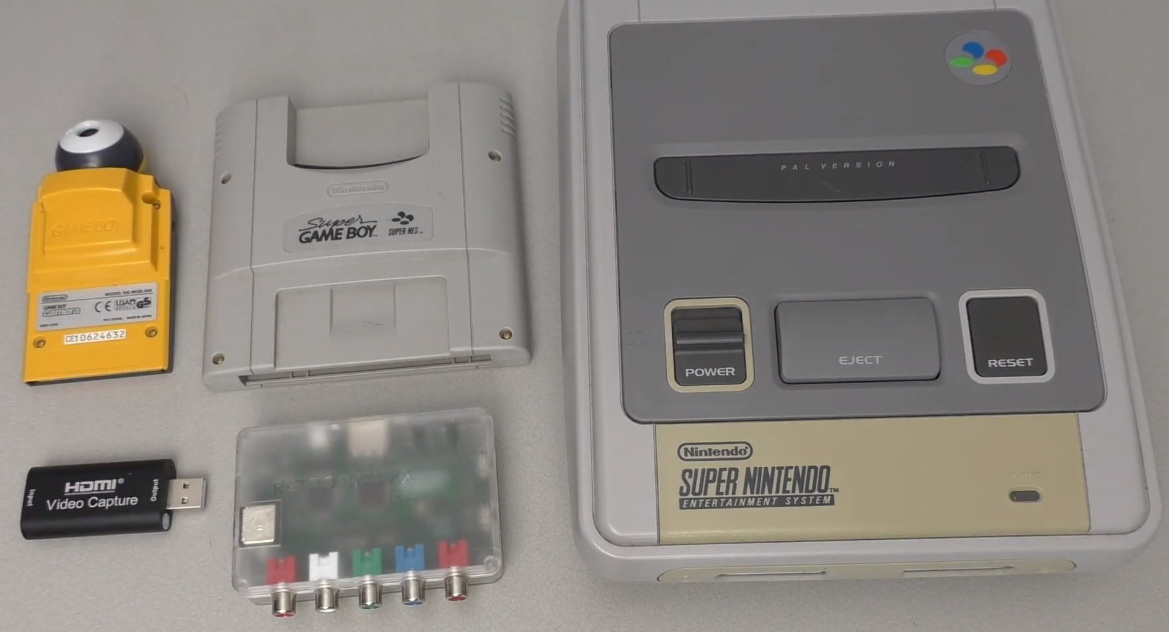
USB Webcams Out Of Stock? Make One With A Raspberry Pi And HQ Camera Module

More people working from home has had an impact on the cost and availability of USB webcams, so [Jeff Geerling] got around the issue with a DIY solution that rang in around $100. It consists of a Raspberry Pi and HQ camera module acting as a USB webcam, and there is no messy streaming of ffmpeg over the network masquerading as a camera device or anything. It works just as a USB camera should.

[Jeff] chose a Raspberry Pi Zero and HQ camera module for his unit, making a tidy package that might not be quite as small as commercial webcams, but is certainly perfectly respectable as a USB camera. That being said, there are a few drawbacks, namely the lack of a microphone or autofocus, latency issues at higher resolutions, and the need to shut down the Pi cleanly.

Check out the GitHub repository for everything needed to set up your own, including a complete hardware list and some options for mounting. [Jeff] also tested whether the camera would work with the new keyboard-embedded Raspberry Pi 400, and it absolutely does. Embedded below is a video walkthrough and demonstration of the whole project, so check it out.

Continue reading “USB Webcams Out Of Stock? Make One With A Raspberry Pi And HQ Camera Module”

Mirror Turns Webcam Into Document Camera

This is one of those so-simple-I-wish-I-invented-it hacks. Professor [Michael Peshkin] is teaching his engineering students remotely. While he has a nice second camera that he can use to transmit whatever he doodles on paper, most of his students just have the single webcam built into their laptops.

The solution is to put a mirror in front of the laptop cam, and flip the image left-to-right in software. They use Zoom, which has a mirror mode. Done.

The trick is making a nice frame. [Michael] has bent one out of wire, but suggests that a mirror compact works about as well in a pinch. It’s super important that his students can ask him questions backed up by drawings, and this reduces the startup cost to nearly nothing, making it universally useful.

[Prof. Peshkin] is not a stranger to mirror-based pedagogical hacks. Seven years ago, he showed us how to make a transparent whiteboard for video lectures, and it blew up on Hackaday. Since then, there are hundreds or thousands of Lightboards in the wild. We hope this idea catches on as well!

Motorized Lens Controller Techs Up Your Webcam

If you’re familiar with the DSLR camera market, you’d know that modern lenses are works of technological art. Crammed full of motors and delicate electronic assemblies, they’re bursting with features such as autofocus, optical stabilization and zoom. [Saulius Lukse] has been experimenting with motorized lenses for webcam applications, and has built a controller to make working with them a snap.

The controller is capable of controlling up to 3 stepper motors, as well as a voice coil, which should be enough for the vast majority of lenses out there. Microstepping is supported, which is key for optical systems in which tiny adjustments can make a big difference. The controller speaks USB and I2C, and is now based on an STM32 chip, having been upgraded from an earlier version which used the venerable ATmega328. The board is designed to be as compact as possible, to enable it to neatly fit inside camera and lens assemblies.

The board has been used to successfully control an 18x zoom lens, among others. Combining such a lens with a webcam and a good pan and tilt mechanism would create a highly capable surveillance package, or an excellent vision system for a robot.

It’s not the first time we’ve seen work from [Kurokesu] in these parts – they’ve done work on pedestrian detection before, too.

Cheap ESP32 Webcam

Looking for a cheap way to keep an eye on something? [Kevin Hester] pointed us to a way to make a WiFi webcam for under $10. This uses one of the many cheap ESP32 dev boards available, along with the Internet of Things platform PlatformIO and a bit of code that creates an RTSP server. This can be accessed by any software that supports this streaming protocol, and a bit of smart routing could put it on the interwebs. [Kevin] claims that the ESP32 camera dev boards he uses can be found for less than $10, but we found that most of them cost about $15. Either way, that’s cheaper than most commercial streaming cameras.

Continue reading “Cheap ESP32 Webcam”

Seeing A Webcam’s PCBs In A Whole Different Light

When it comes to inspection of printed circuits, most of us rely on the Mark I eyeball to see how we did with the soldering iron or reflow oven. And even when we need the help of some kind of microscope, our inspections are still firmly in the visible part of the electromagnetic spectrum. Pushing the frequency up a few orders of magnitude and inspecting PCBs with X-rays is a thing, though, and can reveal so much more than what the eye can see.

Unlike most of us, [Tom Anderson] has access to X-ray inspection equipment in the course of his business, so it seemed natural to do an X-ray enhanced teardown and PCB inspection. The victim for this exercise was nothing special – just a cheap WiFi camera of the kind that seems intent on reporting back to China on a regular basis. The guts are pretty much what you’d expect: a processor board, a board for the camera, and an accessory board for a microphone and IR LEDs. In the optical part of the spectrum they look pretty decent, with just some extra flux and a few solder blobs left behind. But under X-ray, the same board showed more serious problems, like vias and through-holes with insufficient solder. Such defects would be difficult to pick up in optical inspection, and it’s fascinating to see the internal structure of both the board and the components, especially the BGA chips.

If you’re stuck doing your inspections the old-fashioned way, fear not – we have tips aplenty for optical inspection. But don’t let that stop you from trying X-ray inspection; start with this tiny DIY X-ray tube and work your way up from there.

Thanks for the tip, [Jarrett].