Pulling Apart A Premium WebCam

Over at EDN, [Brian Dipert] has been tearing down web cameras. A few months ago, he broke into a bargain basement camera. This time, he’s looking into a premium unit. Although we have to admit from some of what he reports, we are a little surprised at some of the corners cut. For example, it’s a 4K camera that doesn’t quite provide a 4K image. Despite a Sony CMOS sensor, [Brian] found the low-light performance to be poor. However, it does carry a much larger price tag than the previous camera examined.

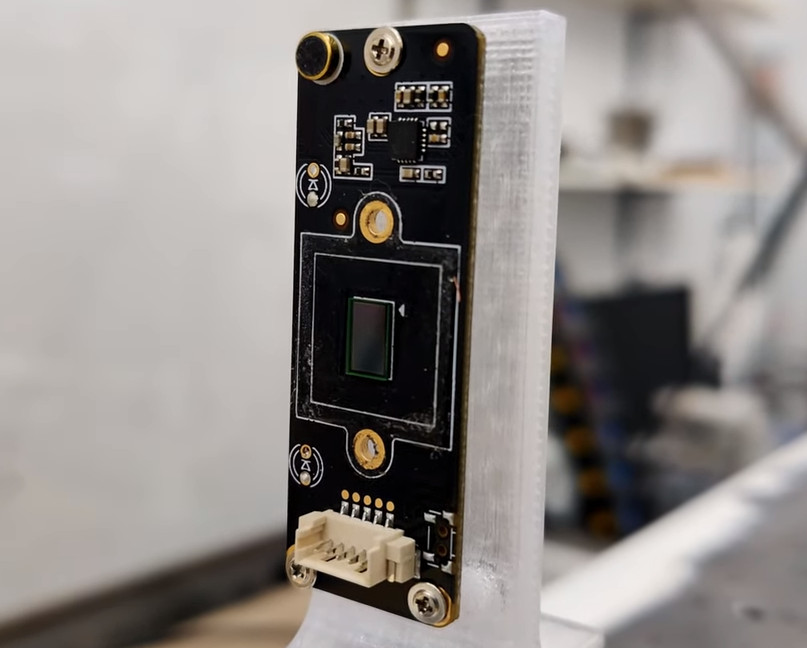
The interesting part is about half way down the page when he tries to open the unit up. It seems like it is getting harder and harder to get into things and this camera was no exception. The device finally gives up. Inside is a relatively unremarkable board with a host of unknown ICs. One interesting item is a gyro chip that determines if the camera is upside down.

[Brian] managed to get the camera back together with no harm. It is interesting to compare it to the $15 camera he took apart earlier.

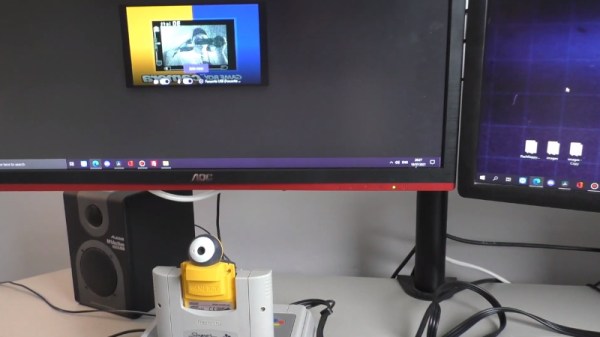
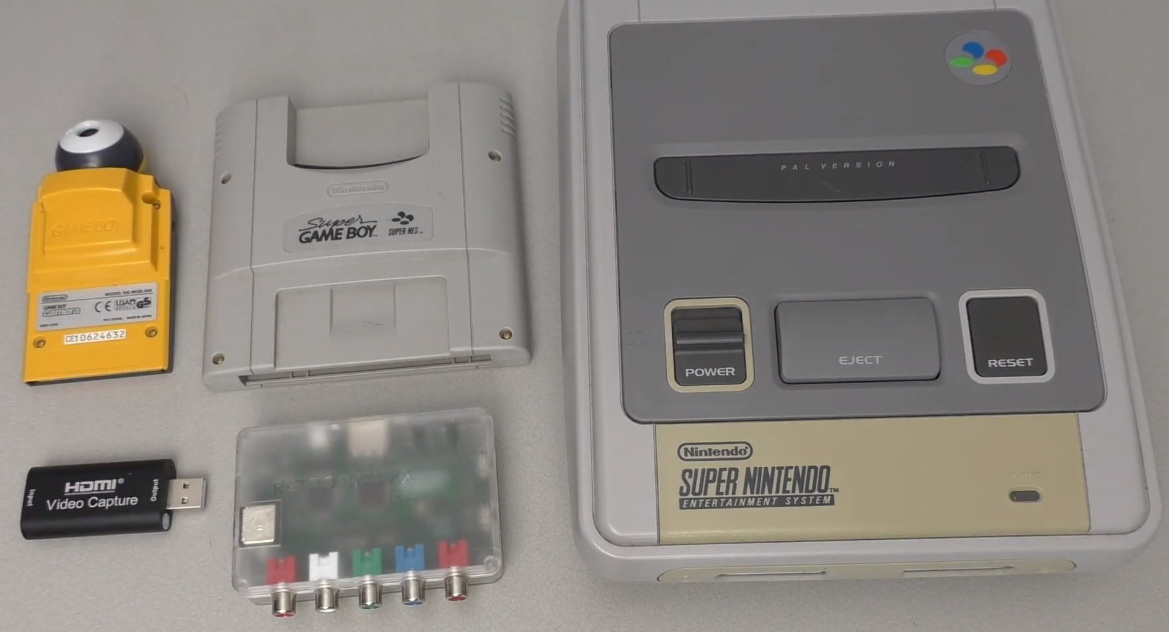
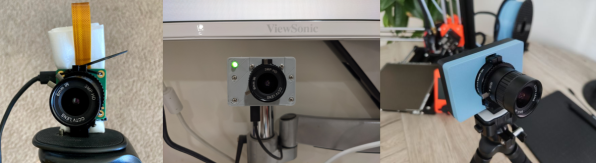
If you want maximum cred, do your video calls with a Game Boy camera. Or, at least, add your own lens to a webcam.

3D Printer Streaming Solution Unlocks Webcam Features

While 3D printer hardware has come along way in the past decade and a half, the real development has been in the software. Open source slicers are constantly improving, and OctoPrint can turn even the most basic of printers into a network-connected powerhouse. But despite all these improvements, there’s still certain combinations of hardware that require a bit of manual work.

[Reticulated] wanted an easy way to monitor his prints over streaming video, but didn’t have any of the cameras that are supported by OctoPrint. Of course he could just point a cheap network-connected camera at the printer and be done with it, but he was looking for a bit better integration than that. In the process, he demonstrates how to unlock some features hidden in inexpensive webcams.

He set about building something that wouldn’t require buying more equipment or overloading the limited hardware responsible for the actual printing. A few of his existing cameras have RTMP support, which allows a fairly straightforward setup with YouTube Live once Monaserver is set up to handle the RTMP feeds from the cameras and OBS Studio is configured to stream it out to YouTube. Using the OctoPrint API, he was able to pull data such as the current extruder temperature and overlay it on the video.

One of the other interesting parts of this build is that not all of [Reticulated]’s cameras have built-in RTMP support but following this guide he was able to get more of them working with this setup than otherwise would have had this capability by default. Even beyond 3D printing, this is an excellent guide (and tip) for getting a quick live stream going for whatever reason. For anything more mobile than a working 3D printer, though, you might want to look at taking your streaming setup mobile instead.

New Drivers For Ancient Webcam

For those of us who are a little older, the 90s seem like they were just a few years ago. The younger folks might think that the 90s were ancient history though, and they might be right as we’ve been hearing more bands like Pearl Jam and The Offspring playing on the classic rock stations lately. Another example of how long ago the 90s were is taking a look at the technological progress that has happened since then through the lens of things like this webcam from 1999, presuming you load up this custom user space driver from [benjojo].

Thankfully the driver for this infamous webcam didn’t need to be built completely from scratch. There’s a legacy driver available for Windows XP which showed that the camera still physically worked, and there’s also a driver for Linux which was used as a foundation to start working from. From there a USB interface was set up which allowed communication to the device. Not a simple task, but apparently much easier than the next steps which involve actually interpreting the information coming from the webcam. This is where a background in digital signal processing is handy to have. First, the resolution and packet size were sorted out which led to a somewhat recognizable image. From there a single monochrome image was pieced together, and then after deconstructing a Bayer filter and adding color, the webcam is back to its former 90s glory.

[benjojo] has hosted all of the code for this project on a GitHub page for anyone who still has one of these webcams sitting around in the junk drawer. The resolution and color fidelity are about what we’d expect for a 25-year-old device that predates Skype, Facebook, Wikipedia, and Firefox. And, while there are still some things that need to be tweaked such as the colors, white balance, and exposure, once that is sorted out the 90s and early 00s nostalgia is free to flood in.

Laser And Webcam Team Up For Micron-Resolution Flatness Measurements

When you want to measure the length, breadth, or depth of an object, there are plenty of instruments for the job. You can start with a tape measure, move up to calipers if you need more precision, or maybe even a micrometer if it’s a really critical dimension. But what if you want to know how flat something is? Is there something other than a straightedge and an eyeball for assessing the flatness of a surface?

As it turns out, there is: a $15 webcam and a cheap laser level will do the job, along with some homebrew software and a little bit of patience. At least that’s what [Bryan Howard] came up with to help him assess the flatness of the gantry he fabricated for a large CNC machine he’s working on.

The gantry arm is built from steel tubing, a commodity product with plenty of dimensional variability. To measure the microscopic hills and valleys over the length of the beam, [Bryan] mounted a lens-less webcam to a block of metal. A cheap laser level is set up to skim over the top of the beam and shine across the camera’s image sensor.

On a laptop, images of the beam are converted into an intensity profile whose peak is located by a Gaussian curve fit. The location of the peak on the sensor is recorded at various points along the surface, leading to a map of the microscopic hills and valleys along the beam.

As seen in the video after the break, [Bryan]’s results from such a quick-and-dirty setup are impressive. Despite some wobblies in the laser beam thanks to its auto-leveling mechanism, he was able to scan the entire length of the beam, which looks like it’s more than a meter long, and measure the flatness with a resolution of a couple of microns. Spoiler alert: the beam needs some work. But now [Bryan] knows just where to scrape and shim the surface and by how much, which is a whole lot better than guessing.   Continue reading “Laser And Webcam Team Up For Micron-Resolution Flatness Measurements”

Webcam VR

Immersive Virtual Reality From The Humble Webcam

[Russ Maschmeyer] and Spatial Commerce Projects developed WonkaVision to demonstrate how 3D eye tracking from a single webcam can support rendering a graphical virtual reality (VR) display with realistic depth and space. Spatial Commerce Projects is a Shopify lab working to provide concepts, prototypes, and tools to explore the crossroads of spatial computing and commerce.

The graphical output provides a real sense of depth and three-dimensional space using an optical illusion that reacts to the viewer’s eye position. The eye position is used to render view-dependent images. The computer screen is made to feel like a window into a realistic 3D virtual space where objects beyond the window appear to have depth and objects before the window appear to project out into the space in front of the screen. The resulting experience is like a 3D view into a virtual space. The downside is that the experience only works for one viewer.

Eye tracking is performed using Google’s MediaPipe Iris library, which relies on the fact that the iris diameter of the human eye is almost exactly 11.7 mm for most humans. Computer vision algorithms in the library use this geometrical fact to efficiently locate and track human irises with high accuracy.

Generation of view-dependent images based on tracking a viewer’s eye position was inspired by a classic hack from Johnny Lee to create a VR display using a Wiimote. Hopefully, these eye-tracking approaches will continue to evolve and provide improved motion-responsive views into immersive virtual spaces.

Dominate Video Calls With Game Boy Camera Webcam

We can’t promise it will all be positive, but there’s no question you’ll be getting plenty of attention when you join a video call using the Game Boy Camera. Assuming they recognize you, anyway. The resolution and video quality of the 1998 toy certainly hasn’t aged very well, and that’s before it gets compressed and sent over the Internet.

From a technical standpoint, this one is actually pretty simple, if rather convoluted. [RetroGameCouch] hasn’t modified the Game Boy Camera in any way, he’s just connected it to the Super Game Boy, which in turn is slotted into a Super Nintendo. From there the video output of the SNES is passed through an HDMI converter, and finally terminates in a cheap HDMI capture device. His particular SNES has been modified with component video, but on the stock hardware you’ll have to be content with composite.

The end result of all these adapters and cables is that the live feed from the Game Boy Camera, complete with the Super Game Boy’s on-screen border, is available on the computer as a standard USB video device that can be used with whatever program you wish. If you’re more interested in recovering still images, we’ve recently seen a project that lets you pull images from the Game Boy Camera over WiFi.

Continue reading “Dominate Video Calls With Game Boy Camera Webcam”

A Pi USB Webcam That Was Born To Boot Quick

In the age of business Zoom rooms, having a crisp webcam is key for introducing fellow executives to your pet cat. Unfortunately, quality webcams are out of stock and building your own is out of the question. Or is it? [Dave Hunt] thought otherwise and cooked up the idea of using the Raspberry Pi’s USB on-the-go mode to stream video camera data over USB. [Huan Trong] then took it one step further, reimagining the project as a bootable system image. The result is showmewebcam, a Raspberry Pi image that transforms your Pi with an attached HQ camera module into a quality usb camera that boots in under 5 seconds.

Some of the project offerings on showmewebcam are truly stunning. Not only does the setup boot quickly, the current version requires a mere 64MB micro SD card for operations. What’s more, the project exposes camera settings like brightness, contrast, etc. via UVC, a standard USB protocol such that they can be controlled via typical software applications.

What’s truly exciting about this project is to see it take shape as different people tackle the same concept whilst referencing the prior milestone. [Dave Hunt] landed early to the scene with a blog post that established that the Pi could indeed be used as a USB webcam. [Huang Truong] built on that starting point, maturing it into an uploadable system image with notes to follow. Now, with showmewebcam on Github, it has seen contributions from over a dozen folks. Its performance specs are gradually improving. And it has a detailed wiki complete with suggested lenses and user-contributed cases to make your first webcam building experience a success.

And that’s not to say that others aren’t tackling this project from their own perspective either! For an alternate encapsulated solution, have a look at [Jeff Geerling’s] take on Pi-based USB webcams.


Continue reading “A Pi USB Webcam That Was Born To Boot Quick”