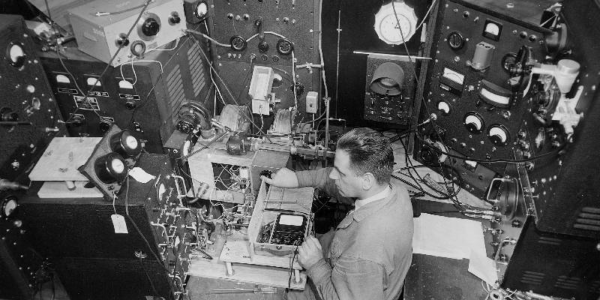
Back in the late 80s, our company managed to procure the complete 28 volume MIT Radiation Laboratory (Rad Lab) series, published in 1947, for the company library. To me, these books were interesting because I like history and old technology, but I didn’t understand why everyone was so excited about the acquisition. Only a cursory glimpse at the volumes would reveal that the “circuits” these books described used vacuum tubes and their “computers” were made from mechanical linkages. This was the 1980s, and we worked with modern radar and communications systems using semiconductors, integrated circuits, and digital computers. How could these old musty books possibly be of any practical use? To my surprise, it turned out that indeed they could, and eventually I came to appreciate the excitement. I even used several of them myself over the years.
Radiation Lab? Nuclear Radar?
![]()
In the years leading up to WW2, the idea of a civilian organization of scientists that would operate independently of the military and government bureaucracies was being championed by Dr. Vannevar Bush. The military and scientists had not worked well together during the first World War, and it looked like science and technology would be playing a much bigger role in the future.
It seemed certain that America would enter the conflict eventually, and Dr Bush and others believed that a new organizational framework was called for. To that end, the National Defense Research Committee (NDRC), which later became the Office of Scientific Research and Development (OSRD) was pitched to President Roosevelt and he approved it in June of 1940.
Almost immediately, a gift fell in the lap of the new organization — the Tizard Mission which arrived in the states from the UK in Sep 1940. They brought a literal treasure chest of technical innovations from the British, who hoped that US industry’s cooperation could help them survive what looked like certain and imminent invasion. One of those treasures was the cavity magnetron, which our own Dan Maloney wrote about a few years ago.
Within a few weeks, under the guidance of young Welshman “Taffy” Bowen, they had reviewed the design and gathered up the necessary equipment to fire it up. A 10 kV anode power supply and a 1,500 gauss electromagnet were procured, and the scientists gathered at the Bell Radio Laboratories in Whippany New Jersey on Sunday, Oct. 6, 1940. They powered up the cavity magnetron and were blown away by the results — over 10 kW of RF at 3 GHz (10 cm) from something the size of a bar of soap. Continue reading “Remembering The MIT Radiation Laboratory”
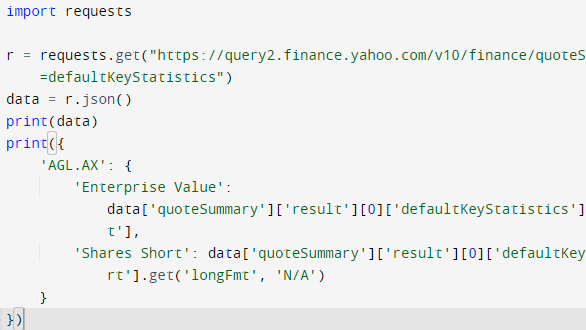
 [Doug] shows that while parsing a web page for a specific piece of data (for example, a stock price) is not difficult, there are sometimes easier and faster ways to go about it. In the case of Yahoo Finance, the web page most of us look at isn’t really the actual source of the data being displayed, it’s just a front end.