Students’ dorm rooms are not generally known to be the most orderly of places. Whether it’s mountains of dishes in the sink, piles of clothes waiting to be washed, or random bits and bobs strewn across the hallway, cleaning up is pretty low on the agenda for many dorm dwellers.
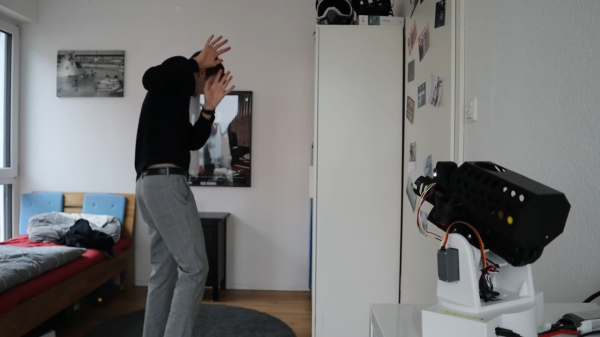
[Luis Marx] seems to have invented a useful solution to his (or his roommates’) sloppiness: a robotic turret that opens fire on anyone who leaves items unattended (video, in German, embedded below). This system uses a set of “clutter sensors” that can be placed in strategic locations around the house and will detect stray objects using ultrasonic sensors. If any are found, the main system is alerted through WiFi. The turret will then search for any persons in its vicinity and start shooting them with little plastic balls.
The turret in question is a beautifully-designed piece of kit made from 3D printed parts and controlled by an ESP32. It can swivel around its axis and tilt up and down using two servos, while its firing mechanism is driven by a DC motor. It tracks its target thanks to a camera-based object sensor that can recognize humans. The whole thing gives us a bit of a RoboCop vibe; we’d half expect it to shout Pick up those clothes. You have twenty seconds to comply.
While this might not be the definitive solution to messy dorm rooms, we like the creative thinking behind it. We’ve seen auto-targeting turrets before, but not in household applications like this. Of course there are plenty of other robots that can help you with domestic tasks.
Continue reading “Automated Turret Keeps Dorm Clean, RoboCop Style”