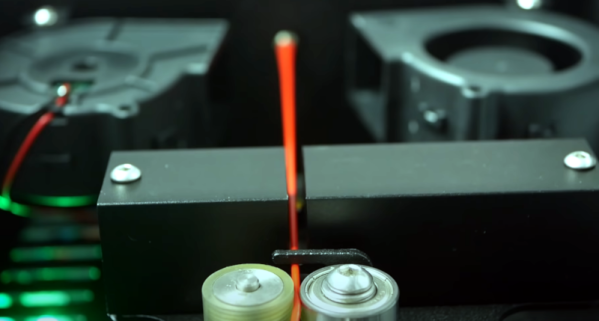
[Will Cogley]’s mechanized gauntlet concept sure has a hypnotizing look to it, and it uses only a single motor. Underneath the scales is a rod with several cams, each of which moves a lever up and down in a rippling wave as it rotates. Add a painted scale to each, and the result is mesmerizing. This is only a proof of concept prototype, and [Will] learned quite a few lessons when making it, but the end result is a real winner of a visual effect.
The gauntlet uses one motor, 3D printed hardware, and a mechanical linkage between the wrist and the rest of the forearm. Each of the scales is magnetically attached to the lever underneath, which provides some forgiveness for when one inevitably bumps into something. You can see the gauntlet without the scales in the video, embedded below the break, which should make clear how the prototype works.
The scales were created with the help of a Mayku desktop vacuum former by making lightweight copies of 3D printed scales. Interestingly, 3D printing each scale with full supports made for a useful mold; there was no need to remove supports from underneath the prints, because they are actually a benefit to the vacuum forming process. When vacuum forming, the presence of overhangs can lead to plastic wrapped around the master, trapping it, but the presence of the supports helps prevent this. 3D prints don’t hold up very well to the heat involved in vacuum forming, but they do well enough for a short run like this. Watch it in action and listen to [Will] explain the design in the video, embedded below.
There’s no question that being able to see who’s at your front door from your computer or mobile device is convenient, which is why the market is currently flooded with video doorbells. Unfortunately, it’s not always clear who else has access to the images these devices capture. Organizations such as the Electronic Frontier Foundation have argued that by installing one of these Internet-connected cameras on their front door, consumers are unwittingly contributing to a mass surveillance system that could easily be turned against them.
Luckily, there’s a solution. As [Sebastian] shows in his latest project, you can build your own video doorbell that replicates the features of the commercial offerings while ensuring you’re the only one who has access to the data by leveraging open source, community developed projects such as ESPHome and Home Assistant. At the same time, modern manufacturing techniques like desktop 3D printing and low-cost PCB fabrication mean your DIY doorbell doesn’t have to look like you made it yourself.
The project starts with a custom PCB that combines the ESP32, a camera module, a capacitive touch sensor, a relay to optionally trigger an electronic door lock, and a DC-DC converter that will let you power the device from a wide range of input voltages. The board even has a spot where you can solder on an additional 8 MB of external PSRAM for the ESP32, which will enable the chip to capture higher resolution video.
The electronics are housed in a minimalistic 3D printed enclosure that would fit right in alongside similar gadgets from the likes of Ring and Arlo; especially if you have access to a CNC and can cut the front panel out of acrylic. The lighted touch sensor looks phenomenal, and really gives the device a professional feel. That said, it doesn’t look like the case would last very long if exposed to harsh weather and there are some obvious physical security issues with this approach. But to be fair, we’ve seen the same problem with commercial hardware.
Naturally with a project like this, the hardware is only half of the story. It takes a considerable amount of software poking and prodding to get things like mobile device notifications working, and as a special added annoyance, the process is different depending on which MegaCorp produced the OS your gadget is running. [Sebastian] has documented the bulk of the process in the video after the break, but the finer points will likely need some adjustment depending on how you want to set things up.
From the old Gumstix boards to everyone’s favorite Raspberry Pi, common single-board computers (SBCs) have traditionally had at least one thing in common: an ARM processor. But that’s not to say hackers and makers haven’t been interested in an SBC with a proper x86 processor. Which is why the $99 Hackboard 2 is so exciting. With a modern x86 chip at the core it’s akin to a small footprint desktop motherboard, but with all the extra features that we’ve come to expect in a hacker-friendly SBC.
So what’s the big deal? In a word, compatibility. The fact that these diminutive computing devices shied away from the x86 architecture that most of us have been using on our desktops and laptops since the 1980s originally introduced software compatibility issues, but this was largely outweighed by the advantages of ARM. The latest NVIDIA Jetson is running on an ARM chip for the same reason the smartphone in your pocket is: they’re smaller, cheaper, and more energy efficient than x86.
However they’re rarely more powerful. Even the latest and greatest Raspberry Pi 4, often touted as a viable desktop replacement thanks to its quad core Cortex-A72, will get absolutely trounced by the pokiest of Intel’s Celeron CPUs. The performance gap is just too great. While the Pi can admirably handle most of the tasks the hacker community asks of it, there will always be a call for a board that puts raw processing power before anything else.
Sucking down nearly 40 watts at full tilt, the Hackboard 2 isn’t the SBC you’d want to use for a solar powered weather station. But if you’re putting together a set top box to play back video and run the occasional emulator, its Celeron N4020 processor and Intel UHD 600 GPU represent the most powerful combination available for a device of this size.
[BrittLiv] started with an open-source Charmander model and added a thread to the flame and the corresponding end of the tail. We love that [BrittLiv] was able to use up a bunch of old filament to print this — a total of 5kg worth over 280+ hours of print time.
[BrittLiv] added lead ballast in the feet for weight while gluing the pieces together and sealed it off at the ankles with epoxy. The entire outside surface was sanded and smoothed with clay and Bondo before getting epoxy, primer, black primer, and then a copper automotive paint that turned out to be too bright. Charmander ended up with copper paint that patinas, which is why it looks so much like a real statue. Check out the build video after the break.
There’s no word on whether there’s a future where Charmander’s flame steams when it rains, but [BrittLiv] does have plans to expand the garden with a Squirtle fountain and a Bulbasaur planter.
Perhaps the best-known ridesharing service, Uber has grown rapidly over the last decade. Since its founding in 2009, it has expanded into markets around the globe, and entered the world of food delivery and even helicopter transport.
One of the main headline research areas for the company was the development of autonomous cars, which would revolutionize the company’s business model by eliminating the need to pay human drivers. However, as of December, the company has announced that it it spinning off its driverless car division in a deal reportedly worth $4 billion, though that’s all on paper — Uber is trading its autonomous driving division, and a promise to invest a further $400 million, in return for a 26% share in the self-driving tech company Aurora Innovation.
Playing A Long Game
Uber’s self-driving efforts have been undertaken in close partnership with Volvo in recent years.
Uber’s driverless car research was handled by the internal Advanced Technologies Group, made up of 1,200 employees dedicated to working on the new technology. The push to eliminate human drivers from the ride-sharing business model was a major consideration for investors of Uber’s Initial Public Offering on the NYSE in 2019. The company is yet to post a profit, and reducing the amount of fares going to human drivers would make it much easier for the company to achieve that crucial goal.
However, Uber’s efforts have not been without incident. Tragically, in 2018, a development vehicle running in autonomous mode hit and killed a pedestrian in Tempe, Arizona. This marked the first pedestrian fatality caused by an autonomous car, and led to the suspension of on-road testing by the company. The incident revealed shortcomings in the company’s technology and processes, and was a black mark on the company moving forward.
The Advanced Technology Group (ATG) has been purchased by a Mountain View startup by the name of Aurora Innovation, Inc. The company counts several self-driving luminaries amongst its cofounders. Chris Urmson, now CEO, was a technical leader during his time at Google’s self-driving research group. Drew Bagnell worked on autonomous driving at Uber, and Sterling Anderson came to the startup from Tesla’s Autopilot program. The company was founded in 2017, and counts Hyundai and Amazon among its venture capital investors.
Aurora could also have links with Toyota, which also invested in ATG under Uber’s ownership in 2019. Unlike Uber, which solely focused on building viable robotaxis for use in limited geographical locations, the Aurora Driver, the core of the company’s technology, aims to be adaptable to everything from “passenger sedans to class-8 trucks”.
Aurora has been developing self-driving technology to handle real-world situations since its founding in 2017. Being able to master the challenges of a crowded city will be key to succeeding in the marketplace.
Getting rid of ATG certainly spells the end of Uber’s in-house autonomous driving effort, but it doesn’t mean they’re getting out of the game. Holding a stake in Aurora, Uber still stands to profit from early investment, and will retain access to the technology as it develops. At the same time, trading ATG off to an outside firm puts daylight between the rideshare company and any negative press from future testing incidents.
[Mark]’s initial attempts relied on Python and the RPI.GPIO library. Unfortunately, the overheads introduced made decoding SENT traffic impossible. Undeterred, [Mark] pressed on, leveraging the pigpio library and its callback function which allowed sampling at up to one microsecond. This was fast enough to read the messages from a LX3302A inductive position sensor that uses the protocol.
It’s a project that could prove useful for those trying to work with certain sensors who want to avoid adding complexity to a Raspberry Pi project. Files are available on Github for the curious. We’ve seen other direct sensor builds with the Pi, before too – like this power monitoring system. Video after the break.
Long before the current smartwatch craze, Texas Instruments released the eZ430-Chronos. Even by 2010s standards, it was pretty clunky. Its simple LCD display and handful of buttons also limited what kind of “smart” tasks it could realistically perform. But it did have one thing going for it: its SDK allowed users to create a custom firmware tailored to their exact specifications.
It’s been nearly a decade since we’ve seen anyone dust off the eZ430-Chronos, but that didn’t stop [ogdento] from turning one into a custom alert device for a sick family member. A simple two-button procedure on the watch will fire off emails and text messages to a pre-defined list of contacts, all without involving a third party or have to pay for a service contract. Perhaps most importantly, the relatively energy efficient eZ430 doesn’t need to be recharged weekly or even daily as would be the case for a modern smartwatch.
To make the device as simple as possible, [ogdento] went through the source code for the stock firmware and commented out every function beyond the ability to show the time. With the watch’s menu stripped down to the minimum, a new alert function was introduced that can send out a message using the device’s 915 MHz CC1101 radio.
Messages and recipients can easily be modified.
The display even shows “HELP” next to the appropriate button so there’s no confusion. A second button press is required to send the alert, and there’s even a provision for canceling it should the button be pressed accidentally.
On the receiving side, [ogdento] is using a Raspberry Pi with its own CC1101 radio plugged into the USB port. When the Python scripts running on the Pi picks up the transmission coming from the eZ430 it starts working through a list of recipients to send messages to. A quick look at the source code shows it would be easy to provide your own contact list should you want to put together your own version of this system.