Adjustable, Low-Impact Keeb Is About As Comfortable As It Gets

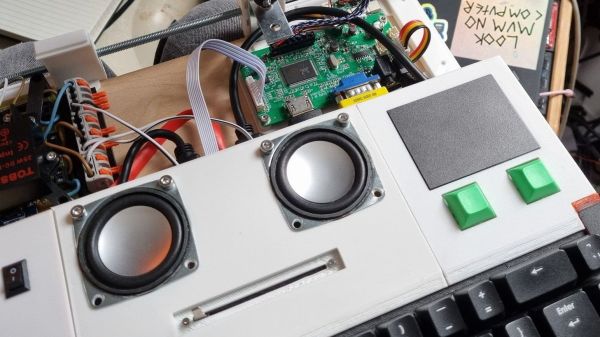
What’s the coolest-looking way to ease the repetitive stress of typing without quitting altogether? Move nothing but your fingers, and move them as little as possible without any stretching or reaching. We’ve been fans of the weirdly wonderful DataHand keyboard since we first laid eyes on one, but [Ben Gruver] has actually been using these out-of-production keyboards for years as a daily driver. And what do we do when we love something scarce? Make our own, improved version like [Ben] has done, with the lalboard.

[Ben] has been using the lalboard for about two years now and has a laundry list of improvements for version two, a project we are proud to host over on IO. Many of the improvements are designed to make this massive undertaking a bit easier to print and put together. Version one uses copper tape traces, but [Ben] is working on a fab-able PCB that will use something other than a pair of Teensy 2.0s, and perhaps QMK firmware.

Something that won’t be changing is the fantastic optical key switch design that uses an IR LED and phototransistor to capture key presses, and tiny square magnets to return the key to the home position and deliver what we’re quite sure is a satisfying clack.

The absolute coolest part of this keyboard is that it’s so adjustable. Every key cluster can be adjusted in 6 directions, which includes the ability to dial in different heights for each finger if that’s what works best. Once that’s all figured out, then it’s time to print some perfect permanent standoffs. Want to make one of these sci-fi clackers for yourself? [Ben] has the BOM, some printing instructions and tips, and a guide to making the copper tape PCBs over on GitHub. Check it out in action after the break as [Ben] rewrites Kafka’s Metamorphosis at 120 WPM.

Interested in learning more about the original DataHand keyboard? Here’s our take.

Continue reading “Adjustable, Low-Impact Keeb Is About As Comfortable As It Gets”

A Raspberry Pi Tablet, With A DSI Screen

Since the Raspberry Pi arrived back in 2012, we’ve seen no end of interesting and creative designs for portable versions of the little computer. They often have problems in interfacing with their screens, either on the very cheap models using the expansion port or on more expensive ones using an HDMI screen with associated controller and cabling. The official Raspberry Pi touchscreen has made life easier with its DSI convector, but as [jrberendt] shows us with this neat little tablet, there are other DSI-based options. This one uses a 5″ DSI touchscreen available through Amazon as well as a Pi UPS board to make a tablet that is both diminutive and self-contained.

Having fooled around ourselves in the world of Pi tablets we like this one for its clean look and a bezel that is little bigger than the screen itself. As is the case with so many Pi tablets though it has to contend with the bulk of a full-sized Model B board on its behind, making it more of a chunky brick than a svelte tablet. The screen has potential though, and we can’t help wondering whether there’s any mileage in pairing it with a much thinner Pi Zero board and a LiPo board for a slimmer alternative.

Probably the nicest Pi tablet we’ve brought you was this one, which managed to remain impressively slim despite its HDMI screen.

Hacking The Ortur Laser With Spoil Board, Z-Height, And Air Assist

Last month in my hands-on review of the Ortur Laser I hinted that I had done a few things to make it work a little better. I made three significant changes in particular: I anchored the machine to a spoil board with markings, I added a moving Z axis to adjust focus by moving the entire laser head, and I added an air assist.

Turns out, you can find designs for all of these things all over the Internet and I did, in fact, use other people’s designs. The problem is the designs often conflict with one another or don’t exactly work for your setup. So what I’ll tell you about is the combination that worked for me and what I had to do to get it all working together. The air assist is going to take a post all by itself, but some of the attempts at air assist led to some of the other changes I made, so we’ll talk about it some in this post, as well.

One of the modifications — the spoil board mount — I simply downloaded and the link for that is below. However, I modified the moving Z axis and air assist parts and you can find my very simple modifications on Thingiverse. You’ll also find links to the original designs and you’ll need them for extra parts and instructions, too.

Continue reading “Hacking The Ortur Laser With Spoil Board, Z-Height, And Air Assist”

The Devil Is In The Details For This Open Air Laser

Normally, we think of lasers as pretty complex and fairly intimidating devices: big glass tubes filled with gas, carefully aligned mirrors, cooling water to keep the whole thing from melting itself, that sort of thing. Let’s not even get started on the black magic happening inside of a solid state laser. But as [Jay Bowles] shows in his latest Plasma Channel video, building a laser from scratch isn’t actually as difficult as you might think. Though it’s certainly not easy, either.

The transversely excited atmospheric (TEA) laser in question uses high voltage passed across a a pair of parallel electrodes to excite the nitrogen in the air at standard atmospheric pressure, so there’s no need for a tube and you don’t have to pull a vacuum. The setup shakes so many UV photons out of the nitrogen that it doesn’t even need any mirrors. In fact, you should be able to get almost all the parts for a TEA laser from the hardware store. For example, the hexagonal electrodes [Jay] ends up using are actually 8 mm hex keys with the ends cut off.

Continue reading “The Devil Is In The Details For This Open Air Laser”

Inputs Of Interest: Marsback M1 Is A Portable Party Peripheral

Again, let’s just get this out of the way up front: I got this lovely little 75% keyboard for free from a gaming accessories company called Marsback. It’s a functioning prototype of a keyboard that they have up on Kickstarter as of March 2nd. It comes in three color schemes: dark, white and sakura pink, which is white and pink with cherry blossoms.

This illustration of the lube points is from my email string with Marsback.

Marsback found me through my personal website and contacted me directly to gauge my interest in this keyboard. I’ll admit that I wasn’t too excited about it until I scrolled further in the email and saw that they are producing their own switches in-house.

I think that’s a really interesting choice given that Cherry MX and other switches exist, and there so many Cherry MX clones out there already. Naturally, I had to investigate, so following a short review, I’ll take it apart.

Continue reading “Inputs Of Interest: Marsback M1 Is A Portable Party Peripheral”

Elegant And Portable DIY Nightlight Becomes A Fixture For Hacker’s Kids

When [itzikdiy]’s kids asked for a night light for their room, he got the bright idea to build something that straddles the line between portable and permanent. This fixture-less fixture plugs directly into a wall socket and is turned on and off with a handsome rocker switch on the bottom.

This lovely little lamp is mostly made from scrap — the oak on the front appears to have come from an old cabinet door, and the other two ring-shaped pieces are made from pine. [itzikdiy] even took the acrylic from broken panel lamps. Everything was cut with a Dremel and a circle-cutter attachment except the oak, which required a jigsaw. We think it looks great, especially with the different grain directions — call it art deco woodworking.

When it was all said and done, [itzikdiy] found it was too heavy to hang by the plug alone, so he added an L-shaped support beneath the power supply that holds it more evenly against the wall. [itzikdiy] also made a pair of hooks that snap into a pair of slots on the sides of the outlet itself. The solution is simple, sturdy, and effective without disrupting the lines of the lamp at all. Carve out a little bit of time to watch the build video after the break.

We know that someone of your hulking intelligence has no fear of the dark. But if you think you could use a nightlight in the bathroom for those 2 AM trips, look no further.

Continue reading “Elegant And Portable DIY Nightlight Becomes A Fixture For Hacker’s Kids”

2:3 Scale VT100 Is A Perfect Pairing For PDP-8/I Replica

When he went shopping for a vintage serial terminal to go along with his reproduction PDP-8/I computer, [Michael Gardi] came down with a bad case of sticker shock. But rather than be discouraged, he reasoned that if his “retro” computer could stand to have modern components at its heart, so could the terminal he used to talk to it. Leaning on his considerable experience in designing 3D printed replica hardware, he’s built an absolutely gorgeous scaled down DEC VT100 terminal that any classic computer aficionado would be happy to have on their desk.

Now to be clear, [Michael] hasn’t created a true serial terminal. Since the faux PDP-8/I is running on a Raspberry Pi, all he needed to do was come up with something that could connect to its HDMI and USB ports. Put simply, he’s essentially just made a 3D printed enclosure for the Pi’s monitor and keyboard. Oh, but what a gorgeous enclosure it is.

Recreating the VT100 in CAD was made more difficult by the fact that [Michael] couldn’t get his hands on the authentic hardware. But of course, that’s never stopped him before. It turns out DEC provided some very detailed dimensions for the terminal in their original documentation, and while comparing them to photographs of the actual terminal did uncover a few key differences, the overall look is spot on. Once the design was done, he reports it took two rolls of filament and more than 200 hours to print out all the parts for the enclosure.

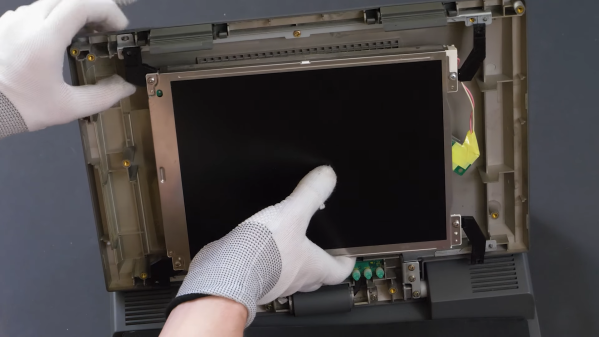
To help sell the authentic look [Michael] tracked down a 4:3 LCD of the appropriate size, and the use of an off-the-shelf portable mechanical keyboard should make text entry a pleasure. For a little fun, he even came up with a themed arcade controller for the VT100 that can be used with RetroPie. The printed logo plate is an especially nice touch, and we’re more than willing to forgive the fact that he had to print it at a larger scale than the rest of the terminal to get all the detail in with his printer’s 0.4 mm nozzle.

On a technical level, this is perhaps the most straightforward replica we’ve ever seen from [Michael]. But even on a relatively simple project like this, his signature attention to detail and craftsmanship is on full display. It’s always a good day when he’s got a new build to show off with, and we’re eager to see what he comes up with next.