Linux-Fu: Your Own Dynamic DNS

It is a problem as old as the Internet. You want to access your computer remotely, but it is behind a router that randomly gets different IP addresses. Or maybe it is your laptop and it winds up in different locations with, again, different IP addresses. There are many ways to solve this problem and some of them are better than others.

A lot of routers can report their IP address to a dynamic DNS server. That used to be great, but now it seems like many of them hound you to upgrade or constantly renew so you can see their ads. Some of them disappear, too. If your router vendor supplies one, that might be a good choice, until you change routers, of course. OpenWRT supports many such services and there are many lists of common services.

However, if you have a single public accessible computer, for example a Web server or even a cloud instance, and you are running your own DNS server, you really don’t need one of those services. I’m going to show you how I do it with an accessible Linux server running Bind. This is a common setup, but if you have a different system you might have to adapt a bit.

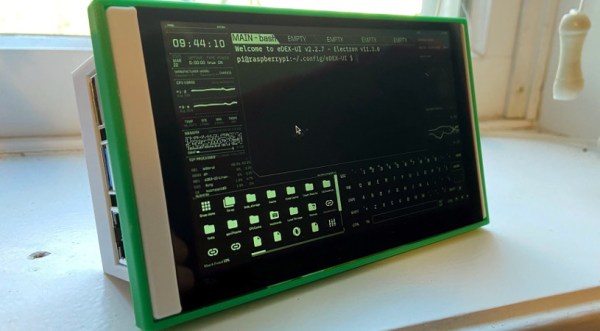
There are many ways to set up dynamic DNS if you are willing to have a great deal of structure on both sides. Most of these depend on setting up a secret key to allow for DNS updates and some sort of script that calls nsupdate or having the DHCP server do it. The problem is, I have a lot of client computers and many are set up differently. I wanted a system where the only thing needed on the client side was ssh. All the infrastructure remains on the DNS server.

Continue reading “Linux-Fu: Your Own Dynamic DNS”

Prop-Driven Cardboard RC Car Doesn’t Skimp On Performance

[Kryzer Channel] takes making a DIY RC car to a whole new level with this prop-driven electric car that is made almost entirely out of cardboard (YouTube video, also embedded below.) By attaching an electric motor with a push prop to the back of the car, [Kryzer] avoids the need for any kind of drive system or gearing. Steering works normally thanks to some scratch-built linkages, but the brake solution is especially clever.

Braking is done by having a stocky servo push a reinforced stub downward, out of a hole in the center of the car. This provides friction against the road surface. After all, on an RC car a functional brake is simply not optional. Cutting the throttle and coasting to a stop works for a plane, but just won’t do for a car.

Winding thread around metal components then saturating with CA glue makes a durable assembly.

Layers of corrugated cardboard and hot glue make up the bulk of the car body, and some of the assembly techniques shown off are really slick and make the video really worth a watch. For example, the construction of the wheels (starting around 2:24) demonstrates making them almost entirely out of cardboard, saturated with CA glue for reinforcement, with a power drill acting as a makeshift lathe for trimming everything down. A section of rubber inner tube provides the tire surface and a piece of hard plastic makes a durable hub. Wraps of thread saturated in CA glue, shown here, is another technique that shows up in several places and is used in lieu of any sort of fasteners.

The well-edited video (embedded below) is chock full of clever assembly and construction. Unsurprisingly, this is not [Krazer]’s first cardboard vehicle: their video channel has other impressive cardboard models and racers to show off.

Continue reading “Prop-Driven Cardboard RC Car Doesn’t Skimp On Performance”

Schlieren On A Stick

Schlieren imaging is a technique for viewing the density of transparent fluids using a camera and some clever optical setups. Density of a fluid like air might change based on the composition of the air itself with various gasses, or it may vary as a result of a sound or pressure wave. It might sound like you would need a complicated and/or expensive setup in order to view such things, but with a few common things you can have your own Schlieren setup as [elad] demonstrates.

His setup relies on a cell phone, attached to a selfie stick, with a spherical mirror at the other end. The selfie stick makes adjusting the distance from the camera to the mirror easy, as a specific distance from the camera is required as a function of focal length. For cell phone cameras, it’s best to find this distance through experimentation using a small LED as the point source. Once it’s calibrated and working, a circular field of view is displayed on the phone which allows the viewer to see any change in density in front of the mirror.

The only downside of this build that [elad] notes is that the selfie stick isn’t stiff enough to prevent the image from shaking around a little bit, but all things considered this is an excellent project that shows a neat and useful trick in the photography/instrumentation world that could be useful for a lot of other projects. We’ve only seen Schlieren imaging once before and it used a slightly different method of viewing the changing densities.

Continue reading “Schlieren On A Stick”

An Old Calculator Lives Again

There was a time when any electronics student would have a slide rule hanging off their belt. By the 1970s, the slide rule changed over to an electronic calculator which was a pricy item. Today you can buy calculators at the dollar store. [JohnAudioTech] pulled out an old Radio Shack vacuum fluorescent display (VFD) calculator and found it didn’t work. Obviously, that means it is time to open it up.

It is fun to see one of these old devices opened up again. Consumer electronics with big through-hole ICs! Troubleshooting the device wound up being anti-climatic, as a broken wire to the battery compartment explained the whole thing.

As a teardown, though, this is a fun video. Not only are all the parts through-hole, but the PCB is clearly a manual layout with serpentine traces flowing across the board like some sort of art piece. Continue reading “An Old Calculator Lives Again”

Hacking D-Link Firmware

When [0xRickSanchez] found some D-Link firmware he couldn’t unpack, he was curious to find out why. The firmware had a new encryption method which was doing its job of preventing tampering and static analysis. Of course, he had to figure out how to get around it and is documenting his work in a series of blog posts.

Looking at the entropy analysis showed the data to be totally random,  a good sign it was either encrypted or compressed. The target router cost about $200, but a similar cheaper router used the same encryption and thus this model became the hardware of choice for testing.

Continue reading “Hacking D-Link Firmware”

Reactive Pixel Lamps Create Colourful Vibes On Command

Phillips Ambilight technology is a curious thing, never quite catching on in the mainstream due to its proprietary nature. Consisting of an LED array that sits behind a television screen, it projects colours relevant to the content on screen to create a greater feeling of ambience. [Ed Chamberlain]’s reactive pixel lamps aim to do much the same thing in a more distributed way.

Each pixel lamp consists of a Wemos D1 controller fitted with an old-school 4-wire RGB LED. The components are placed in a 3D printed translucent cube, which serves as an attractive enclosure and diffuser. With WiFi connectivity on board, it’s possible to connect the individual cubes up to a Raspberry Pi serving as a Phillips Hue bridge thanks to DIYHue. Once setup, the lights can be configured as an Ambilight system within the Phillips Hue app.

It’s an impressive way to give a room reactive lighting on a budget, without resorting to costly off-the-shelf solutions. We’d love to see this expanded further, as we’re sure a room full of reactive lights would be truly a sight to behold. Other methods to recreate the Ambilight technology are possible, too. Video after the break.

Continue reading “Reactive Pixel Lamps Create Colourful Vibes On Command”

Arduino Rig Does Spectrophotometry

Spectrophotometry is an important scientific tool, most commonly used in biology and chemistry. It’s a method to measure the amount of light absorbed by a chemical solution at various different wavelengths. While it’s typically the preserve of expensive lab equipment, [Daniel Hingston] built a rig to do the job at home.

The heart of the rig is a normal filament-based flashlight bulb, which produces good-quality white light containing all colors. A prism is then used to split the light into its component wavelengths, so that the sample can be tested across the whole light spectrum. The prism is rotated by a servo motor, which exposes the sample to the full rainbow, while an Arduino uses a light-dependent resistor to measure how much light makes it through the sample. Thus, the amount of light absorbed by the sample can be calculated, relative to calibrations made with no sample present.

It’s a simple build that can be achieved with fairly common materials, barring the prism which may need to be specially ordered. It would be a great way to teach highschool students about advanced scientific concepts, as well as showing them behind the curtain of how lab equipment works.

We see all kinds of DIY science gear around here; this lantern-based bioreactor is a great example. Video after the break.

Continue reading “Arduino Rig Does Spectrophotometry”