Have you seen this yet? YouTuber [VK’s Channel] claims to have a permanent fix for Joy-Con drift — the tendency for Nintendo Switch controllers to behave as though they’re being moved around when they’re not even being touched. Like everyone else, [VK’s Channel] tried all the usual suspects: compressed air, isopropyl alcohol, contact cleaner, and even WD-40. But these are only temporary fixes, and the drift always comes back. None of the other fixes so far are permanent, either, like shimming the flat cable that connects the stick to the mobo, adding graphite to the worn pads inside, or trying to fix a possible bad antenna connection.
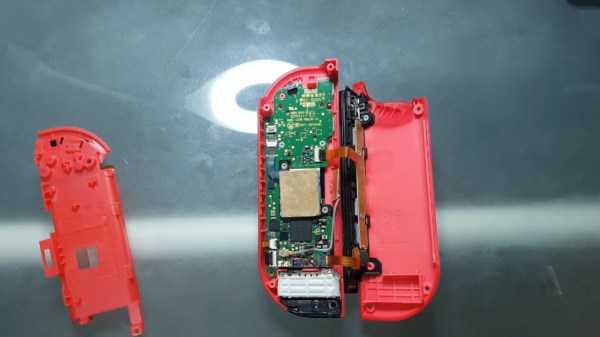
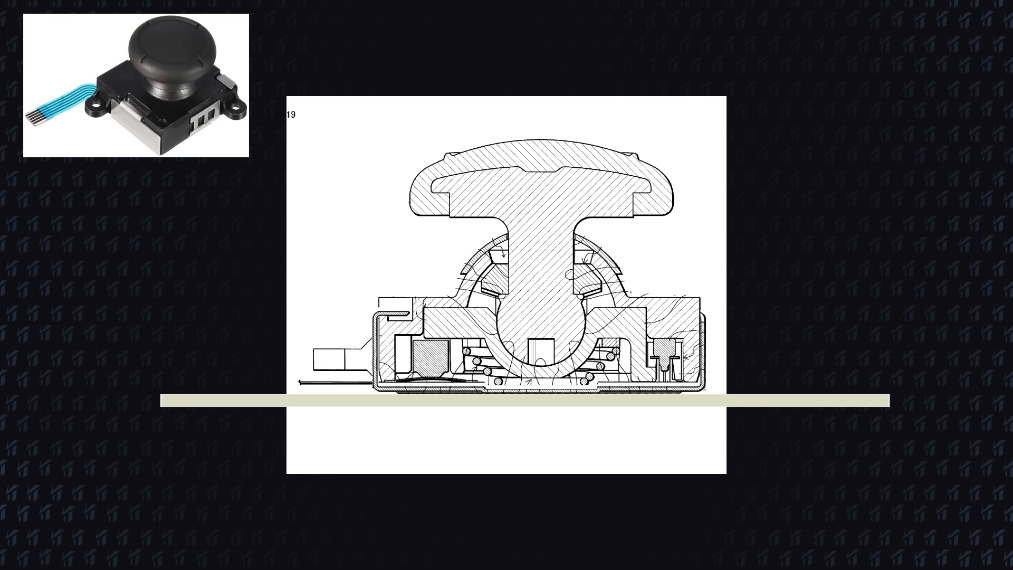 While calibrating a drifting Joy-Con, [VK’s Channel] noticed that applying pressure near the Y and B buttons corrected the issue immediately, so they got the idea to add a 1mm thick piece of card stock inside. [VK’s Channel] believes the issue is that there is no fastener connecting the plastic part of the joystick to the metal part on the bottom. Over time, using the joystick causes the bottom to sag, which makes the metal contacts inside lose their grip on the graphite pads. It’s been two months now and there is absolutely no drift in either of the Joy-Cons that [VK’s Channel] has shored up this way.
Nintendo is now fixing Joy-Cons for free. The problem is that they are replacing irreparable ones outright, so you have to agree that you will settle for a plain old gray, red, or blue instead of your special edition Zelda controllers or whatever you send them. Hopefully, this really is a permanent fix, and that Nintendo gives [VK’s Channel] a job.
You could forego the joysticks altogether and swap them out for touchpads. Suffering from XBOX drift instead? We have just the thing.
Continue reading “Fixing Joy-Con Drift With Recycle Bin Parts”