DVD Optics Power This Scanning Laser Microscope

We’ve all likely seen the amazing images possible with a scanning electron microscope. An SEM can yield remarkably detailed 3D images of the tiniest structures, and they can be invaluable tools for research. But blasting high-energy cathode rays onto metal-coated samples in the vacuum chamber of a bulky and expensive instrument isn’t the only way to make useful images, as this home-brew laser scanning microscope demonstrates.

This one comes to us by way of [GaudiLabs], a Swiss outfit devoted to open-source lab equipment that enables citizen science; we saw their pocket-sized thermal cycler for PCR a while back. The basic scheme here is known as confocal laser scanning fluorescence microscopy, where a laser at one wavelength excites fluorescent tags bound to structures in a sample. Light emitted by the tags is collected, and a 3D image is built up from multiple scans of the sample at different focal planes.

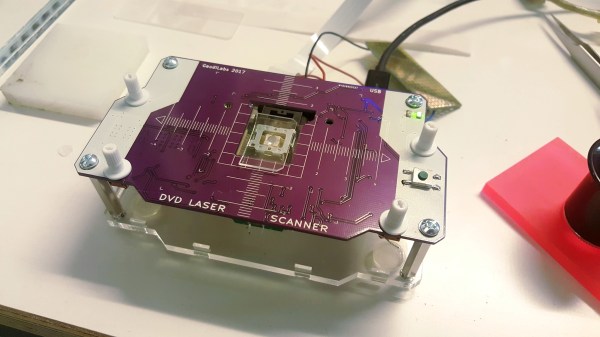
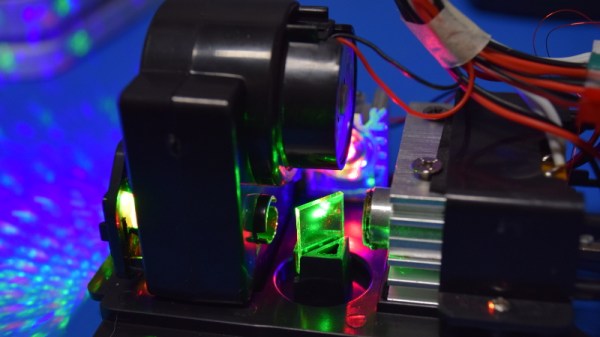
Like many DIY projects, this microscope is built from old DVD parts, specifically the pickup heads. The precision optics in these commonly available assemblies, which are good enough to read pits as small as 150 nm on a Blu-Ray DVD, are well-suited for resolving similarly sized microstructures. One DVD pickup is used to scan the laser in the X-axis, while the other head is modified to carry the sample and move it in the Y-axis. The pickup head coils and laser are driven by an Arduino carried on a custom PCB along with the DVD heads. Complete build files are posted on GitHub for anyone interested in recreating this work.

We love tips like this that dig back a bit and find things we missed the first go-around. And the equipment [GaudiLabs] lists really has potential for the budding biohacker, which we also like.

Thanks for the tip on this one, [Bill].

500 Lasers Are Not Necessarily Better Than One, But They Look Great

If playing with but a single laser pointer is fun, then playing with 500 laser pointers must be 500 times the fun, right? So by extension, training 500 laser pointers on a single point must be the pinnacle of pointless mirth. And indeed it is.

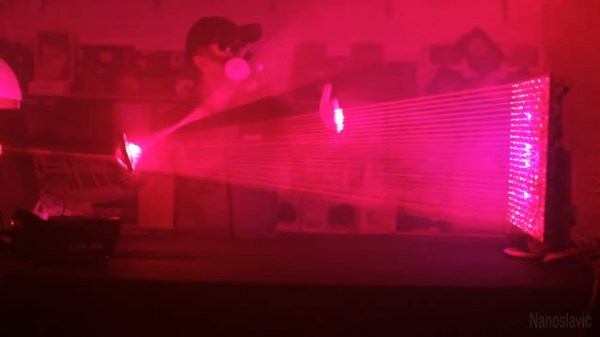
When we first spotted this project, we thought for sure it was yet another case of lockdown-induced  boredom producing an over-the-top build. Mind you, we have no problem with that, but in this case, [nanoslavic] relates that this is actually a project from a few years back. It’s really as simple as it looks: 500 laser pointer modules arranged on a plate with a grid of holes in a 25 by 20 array. As he placed the laser modules on the board with a glob of hot glue, he carefully aimed each one to hit a single point about a meter and a half away.  There are also a handful of blue LEDs nestled into the array, because what project is complete without blue LEDs?

The modules are wired in concentric circuits and controlled by a simple bank of toggle switches. Alas, 500 converging 150-mW 5 mW lasers do not a 75-W 2.5 W laser make; when fully powered, the effect at the focal point is reported to be only a bit warm. But it looks incredible, especially through smoke. Throwing mirrors and lenses into the beam results in some interesting patterns, too.

You’ll still need to take safety seriously if you build something like this, of course, but this one is really just for show. If you’re really serious about doing some damage with lasers, check out the long list of inadvisable laser builds that [Styropyro] has accumulated — from a high-powered “lightsaber” to a 200-Watt laser bazooka.

(Terminate your beams carefully, folks. We don’t want anyone going blind.)

Continue reading “500 Lasers Are Not Necessarily Better Than One, But They Look Great”

Tearing Down A PS3 Blu Ray Drive

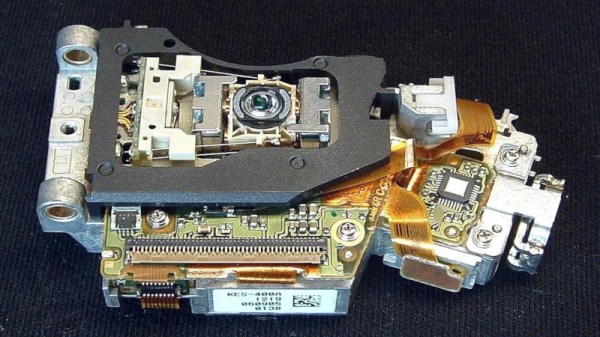
Optical drives are somewhat passe in 2019, with most laptops and desktops no longer shipping with the hardware installed. The power of the cloud has begun to eliminate the need for physical media, but that doesn’t mean the technology is any less marvellous. [Leslie Wright] and [Samuel Goldwater] took a deep dive into what makes the PS3’s optical drive tick, back in the heyday of the Blu Ray era.

The teardown starts by examining the layout of the assembly, and the parts involved. This is followed by a deep dive into an exploration of the triple-laser diode itself, There are tips on how to safely extract the delicate parts, which are highly sensitive to electrostatic discharge, as well as exhaustive specifications and measurements of performance. There’s even a break down of the optical package, too, including a patent search to shed more light on the complicated inner workings of the hardware.

And if this lures you to dig deeper into Sam’s Laser FAQ, prepare to spend the rest of the week.

We’ve seen other optical teardowns before, too – like this look inside a stereo microscope. It’s quite technical stuff, and may fly over the heads over the optically inexperienced. However, for those in the know, it’s a great look at the technology used in a mass-produced console.

Hacking A Cheap Laser Rangefinder

When a new piece of technology comes out, the price is generally so high that it keeps away everyone but the die hard early adopters. But with time the prices inch down enough that more people are willing to buy, which then drives the prices down even more, until eventually the economies of scale really kick in and the thing is so cheap that it’s almost an impulse buy. Linux SBCs, Blu-ray lasers, 3D printers; you name it and the hacker community has probably benefited from the fact that it’s not just the hacker community that’s interested anymore.

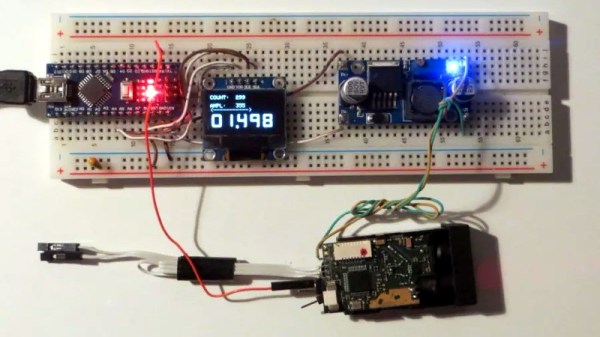
Which is exactly what’s started to happen with laser rangefinders. Once almost exclusively a military technology, you can now pick a basic “laser tape measure” for less than $40 USD from the normal overseas suppliers. Unfortunately, as [iliasam] found, they aren’t particularly well suited other tasks. For one there’s no official way of getting the data out of the thing, but the other problem is that the sample rate is less than one per second. Believing the hardware itself was promising enough, he set out to reverse engineer and replace the firmware running on one of these cheap laser rangefinders (Google Translate from Russian).

His blog post is an absolute wealth of information on how these devices operate, and a must read for anyone interested in reverse engineering. But the short version is that he figured out a way to reprogram the STM32F100C8T6 microcontroller used in the device, and develop his own firmware that addresses the usability concerns of this otherwise very promising gadget.

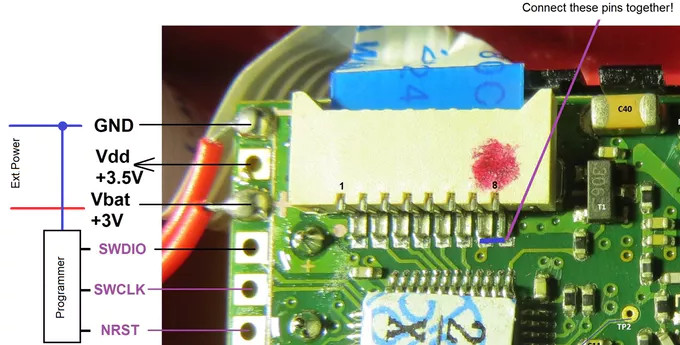
With some minor hoop jumping, the laser tape measure PCB can be hooked up to an ST-Link programmer, and the firmware provided by [iliasam] can be used to enable an easy to use serial interface. Perfect for pairing with an Arduino or Raspberry Pi to get fast and accurate range data without breaking the bank.

It probably won’t surprise you to see this isn’t the first time [iliasam] has gotten down and dirty with a laser rangefinder. This extremely impressive build from last year allowed for incredibly accurate 3D scans of his room, and before that he created his own rangefinder from scratch.

Continue reading “Hacking A Cheap Laser Rangefinder”

Teardown: What’s Inside A Christmas Laser Projector?

In the world of big-box retail, December 26th is a very special day. The Christmas music playing on the overhead speakers switches back to the family friendly Top 40, the store’s decorations get tossed in the compactor, and everything that’s even remotely related to the holiday is put on steep clearance. No more money to be made on the most commercialized of all holidays, so back to business as usual.

It’s in this narrow corridor of time, between the Great Holiday Unloading and the new spring products coming in, that you can find some fantastic deals on Christmas decorations. Not that long ago, this would hardly be exciting news for the readers of Hackaday. But Christmas lights and decorations have really started pushing the envelope in terms of technology: addressable RGB LED strands, Bluetooth controlled effects, and as of the last couple years, friggin’ lasers.

That’s right, you’ve seen them all over the neighborhood, probably took a few stray beams to the eye, you might even own your own. Laser projectors have been one of the most popular Christmas decorations for the last couple of years, and it’s not hard to see why. Just set the projector up in front of your house, and you’re done. No need to get on a ladder and string lights on the roof when you can just blast some directed energy up there instead.

Given how popular they are, I was surprised to see a lone Home Accents Holiday Multi-Color Light Projector on the clearance rack at Home Depot for around $14 a few days after Christmas. This was a 75% price reduction from normal MSRP, and right in that sweet impulse-buy price range. Let’s see what’s hiding inside!

Continue reading “Teardown: What’s Inside A Christmas Laser Projector?”

Laser Cutter Alignment Mod Skips Beam Combiner

A lot of the DIY laser engravers and cutters we cover here on Hackaday are made with laser diodes salvaged from Blu-ray drives and projectors, which are visible lasers in the 400 – 450nm range (appearing as violet or blue). Unfortunately there is an upper limit in terms of power on visible diode lasers, most builds max out at 5W or so. If you need more power than that, you’ll likely find yourself looking at gas laser cutters like the K40. While the K40 is a great starting point if you’re looking to get into “real” lasers, it’s a very different beast from the homebrew builds using visible lasers.

With a gas laser the beam itself is invisible, making it much more difficult to align or do test runs. One solution is to add a visible laser to the K40 which can be used to verify alignment, but making sure it’s traveling down the same path as the primary laser usually requires an expensive beam combiner. Looking to avoid this cost, [gafu] wanted to see if it was possible to simply move the visible laser into the path of the primary beam mechanically.

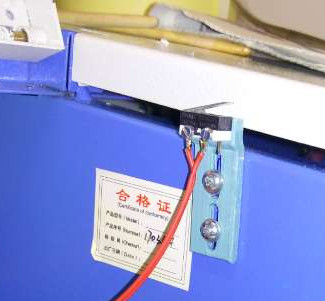
An adjustable microswitch detects when the lid has been opened.

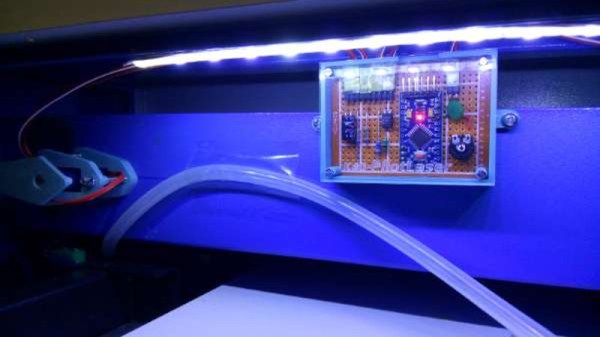
In the setup that [gafu] has come up with, a cheap laser module (the type from a handheld laser pointer) is moved into the path of the primary laser on an arm that’s actuated by a simple hobby servo. To prevent the primary and visible lasers from firing at the same time, an Arduino is used to control the servo given the current state of the K40’s lid. If the lid of the K40 is open, the primary laser is shutoff and the visible laser is rotated into position so the operator can see where the primary laser’s beam would be hitting. Once the lid is closed, the visible laser rotates out of the way and the primary is powered back up.

Running the cutting or engraving job with the lid of the K40 machine open now let’s [gafu] watch a “dry run” of the entire operation with the visible laser before finally committing to blasting the target with the full power beam.

We’ve covered many hacks and modifications for everyone’s favorite entry-level CO2 laser cutter. From replacing the controller to making it bigger, K40 owners certainly seem like a creative bunch.

Bluetooth Bedroom Clock!

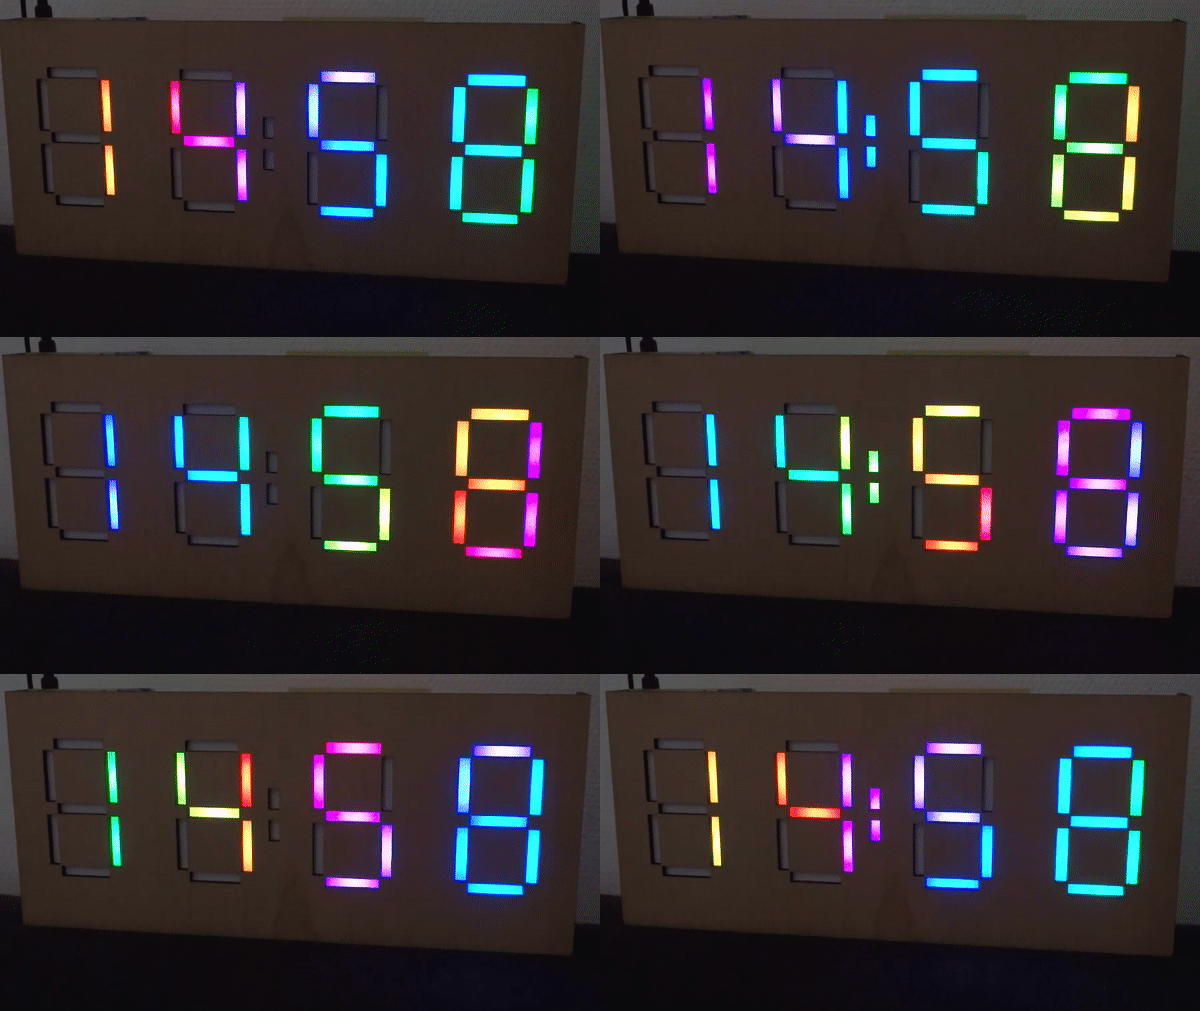
When [decino]’s old bedroom clock finally bit the dust, he built himself a new one from scratch for fun and functionality.

Initially, he wanted to solder Adafruit NeoPixel lights onto four prototype boards, using a mini-USB for power and a DS1307 to keep the time. However, after soldering the board for the first digit and realizing that carrying on with the other three would be a huge pain, he switched to etching the boards instead — a far more efficient solution. In keeping with this time-saving mindset, he added a Bluetooth module that would allow him to update the clock from his phone whenever the DS1307 started dropping minutes or whenever daylight savings time is in effect.

Continue reading “Bluetooth Bedroom Clock!”