SNES Controller Has A Pi Zero In The Trunk

We’re no stranger to seeing people jam a Raspberry Pi into an old gaming console to turn it into a RetroPie system. Frankly, at this point it seems like we’ve got to be getting close to seeing all possible permutations of the concept. According to the bingo card we keep here at Hackaday HQ we’re just waiting for somebody to put one into an Apple Bandai Pippin, creating the PiPi and achieving singularity. Get it done, people.

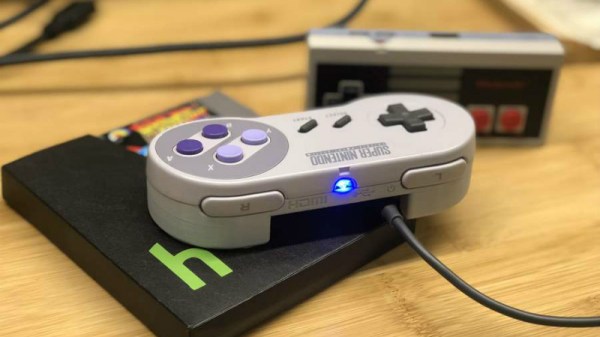
That being said, we’re still occasionally surprised by what people come up with. The Super GamePad Zero by [Zach Levine] is a fairly compelling take on the Pi-in-the-controller theme that we haven’t seen before, adding a 3D printed “caboose” to the stock Super Nintendo controller. The printed case extension, designed by Thingiverse user [Sigismond0], makes the controller about twice as thick, but that’s still not bad compared to modern game controllers.

In his guide [Zach] walks the reader through installing the Raspberry Pi running RetroPie in the expanded case. This includes putting a power LED where the controller’s cable used to go, and connecting the stock controller PCB to the Pi’s GPIO pins. This is an especially nice touch that not only saves you time and effort, but retains the original feel of the D-Pad and buttons. Just make sure the buttons on your donor controller aren’t shot before you start the build.

Adding a little more breathing room for your wiring isn’t the only reason to use the 3D printed bottom, either. It implements a very clever “shelf” design that exposes the Pi’s USB and HDMI ports on the rear of the controller. This allows you to easily connect power and video to the device without spoiling the overall look. With integrated labels for the connectors and a suitably matching filament color, the overall effect really does look like it could be a commercial product.

The SNES controller is an especially popular target for hacks and modifications. From commercially available kits to the wide array of homebrew builds, it there’s plenty of people who want to keep this legendary piece of gaming gear going strong into the 21st century

Continue reading “SNES Controller Has A Pi Zero In The Trunk”

Contest Results: Raspberry Pis Put On A Show

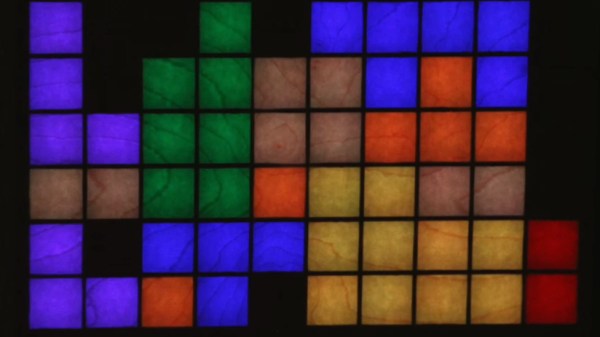
Some of the most satisfying projects of all are the ones that do something visual. All the network routers, data loggers, and thermostats are great. But we are visual creatures and even a humble blinking LED is enough to give you a little rush even compared to finding a large prime number. We wanted to see what our community could do visually with a Raspberry Pi so we challenged you with the Visualize it with Pi contest.

As always, the competition was brisk, with a lot of great projects. This contest showed off the trend towards using LED modules and assemblies to add visuals to projects. Why not? They are cheap enough and a well-integrated module can make a project simple to wire and integrate.

We didn’t see as many media-related projects as you might expect, although there was one tied into Stranger Things, one to Tron, and the virtual reality lighting project did have some Star Wars images. Projects ranged from the practical storage box labels to the whimsical lemonade bottle that strobes to the beat of the music. If none of that is hardcore enough for you, there was even a Raspberry Pi-controlled radio telescope. You can find all the entries over on Hackaday.io. Now let’s see which entries managed to turn the head of the judging panel.

Continue reading “Contest Results: Raspberry Pis Put On A Show”

Retro Console Upgrade Gives Atari Flair

If you’re desperate for a sense of nostalgia for video games of yore but don’t want to shell out the big bucks for an NES classic, you can always grab a single arcade-style game that’ll plug straight into your TV. Of course it’s no longer 1980, and playing Space Invaders or Asteroids can get old after a while. When that happens, just replace the internals for an upgraded retro Atari 2600 with all the games from that system instead of just one.

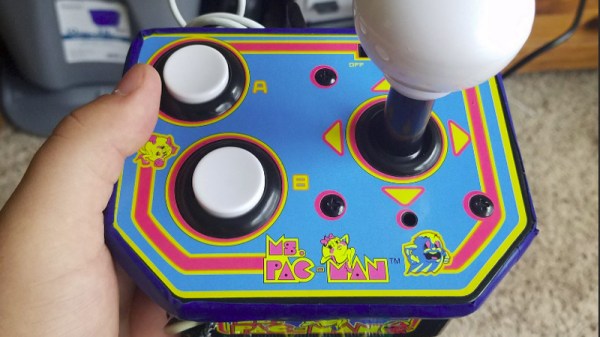
As expected for something that has to fit in such a tiny package, this upgrade is based on a Raspberry Pi Zero. It’s not quite as simple as throwing RetroPi on it and calling it a day, though. For one, [Blue Okiris] is still using the original two-button controller/joystick that came with the Ms. Pac-Man game this build is based on, and that added its own set of challenges. For another, RetroPi didn’t have everything he needed so he switched to another OS called Recalbox. It also includes Kodi so it could be used as a media center as well.

The build looks like a hack in the truest sense of the word. The circuit board sticks out the bottom a little bit, but this is more of a feature than a bug because that’s where some extra buttons and the power switch are. Overall, it’s a great Retro Atari system that has all the true classics that should keep [Blue Okiris] entertained until Atari releases an official system one day. If you’d like to go a little deeper in the Atari world, though, you could always restore one instead.

Continue reading “Retro Console Upgrade Gives Atari Flair”

Dual-Port Memory And Raspberry Pi Team Up For Retro Console Multicart

There’s something powerful about reliving the experience of using a game console from our personal good old days, especially the tactile memories stored up from hundreds of hours handling a chintzy joystick or the sound and feel of inserting a game cartridge. Emulators have their place, but they fall far short of period-correct hardware in the nostalgia department.

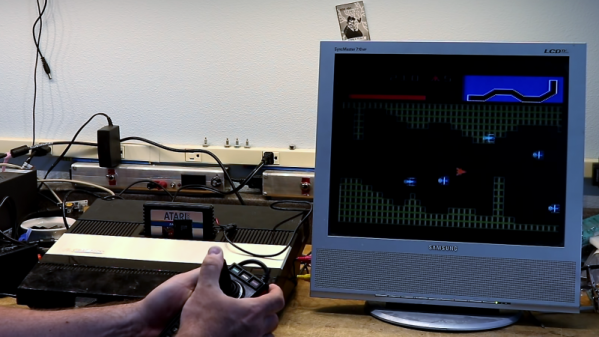
That’s not to say that the retro gear can’t use a little help in terms of usability, which is why [Scott M. Baker] built this Raspberry Pi multi-cartridge for his Atari 5200. The idea is to maintain the experience of the cartridge interface without having to keep stacks of cartridges around for all the games he wants to play. [Scott] leveraged the approach he used when he built a virtual floppy drive for a homebrew PC/XT: dual-port memory. The IDT7007 is a 32k chip that lives between the Atari 5200 and a Raspberry Pi Zero and can be addressed by both systems; the Pi to write ROM images to the memory, and the console to read them. He had to deal with some fussy details like chip select logic and dealing with the cartridge interlock signals, not to mention the difference in voltage between the memory chip’s logic levels and that of the Pi. Retro game-play occupies the first part of the video below; skip to 6:45 for build details.

The one quibble we have is trying to jam everything into an old cartridge. It’s critical to replicating the tactile experience, and while we don’t think we’d have gone so far as to injection mold a custom cartridge to house everything without any protrusions, we might have 3D-printed a custom cartridge instead. In the end it doesn’t detract much from the finished project, though, and we appreciate the mix of old and new tech.

Continue reading “Dual-Port Memory And Raspberry Pi Team Up For Retro Console Multicart”

The Better RetroPie Handheld

The Raspberry Pi has become the best video game console on the planet. With RetroPi, anyone can play Super Mario 3, Doctor Mario, and even Doki Doki Panic. Adafruit’s PiGRRL Zero and [Wermy]’s reconfabulation of an old brick Game Boy to house a Raspi Zero and display have made the Raspberry Pi portable, along with all those retro games we love so dearly.

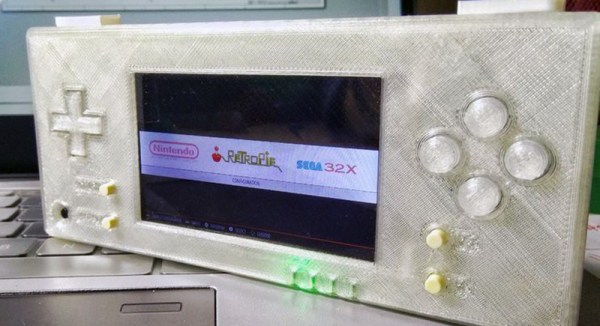
There’s a problem with these builds, though. They only use the Raspberry Pi Zero, and with that the limitations on emulation performance, and the Raspi 3 is far too big for a portable console. What’s the solution? It’s the greatest homebrew console ever created. For this year’s Hackaday Prize, [DeanChu] is building the Retro-CM3. It’s a retro handheld with a 3D printed enclosure, that’s powered by the Raspberry Pi Compute Module 3. Stand back, folks. We have a winner that will top the Raspberry Pi and 3D printing subreddits.

The key feature for this build is, of course, the raw processing power of the Raspberry Pi Compute Module 3. This is a Raspberry Pi 3 with 4 GB of eMMC stuffed onto a board that fits into an SODIMM socket. The pins on this device give you access to the GPIOs and the DSI connector. All you really need to turn this into an amazing vintage emulation console is a breakout board with a few buttons, power supply, and a display.

The extra components for this build include a 3.2 inch LCD using the DPI interface. There’s a speaker, and a 2000mAh battery. The real tricky part here is the custom PCB, breaking out the DPI pins on the Compute Module, adding a small speaker, and throwing a small STM32 to read the buttons. It’s an entire system, ready to be housed in a 3D printed enclosure.

This is, simply, the best Raspberry Pi portable you’ll ever see, at least until we get a Rasberry Pi Zero with the capabilities of the Pi 3. It’s an excellent use of the very small Compute Module, and one of the most polished Hackaday Prize entries we’ve seen thus far.

Gamecube Dock For Switch Mods Nintendo With More Nintendo

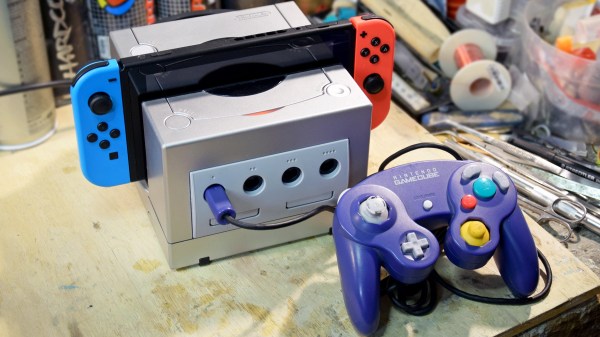
[Dorison Hugo] let us know about a project he just completed that not only mods Nintendo with more Nintendo, but highlights some of the challenges that come from having to work with and around existing hardware. The project is a Gamecube Dock for the Nintendo Switch, complete with working Gamecube controller ports. It looks like a Gamecube with a big slice out of it, into which the Nintendo Switch docks seamlessly. Not only that, but thanks to an embedded adapter, original Gamecube controllers can plug into the ports and work with the Switch. The original orange LED on the top of the Gamecube even lights up when the Switch is docked. It was made mostly with parts left over from other mods.

The interesting parts of this project are not just the attention to detail in the whole build, but the process [Dorison] used to get everything just right. Integrating existing hardware means accepting design constraints that are out of one’s control, such as the size and shape of circuit boards, length of wires, and often inconvenient locations of plugs and connectors. On top of it all, [Dorison] wanted this mod to be non-destructive and reversible with regards to the Nintendo Switch dock itself.

To accomplish that, the dock was modeled in CAD and 3D printed. The rest of the mods were all done using the 3D printed dock as a stand-in for the real unit. Since the finished unit won’t be painted or post-processed in any way, any scratches on both the expensive dock and the Gamecube case must be avoided. There’s a lot of under-cutting and patient sanding to get the cuts right as a result. The video (embedded below) steps through every part of the process. The final screws holding everything together had to go in at an odd angle, but in the end everything fit.

Continue reading “Gamecube Dock For Switch Mods Nintendo With More Nintendo”

FatPiBoy: Respin Game Boy With A Pop-Out Controller

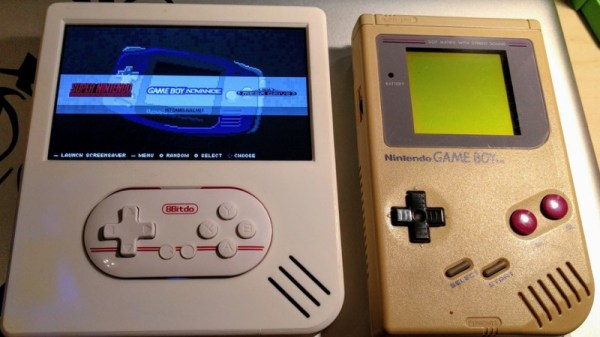
Have you ever found yourself wishing you had a clone of the Game Boy, except it was actually twice as wide, and instead of holding it in your hands you pop a tiny separate controller out of the middle and play it that way? No? Well, neither have we. But that didn’t stop [Christian Reinbacher] from designing and building exactly that, and by the looks of the finished product, we have to say he might be onto something.

To be fair, the charmingly-named FatPiBoy is not really meant to be played like the GameBoy of yesteryear. It’s more like a game console with built in display; you prop the console up on something, and then remove the controller from the system and play that way.

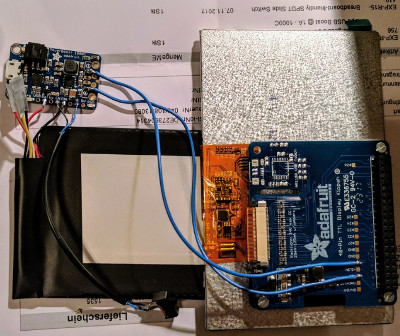
The controller itself is a commercial product, the 8bitdo Zero, but [Christian] based the rest of the system on parts intended for the Adafruit PiGRRL. For the battery, [Christian] used a 4,500 mAh pack that was originally from his Nexus 7 tablet; a tip to keep in mind next time you’re looking for a big and cheap lithium-ion battery.

[Christian] notes that the case design isn’t perfect. There’s currently no external access to the Pi’s USB ports, and the recess for the 8bitdo Zero could be a few millimeters deeper. Still, we think he did an excellent job finishing the case and giving it a professional look; the case and controller look like nearly a perfect match.

This isn’t the first time we’ve seen a Raspberry Pi put on a GameBoy costume, but the FatPiBoy does bring something new to the table with its removable controller. Of course, if you think the controller [Christian] selected for this build is a bit too small, you can always substitute your own