This Year, Badges Get Blockchains

This year’s hottest new advance in electronics comes through wearable badges. You can’t have failed to notice another technology that’s getting really hot. It’s the blockchain. What is a blockchain? It’s a linked list where every item in the list contains a cryptographic hash of the previous item in the list. What is a blockchain in English? It’s the most revolutionary technology that’s going to solve every problem on the planet, somehow. It’s the basis for crypto (no not that one, the other one). The blockchain is how you add more Lamborghinis to your Lamborghini account. Even though we’re still trying to figure out how it solves a single problem, one thing is certain: blockchains solve every problem. We were born too late to explore the Earth, born too early to explore the Universe, but just in time for blockchain.

Independent badges are always looking at the latest technology, and perhaps this was inevitable. It’s a badge built on the blockchain. It’s a wearable sneakernet of mining. It’s a game with collaborative proof of work.

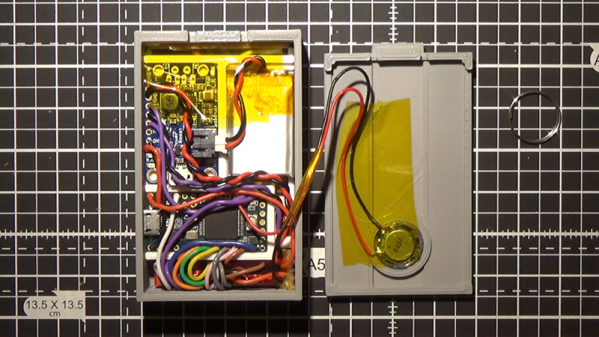
The blockchain badge from [Mr Blinky Bling] is an independent badge for this year’s Defcon, and like most independent badges it’s loaded up with RGB LEDs, microcontrollers, and exquisitely crafted FR4. What makes this badge different is the add-ons, or ‘blocks’ that attach to the main badge through 1/8″ phono jacks. These blocks form the basis of the social game, where two badge holders trade blocks for a while, allow their badges to perform a proof of work on each block, and finally, each block is hashed and the score increased. Yes, this is a blockchain, but it’s more of a block-tree, and it runs on sneakernet instead of the Internet.

Yes, this does indeed all sound like a joke. Make no mistake, though: this is real. This is a hardware game built on blockchain technology, that some lucky badge holders will be playing at this year’s Defcon. It’s filled with blinky and blockchain. It’s awesome.

[Mr. Blinky Bling] has already started a project for this badge over on hackaday.io, and right now they’re running a Kickstarter campaign for this badge with delivery at Defcon. This is one of the more interesting badges that will be floating around the con this year, and it has blockchain. This really isn’t one to miss.

A Lightgun For LCDs – Thanks To Maths!

Light guns were a fun way to learn to shoot things on consoles, enjoying their heyday in the 80s and 90s. The original designs largely relied on the unique characteristics of CRT televisions and the timing involved in the drawing of their frames. Unfortunately, due to a variety of reasons (dependent on the exact techniques used), they typically do not work at all with modern LCD & plasma screens.

The light gun contains a camera, and reportedly works by using the distortion of the rectangular image of the screen to calculate the position of the light gun itself.

Recently, there has emerged a new project called the Sinden Lightgun. In the How It Works video, it seems to use a fairly standard 30fps camera inside the gun to image the television screen being used by the game. The display is then rendered in 4:3, letterboxed on a 16:9 aspect ratio display, within a rectangular bezel. The image from the camera is then processed, and the distortion of the game image is used to calculate the position of the gun and the direction of its aim. Processing is handled by the host computer running MAME and the requisite coordinates are fed back in to the game code.

The basic concept seems sound, though as always, there’s a healthy amount of skepticism around the project. We’d love to hear your take, on whether the concept is plausible, and whether the lag figures stated are cromulent. We’re always excited to see new developments in the lightgun space! Video after the break.

Our own [Will Sweatman] penned an excellent piece on a variety of ways one could resurrect the venerable game of Duck Hunt, too.
Continue reading “A Lightgun For LCDs – Thanks To Maths!”

Simple Quadcopter Testbed Clears The Air For Easy Algorithm Development

We don’t have to tell you that drones are all the rage. But while new commercial models are being released all the time, and new parts get released for the makers, the basic technology used in the hardware hasn’t changed in the last few years. Sure, we’ve added more sensors, increased computing power, and improved the efficiency, but the key developments come in the software: you only have to look at the latest models on the market, or the frequency of Git commits to Betaflight, Butterflight, Cleanflight, etc.

With this in mind, for a Hackaday prize entry [int-smart] is working on a quadcopter testbed for developing algorithms, specifically localization and mapping. The aim of the project is to eventually make it as easy as possible to get off the ground and start writing code, as well as to integrate mapping algorithms with Ardupilot through ROS.

The initial idea was to use a Beaglebone Blue and some cheap hobby hardware which is fairly standard for a drone of this size: 1250 kv motors and SimonK ESCs, mounted on an f450 flame wheel style frame. However, it looks like an off-the-shelf solution might be even simpler if it can be made to work with ROS. A Scanse Sweep LIDAR sensor provides point cloud data, which is then munched with some Iterative Closest Point (ICP) processing. If you like math then it’s definitely worth reading the project logs, as some of the algorithms are explained there.

It might be fun to add FPV to this system to see how the mapping algorithms are performing from the perspective of the drone. And just because it’s awesome. FPV is also a fertile area for hacking: we particularly love this FPV tracker which rotates itself to get the best signal, and this 3D FPV setup using two cameras.

Rachel Wong Keynote: Growing Eyeballs In The Lab And Building Wearables That Enhance Experience

The keynote speaker at the Hackaday Belgrade conference was Rachel “Konichiwakitty” Wong presenting Jack of All Trades, Master of One. Her story is one that will be very familiar to anyone in the Hackaday community. A high achiever in her field of study, Rachel has learned the joy of limiting how much energy she allows herself to expend on work, rounding out her life with recreation in other fascinating areas.

There are two things Rachel is really passionate about in life. In her professional life she is working on her PhD as a stem cell researcher studying blindness and trying to understand the causes of genetic blindness. In her personal life she is exploring wearable technology in a way that makes sense to her and breaks out of what is often seen in practice these days.

Continue reading “Rachel Wong Keynote: Growing Eyeballs In The Lab And Building Wearables That Enhance Experience”

Next Weekend: Beginner Solar Workshop

Next week, Hackaday is hosting a workshop for all you hackers ready to harness the power of the sun. We’re doing a Beginner Solar Workshop at Noisebridge in San Francisco. You’re invited to join us on July 7th, we’ll provide the soldering irons.

The instructor for this workshop will be [Matt Arcidy], avid Hackaday reader and member of Noisebridge. He’s contributed to the incredible Noisebridge Gaming Archivists Live Arcade Cabinet, given talks on electronic components for the Arduino ecosystem, and now he’s hosting a workshop on the basics of solar charging.

This workshop will cover the theory of solar charging, how solar cells convert light into electricity, when and where this technology is appropriate, and the safe handling of lithium-ion batteries. At the end of the workshop, every attendee will have built a system that captures power from the sun and charges a battery, ready to be used in any future projects.

This is a big deal. Right now, the Hackaday Prize is in the middle of its third challenge, the Power Harvesting Module Challenge. This is a big part of the prize, and already there are some fascinating projects which harvest electricity from stomach acid, and even the gravitational potential of the Earth. Of course, some of those are more practical than others, and we’re really interested to see where this Power Harvesting Challenge goes and what great projects will be created.

3D Printed Tourniquets Are Not A Cinch

Saying that something is a cinch is a way of saying that it is easy. Modeling a thin handle with a hole through the middle seems like it would be a simple task accomplishable in a single afternoon and that includes the time to print a copy or two. We are here to tell you that is only the first task when making tourniquets for gunshot victims. Content warning: there are real pictures of severe trauma. Below, is a video of a training session with the tourniquets in Hayat Center in Gaza and has a simulated wound on a mannequin.

On the first pass, many things are done correctly: the handle is the correct length and diameter, the strap hole fit the strap, and the part is well oriented on the platen. As with many first iterations, it looks good on a screen, but in the real world, we all live under Murphy’s law. In practice, some of the strap holes had sharp edges that cut into the strap, and one of the printed buckles broke unexpectedly.

On the whole, the low cost and availability of the open-source tourniquets outweigh the danger of operating without them. Open-source medical devices are not just for use in the field, they can help with training too. This tourniquet is saving people and proving that modeling skills can be a big help in the real world.
Continue reading “3D Printed Tourniquets Are Not A Cinch”

Move Aside Mercury: Measuring Temperature Accurately With An RTD

Temperature is one of the most frequently measured physical quantities, and features prominently in many of our projects, from weather stations to 3D printers. Most commonly we’ll see thermistors, thermocouples, infrared sensors, or a dedicated IC used to measure temperature. It’s even possible to use only an ordinary diode, leading to some interesting techniques.

Often we only need to know the temperature within a degree Celsius or two, and any of these tools are fine. Until fairly recently, when we needed to know the temperature precisely, reliably, and over a wide range we used mercury thermometers. The devices themselves were marvels of instrumentation, but mercury is a hazardous substance, and since 2011 NIST will no longer calibrate mercury thermometers.

A typical Pt100 RTD probe

Luckily, resistance temperature detectors (RTDs) are an excellent alternative. These usually consist of very thin wires of pure platinum, and are identified by their resistance at 0 °C. For example, a Pt100 RTD has a resistance of 100 Ω at 0 °C.

An accuracy of +/- 0.15 °C at 0 °C is typical, but accuracies down to +/- 0.03 °C are available. The functional temperature range is typically quite high, with -70 °C to 200 °C being common, with some specialized probes working well over 900 °C.

It’s not uncommon for the lead wires on these probes to be a meter or more in length, and this can be a significant source of error. To account for this, you will see that RTD probes are sold in two, three, and four wire configurations. Two-wire configurations do not account for lead wire resistance, three-wire probes account for lead resistance but assume all lead wires have the same resistance, and four-wire configurations are most effective at eliminating this error.

In this article we’ll be using a 3-wire probe as it’s a good balance between cost, space, and accuracy. I found this detailed treatment of the differences between probe types useful in making this decision.

Continue reading “Move Aside Mercury: Measuring Temperature Accurately With An RTD”