Arduino Handheld Game System Gets A Grip

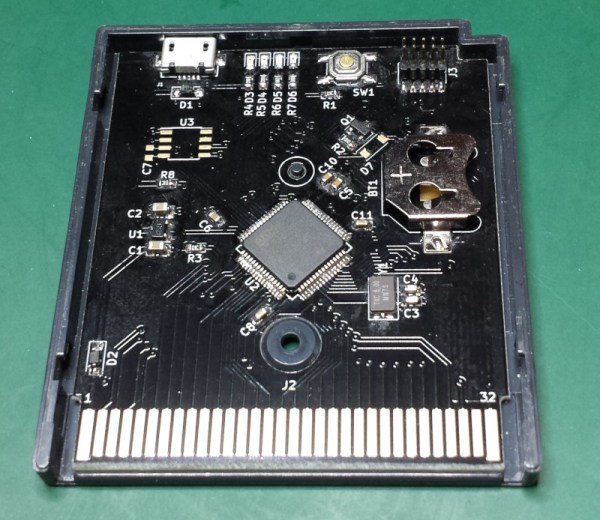
With little more than an Arduino, an OLED display, and some buttons, it’s easy to build your own faux-retro game system. There’s even a growing library of titles out there that target this specific combination of hardware, thanks in no small part to the Arduboy project. But unless you’re content to play Circuit Dude on a breadboard, at some point you’ll probably want to wrap the build up in a more convenient form.

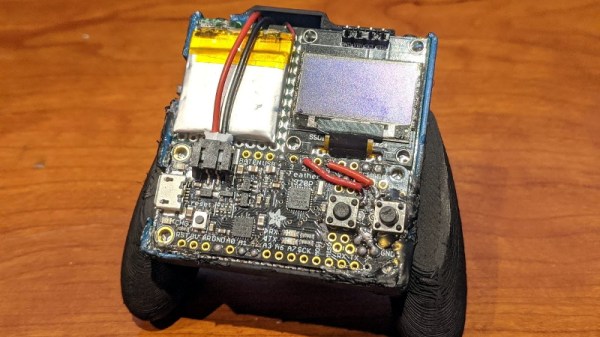
Like many that came before it, the OLED handheld created by [Alex Zidros] takes inspiration from a Nintendo product; but it’s not the Game Boy. Instead, his design is based on a 3D printed grip for the Switch Joy-Cons that he found on Thingiverse. After tacking on a holder for the PCB, he had the makings of a rather unique system.

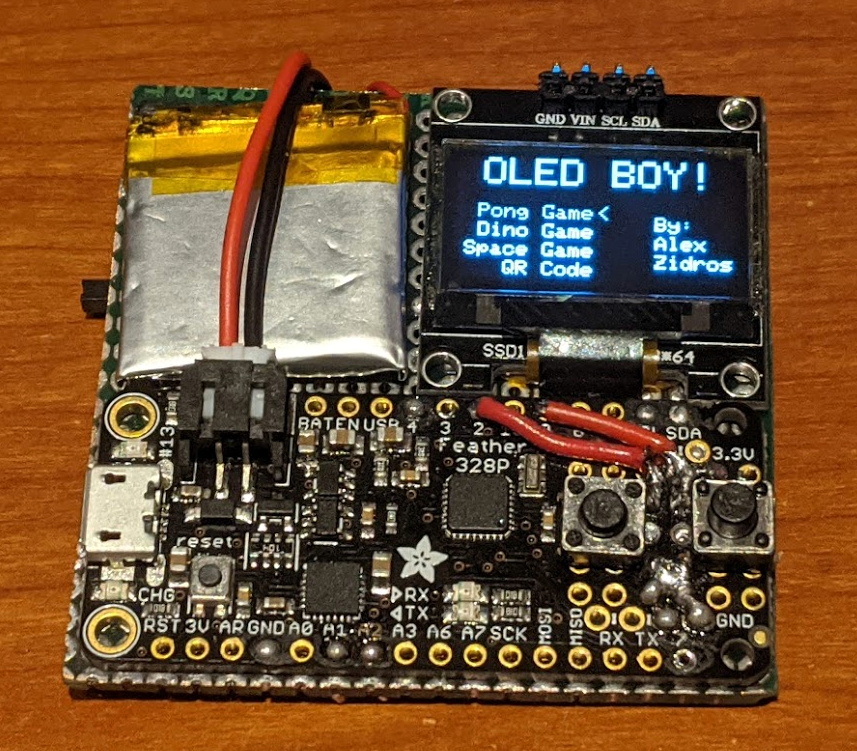
We especially like the offset SSD1306 OLED display. Not because we think a game system with an asymmetrical layout is a particularly sound design decision, but because it gives the whole build a rather cyberpunk feel. When combined with the exposed electronics, the whole system looks like it could have been cobbled together from a futuristic dumpster. Which is high praise, as far as we’re concerned.

Opposite the display is a LiPo pouch battery that [Alex] says was liberated from a portable speaker, and down below is an Adafruit Feather 328P. There are two tactile switches mounted to the front of the Feather, and in something of a departure from these sort of builds, there are two more on the shoulders of the 3D printed case. Everything is held together with nothing more exotic than a scrap of perfboard, making it easy for anyone who might want to build their own version.

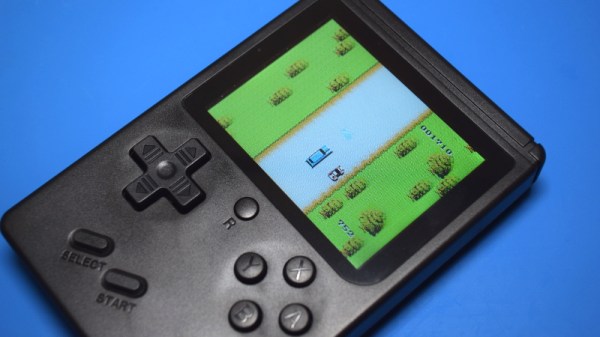
If you prefer your Arduino and OLED gaming to come in a slightly more familiar form factor, the build that was done inside of a Dreamcast Visual Memory Unit (VMU) has always been a favorite around these parts.

All The Games In One Cartridge

The original Game Boy was a smash success for Nintendo and has an amazing collection of games. You might relive some childhood nostalgia by booting up a Game Boy emulator, but to really get the full experience you’ll need the battery-draining green-tinted original hardware. Thanks to modern technology you can also load all of the games at one time on the original hardware with this STM32 cartridge that fits right in.

The device can load any Game Boy game (and homebrews) and ROMs can be sent to the cartridge via USB. There were are a lot of hurdles to getting this working properly, the largest of which is power management. A normal cartridge has a battery backup for save data, but using a small coin cell to run an STM32 would kill the battery quickly. To get around that, the cartridge writes the states to nonvolatile memory and then shuts itself off, although this has the side effect of crashing the Game Boy.

The creator of this project, [Emeryth], noted that we featured a similar project from [Dhole] a few years ago, also involving an STM32. [Emeryth] decided that it would be fun to build his own project anyway, and it’s certainly an interesting take on GameBoy hacking. He also has the files for this project available on his Git Hub page.

Teardown: 168-in-1 Retro Handheld Game

The holidays are upon us, and that can mean many furrowed brows trying to figure out what token gift they can give out this year as stocking-stuffers. Something that’s a bit more interesting than a coupon book or a lotto scratcher, but also affordable enough that you can buy a few of them without having to take part in that other great holiday tradition: unnecessary credit debit.

Includes the NES classic Super Militarized Police Bros 3

Which is how I came to possess, at least temporarily, one of these cheap handheld multi-games that are all over Amazon and eBay. The one I ordered carries the brand name Weikin, but there are dozens of identical systems available, all being sold at around the same $20 USD price point. With the outward appearance of a squat Game Boy, these systems promise to provide precisely 168 games for your mobile enjoyment, and many even include a composite video out cable and external controller for the less ambulatory classic game aficionado.

At a glance, the average Hackaday reader will probably see right through this ploy. Invariably, these devices will be using some “NES on a Chip” solution to emulate a handful of legitimate classics mixed in with enough lazy ROM hacked versions of games you almost remember to hit that oddly specific number of 168 titles. It’s nearly a foregone conclusion that at the heart of this little bundle of faux-retro gaming lies a black epoxy blob, the bane of hardware tinkerers everywhere.

Of course, there’s only one way to find out. Let’s crack open one of these budget handhelds to see what cost reduction secrets are inside. Have the designers secured their place on the Nice List? Or have we been sold the proverbial lump of coal?

Continue reading “Teardown: 168-in-1 Retro Handheld Game”

Gameslab: The Other FPGA Game Console Badge

Anyone who was at Supercon will no doubt remember the badges that dangled around everyone’s neck. Some were reasonable, while some were neck-straining monsters that added anything and everything to hack the badge into something cool. We saw everything from AI cameras to a fully autonomous vehicle being worn with pride.

Sadly, one that we missed was Gameslab, [Craig J. Bishop]’s FPGA-based portable game console. No, not that FPGA-based game console; in an example of great minds thinking alike, [Craig] had actually been toying with his own handheld console design for quite some time. And we have to say the results are stunning.

The FPGA at the heart of this is a Xilinx Zynq FPGA-ARM Cortex A9 combo SoC, normally a prohibitively expensive monster of a chip. When [Craig] found “refurbished” Zynq chips on eBay for less than 10% of the cost of new units, it was literally game-on for the build. The console required a six-layer PCB to support the big BGA chip and the hundreds of support components around it. There’s a 5″ TFT touchscreen with a video controller implemented in the FPGA, a stereo sound system, and all the buttons and thumbsticks you’d expect on a modern console.

For our money, the best part is the case, about which [Craig] has yet to share any details. But it looks like a machined aluminum plate with wide chamfers around each cutout that contrast nicely with the brushed surface. We’ll be looking forward to more details on that and on progress with Gameslab.

Ambitious LED Cube Provides Endless Video Game Scrolling; Plays Castlevania

LED cubes are all the rage right now, and rightly so given the amount of work that goes into them and the interesting things people find to do with them. Not content to make yet another position-sensitive display or an abstract design, though, [Greig Stewart] opted for something a bit more ambitious: an LED cube with a playable game of Castlevania.

As ambitious projects often do, this one required leveraging the previous art, some of which we’ve featured before. [Greig] pulled inspiration and information from cube builders like [polyfloyd], [Greg Davill], and [kbob] to put the six 64-LED matrix panels to work. Getting the structural elements figured out was an early stumbling block, but [Greig] pulled it off with 3D-printed brackets and a hinge that’s a work of art in itself; the whole thing looks like something the Borg would have built. The Raspberry Pi inside made a Gameboy emulator possible, and his first stab at it was to have six different games running at once, one on each panel. He settled on just one game, the classic side-scroller Castlevania, played on just four of the panels. Some wizardry was required to de-scroll the game so that the character walks around the cube rather than having the background scroll; you can check out the results in the clip below.

Currently, the cube sits on a lazy susan with a small motor controlling the swiveling in response to a foot control. [Greig] wants to put the motor under control of the game so that physical scrolling is synced with gameplay; we heartily endorse that plan and look forward to the results.

Continue reading “Ambitious LED Cube Provides Endless Video Game Scrolling; Plays Castlevania”

That Game Cartridge Isn’t As Straightforward As You’d Think

Classic games consoles played their games from cartridges, plastic bricks that held a PCB with the game code on it ready to be run by the console hardware. You might therefore expect them to be an easy prospect for emulation, given that the code can be extracted from whatever ROM they contain. But as anyone with an interest in the subject will tell you, some cartridges included extra hardware to boost the capabilities of their games, and this makes the job of an emulator significantly more complex.

[Byuu] has penned an article exploring this topic across a variety of consoles, with in-depth analyses of special-case cartridges. We see the obvious examples such as the DSP coprocessors famously used on some SNES games, as well as Nintendo’s Super Game Boy that contained an entire Game Boy on a chip.

But perhaps more interesting are the edge-case cartridges which didn’t contain special hardware. Capcom’s Rockman X had a copy protection feature that sabotaged the game if it detected RAM at a frequently used save game address emulated by copiers. Unfortunately this could also be triggered accidentally, so every one of the first generation Rockman X cartridges had a manually attached bodge wire that a faithful emulator must replicate. There is also the case of the Sega Genesis F22 Interceptor, which contained an 8-bit ROM where most cartridges for this 68000-powered platform had a 16-bit part. Simple attempts to copy this cartridge result in the upper 8 bits having random values due to the floating data lines, which yet again an emulator must handle correctly.

It’s a subject with a variety as huge as the number of console developers and their games, and a field in which new quirks are constantly being unearthed. While most of us don’t spend our time peering into dusty cartridges, we’re grateful for this insight into that world.

We’ve visited the world of emulators a few times before, such as when we looked at combatting in-game lag.

Tiny ThinkPad Plays Tiny Games

[Paul Klinger] can’t seem to get enough of building tiny, amazing gaming rigs, and we love him for that. They combine two of our favorites: miniatures and portable gaming. His newest creation honors the form of the formidable ThinkPad.

Of course it has the red nipple and lid LED—wouldn’t be a ThinkPad without ’em. ThinkTiny’s nipple is a 5-way joystick that plays Snake, Tetris, Lunar Lander, and more on an OLED screen. Like its predecessor the Tiny PC, [Paul] used an ATtiny1614, which (FYI) has a new one-wire UDPI interface. He can easily reprogram it through pogo pin holes built into the case.

There are some nice stylistic details at play here, too. The lid LED is both delivered and diffused by a 2mm grain of fiber-optic cable. And [Paul] printed the cover with a color change to transparent filament to make the Think logo and the charging LEDs shine through. Maneuver your way past the break to see it in action.

If you haven’t leveled up to AVR programming yet, introduce yourself to Arduboy.

Continue reading “Tiny ThinkPad Plays Tiny Games”