To the uninitiated the words ‘State machine’ sound like something scarily big and complex. They aren’t (necessarily) and can be quite useful. In fact, state machines are no physical machines but a model of processes. They link the states a system can be in with allowed transitions. For example a media player when stopped can change to play or open another file. While playing, it can go to pause, stop, reverse, fast forward and so on. A state machine creates a map of all states and how they are connected. It is an abstract tool hat offers a graphical approach to organizing your code before actually programming.
In his video [Chris Guichet] uses a state machine to debounce a switch for a beginner friendly introduction of the concept. He then shows how to turn the hand drawn map to actual code, including a section on debugging state machines.
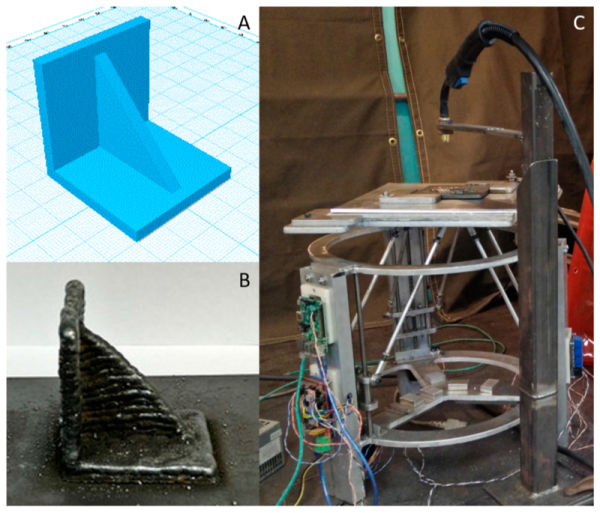
3D printers hit the scene in a big way in the last decade, and thanks to the constant improvements that we’ve seen since then you can now get a decent one, assembled or as a kit, for a reasonable price. The one major drawback is that almost all of these printers are limited to printing in plastic, which has its obvious limitations. Printing in metal seems like the next logical step, and a group from Michigan Tech has created something that is accessible to most of us. Spoiler: they used plastic and metal printing to print a functioning axe.
Untill now, most metal printers have used a process like laser sintering to achieve the desired effect. This group uses a much more common tool: a MIG welder. MIG welders work by passing a wire through the welding handle, which would normally used as the filler material for the weld. If you use the wire for laying down material rather than for welding specifically, you can build up material on a surface in essentially the same way that a printer that prints plastic would.
From there, all that’s needed is to attach the MIG welder to a CNC machine and get to printing. The team has produced some great results so far, including some metal braces and farm implements, so hopefully their work leads to another revolution in 3D printing for the masses. We think it’s high time.
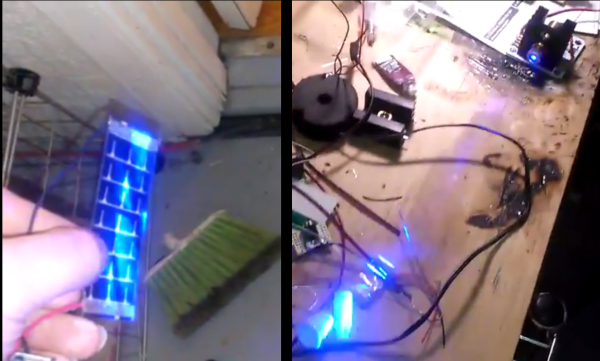
With its vintage sound, there’s no mistaking the unique 8-bit sound of video games from the 80s and 90s. It became so popular that eventually sparked its own genre of music known as “chiptune” for which musicians are still composing today. The music has some other qualities though, namely that it’s relatively simple from a digital standpoint. [Robots Everywhere] found that this simplicity made it perfect as a carrier for wireless power transmission.
The project acts more like a radio transmitter and receiver than it does a true wireless power transmitter, but the principle is the same. It uses a modified speaker driver and amplifier connected to a light source, rather than to a speaker. On the receiving end, there is a solar panel (essentially a large photodetector) which is wired directly to a pair of earbuds. When the chiptune is played through the amplifier, it is sent via light to the solar panel where it can be listened to in the earbuds.
The project is limited to 24,000 bytes per second which is a whole lot more useful than just beaming random audio files around your neighborhood, although that will still work. You can also use something like this to establish a long-distance serial link wirelessly, which can be the basis of a long distance communications network.
For this year’s Hackaday Prize, we’re doing something special. We’re introducing achievements for Prize projects. Think of them as merit badges. If your Hackaday Prize project has multiple parts that come together into one unified, awesome whole, you get the Voltron achievement. If you’ve built a musical instrument that unexpectedly blows everyone’s minds, you get the Diva Plavalaguna Achievement. A select few entries will earn the Pickle Rick achievement. What’s this? It’s a jaw-dropping build that makes you shake your head in the totality of engineering perfection.
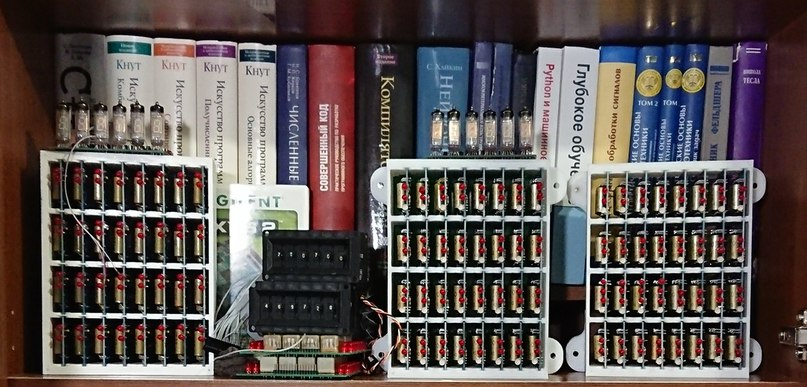
Here’s a project that nails this achievement. It’s a homebrew computer, made out of relays, that runs a custom instruction set. It’s built on Brainf*ck. It is, by far, the most absurd and amazing homebrew computer you’ve ever seen.
Several modules on a shelf, for scale.
First, the hardware. This CPU is built out of about 800 Soviet reed relays, RES64, RES55, and RES-43 relays, if you want some part numbers. These relays are mounted on logic cards connected to a backplane. Each backplane consists of thirty-two of these cards, and it takes two backplanes to build up a 16-bit full adder. The 16-bit instruction pointer and 16-bit address pointer each fit on half a backplane.
Moving up one level, the instruction set for this computer is based on Brainf*ck, with a few additions. The ‘+’ instruction adds to the current value, the ‘>’ instruction still increases the current memory address, but there are a few new instructions that make this CPU not an interminable world of suffering. There’s now a ‘write current data value to register’ commands, and logical XOR instructions.
Have relay-based computers been done before? Yes, and so have Brainf*ck ISAs. The combination is rarely seen, and we’ve never seen one that performs this well. Below, you can see a video of this computer counting at 500 operations per second (or 500 Hz from a frequency counter). This is really unimaginable with any other relay computer we’ve seen, and it’s all thanks to those really tiny Soviet tubes. If you want a Hackaday Prize project that’s jaw-dropping, here you go.
At what age did you begin learning about electronics? What was the state of the art available to you at the time and what kinds of things were you building? For each reader these answers can be wildly different. Our technology advances so quickly that each successive generation has a profoundly different learning experience. This makes it really hard to figure out what basic knowledge today will be most useful tomorrow.
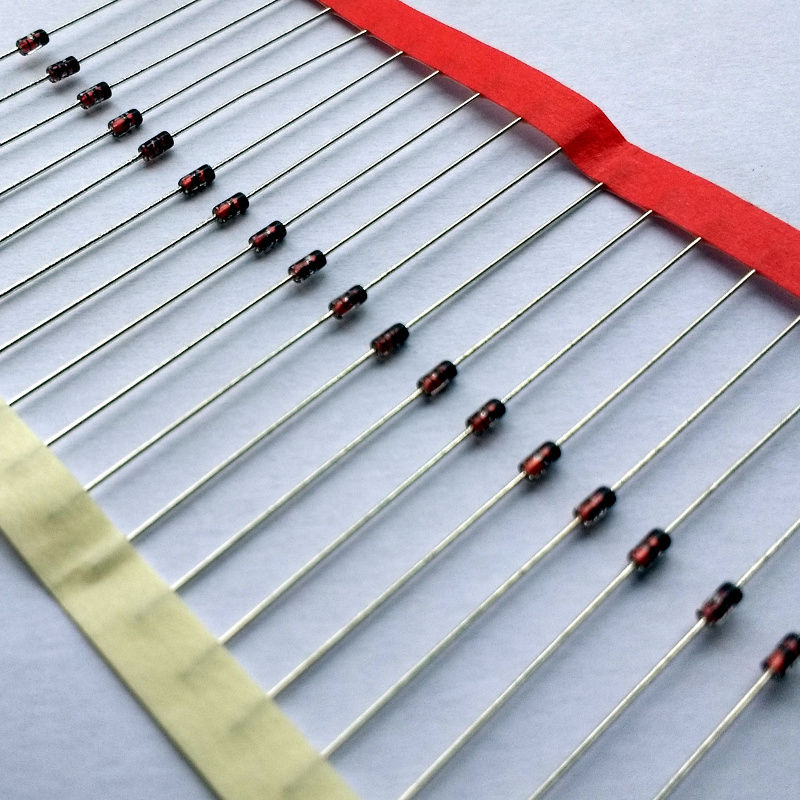
Go on, guess the diode!
Do you know the forward voltage drop of a diode? Of course you do. Somewhere just below 0.7 volts, give or take a few millivolts, of course given that it is a silicon diode. If you send current through a 1N4148, you can be pretty certain that the cathode voltage will be that figure below the anode, every time. You probably also have a working knowledge that a germanium diode or a Schottky diode will have a lower forward voltage, and you’ll know in turn that a bipolar transistor will begin to turn on when the voltage between its base and emitter achieves that value. If you know Ohm’s Law, you can now set up a biasing network and without too many problems construct a transistor amplifier.
Light painting is a technique which allows you to “draw” on a photograph by moving a light past the camera during a long exposure shot. While it can be difficult to master, light painting allows for some incredible effects such as text and images that appear to be hovering in mid-air. Think of it like a very slow but much cooler version of an augmented reality app.
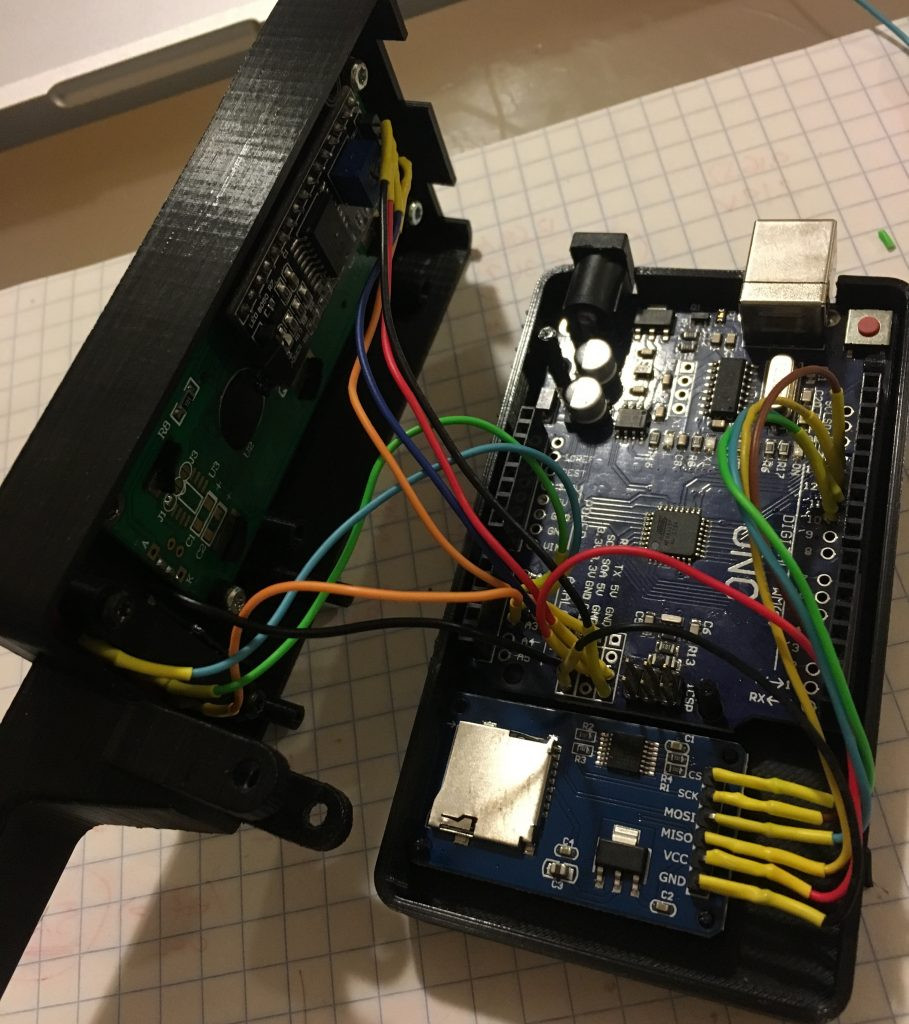
[Reven] recently wrote in to tell us about the Arduino light painter he put together, and while DIY (and even commercial) light painting gear isn’t exactly new at this point, we think he’s raised the bar a bit with his design. With the addition of a slick 3D printed enclosure and on-board display and menu system, his light painter looks exceptionally professional for being built out of hardware he had on hand.
On his blog, [Reven] has done a phenomenal job of documenting the build from start to finish. Not only does he include a detailed Bill of Materials and the STL files so you can build your own version of his light painter, he walks the reader though his design process and explains why he did the things he did. Even if you aren’t interested in building a light painter, there’s almost certainly something of interest for anyone who’s ever looked at a pile of parts on their workbench and wondered how they were going to turn it into a functioning device.
Powered by an Arduino Uno, the light painter provides a user interface on a 16×2 LCD which allows control over not only the brightness of the WS2812 LED strips but selecting and loading different images from the micro SD card. The case was designed in FreeCAD, and while [Reven] mentions there are a number of issues which could be improved, satisfies all his design goals.
There was a time when taking a low DC voltage — say a single battery — and converting it to a higher voltage was painful. Now, however, cheap and easy-to-use DC to DC converters are readily available. For some small tasks, though, these can seem like overkill. For example, consider a case where you need to supply a higher voltage for a MOSFET gate that doesn’t draw much current. Perhaps you need that higher voltage to trigger a microcontroller’s programming mode and nothing else. The current draw is minimal, and a full-blown DC to DC converter is overkill. For cases like that, it is tempting to use some voltage multiplication scheme. There are many, but for this post, I’m going to take you inside a Dickson charge pump. This is Circuit VR because not only are we going to discuss the circuit, we’ll look at an LT Spice simulation you can try yourself.
The Dickson is interesting because it doesn’t require any AC conversion or transformers. Instead, it uses diodes or other switching elements to transfer charge between capacitors in stages. Each stage will effectively increase the voltage by the supply voltage — in theory. Reality isn’t so kind, though, as we’ll see.