It’s a dilemma many hams face: it’s easy to find yourself with a big spool of RG-11 coax cable, usually after a big cable TV wiring project. It can be tempting to use it in antenna projects, but the characteristic impedance of RG-11 is 75 Ω, whereas the ham world is geared to 50 Ω. Not willing to waste a bounty of free coax, one ham built a custom 1:1 current balun for a 75 Ω dipole.
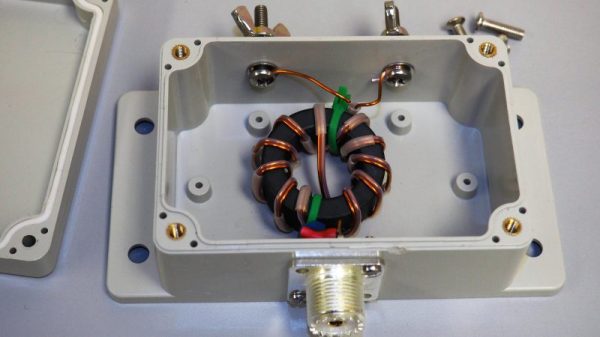
Converting between balanced and unbalanced signals is the job of a balun, and it’s where the device derives its name. For hams, baluns are particularly useful to connect a dipole antenna, which is naturally balanced, to an unbalanced coax feedline. The balun [NV2K] built is a bifilar 1:1 design, with two parallel wires wound onto a ferrite core. To tweak the characteristic impedance to the 75 Ω needed for his antenna and feedline, [NV2K] added short lengths of Teflon insulation to one of the conductors, which is as fussy a bit of work as we’ve seen in a while. We appreciate the careful winding of the choke and the care taken to make this both mechanically and electrically sound, and not letting that RG-11 go to waste is a plus.
With as much effort as hams put into antenna design, there’s a surprising dearth of Hackaday articles on the subject. We’ve talked a bit about the Yagi-Uda antenna, and we’ve showcased a cool magnetic loop antenna, but there’s precious little about the humble dipole.
[via r/amateurradio]