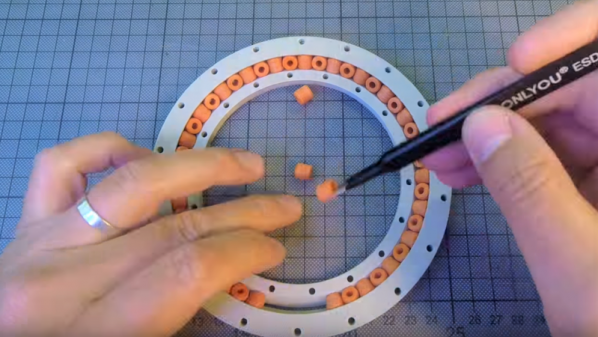
A Truly Classy Metal-Framed Mini CNC

We’ve seen a number of DVD- and CDROM-based small CNC machines here, but few are as simply beautiful as this one by [julioberaldi] over on Instructables (translated from Portuguese here).

fbis2gciv0ajsdxWe’ll cut to the chase; it’s the frame. Cut from steel sheet scraps with a hacksaw, and welded or soldered together with “bar solder”. It looks like a lot of sanding, painting, and polishing went on. The result is something we’d be proud to have on our desk.

For now, it simply draws with a pen. But watch the video, embedded below, and you’ll see that it runs exceptionally smoothly. If we’re reading the Instructable right, the next step is to turn this into a CNC cutter. We can’t wait to see where the project goes from here.

Continue reading “A Truly Classy Metal-Framed Mini CNC”

Linux On Your NES Classic Edition

Nintendo look as though they may have something of a hit on their hands with their latest console offering. It’s not the next in the line of high-end consoles with immersive VR or silicon that wouldn’t have looked out of place in last year’s supercomputer, instead it’s an homage to one of their past greats. The NES Classic Edition is a reboot of the 1980s console with the familiar styling albeit a bit smaller, and 30 of the best NES games included.

You do not, however, get an original NES with a 6502 derived processor, and a stack of game cartridges. In the Classic Edition is a modern emulator, running on very modern hardware. We’re told it contains an Allwinner R16 quad-core Cortex A7 SoC, 256Mb of RAM, and 512Mb of Flash. That’s a capable system, and unsurprisingly any hacking potential it may have has attracted some interest. Reddit user [freenesclassic] for example has been investigating its potential as a Linux machine, and has put up a post showing the progress so far. It is known that there is already some form of Linux underpinning the console because Nintendo have released a set of sources as part of their compliance with the terms of the relevant open-source licences. That and the availability of a serial port via pads on the PCB gives hope that a more open distro can be installed on it.

We’re taken through the process of starting the machine up with the serial port connected to a PC, and getting it into the Allwinner FEL mode for low-level flashing work. Then we’re shown the process of loading a custom U-Boot, from which in theory a kernel of your choice can be loaded.

Of course, it’s not quite that simple. There is still some way to go before the device’s Flash can be accessed so for now, all that is possible is to use the RAM, and the current state of play has a kernel panic as it is unable to mount a filesystem. However this is a new piece of hardware in its first few days after launch, so this is very much a work in progress. We are sure that this device will in time be opened up as a fully hackable piece of hardware, and we look forward to covering the interesting things people do with it when that has happened.

If you are interested in the NES Classic, take a look at it on Nintendo’s web site. Meanwhile, here at Hackaday as a quick look at our past stories tagged “nes” shows, we’ve covered a huge number of projects involving the platform in the past.

Thanks [Doc Oct] for the tip.

Original NES console header image: Evan-Amos [Public domain], via Wikimedia Commons.

PLC And Linear Actuators Automate Double-Hung Windows

Very few residential architectural elements lend themselves to automation, with doors and windows being particularly thorny problems. You can buy powered doors and windows, true, but you’ll pay a pretty penny and have to go through an expensive remodeling project to install them. Solving this problem is why this double-hung window automation project caught our eye.

Another reason we took an interest in this project is that [deeewhite] chose to use a PLC to control his windows. We don’t see much love for industrial automation controllers around here, what with the space awash in cheap and easy to use microcontrollers. They have their place, though, and a project like this is a good application for a PLC. But the controller doesn’t matter at all if you can’t move the window, for which task [deeewhite] chose 12V linear actuators. The fact that the actuators are mounted in the center of the window is probably necessary given the tendency of sashes to rack in their frames and jam; unfortunately, this makes for a somewhat unsightly presentation. [deeewhite] also provides the ladder logic for his PLC and discusses how he interfaces his system with Alexa, a WeMo and IFTT.

We’d love to see this project carried forward a bit with actuators hidden under the window trim, or a rack and pinion system built into the window tracks themselves. This is a pretty good start and should inspire work on other styles of windows. While you’re at it, don’t forget to automate the window blinds.

[via r/DIY]

Pulling Music Out Of The Airwaves

RADIO WONDERLAND is a one-man band with many famous unintentional collaborators. [Joshua Fried]’s shows start off with him walking in carrying a boombox playing FM radio. He plugs it into his sound rig, tunes around a while, and collects some samples. Magic happens, he turns an ancient Buick steering wheel, and music emerges from the resampled radio cacophony.

It’s experimental music, which is secret art-scene-insider code for “you might not like it”, but we love the hacking. In addition to the above-mentioned steering wheel, he also plays a rack of shoes with drumsticks. If we had to guess, we’d say rotary encoders and piezos. All of this is just input for his computer programs which take care of the sampling, chopping, and slicing of live radio into dance music. It’s good enough that he’s opened for [They Might Be Giants].

Check out the videos (embedded below) for a taste of what a live show was like. There are definitely parts where the show is a little slow, but they make it seem cooler when a beat comes together out of found Huey Lewis. We especially like the “re-esser” routine that hones in on the hissier parts of speech to turn them into cymbals. And if you scan the crowd in the beginning, you can find a ten-years-younger [Limor Fried] and [Phil Torrone].

Continue reading “Pulling Music Out Of The Airwaves”

Arduino With A… PIC?

Before the Arduino took over the hobby market (well, at least the 8-bit segment of it), most hackers used PIC processors. They were cheap, easy to program, had a good toolchain, and were at the heart of the Basic Stamp, which was the gateway drug for many microcontroller developers.

[AXR AMR] has been working with the Pinguino, an Arduino processor based on a PIC (granted, an 18F PIC, although you can also use a 32-bit device, too). He shows you how to build a compatible circuit on a breadboard with about a dozen parts. The PIC has built-in USB. Once you flash the right bootloader, you don’t need anything other than a USB cable to program. You can see a video of this below.

You will need a programmer to get the initial bootloader, but there’s plenty of cheap options for that. The IDE is available for Windows, Linux, and the Mac. Of course, you might wonder why you would use a PIC device instead of the more traditional Arduino devices. The answer is: it depends. Every chip has its own set of plusses and minuses from power consumption to I/O devices, to availability and price. These chips might suit you, and they might not. That’s your call.  Of course, the difference between Microchip and Atmel has gotten less lately, too.

We’ve covered Pinguino before with a dedicated board. If you never played with a Basic Stamp, you might enjoy learning more about it. If you’re looking for more power than a PIC 18F can handle, you might consider the Fubarino, a PIC32 board you can use with the Arduino IDE.

Continue reading “Arduino With A… PIC?”

Put A Pi In Your JAMMA

Most of us who play an occasional arcade game will have never taken a look inside a cabinet however much its contents might interest us. We’ll know in principle what kind of hardware we’d expect to see if we were given the chance, but the details are probably beyond us.

In fact, there is a standard for the wiring in arcade cabinets. Arcade operators demanded running costs as low as possible, and the industry responded with the JAMMA wiring standard. The Japan Amusement Machinery Manufacturers Association was the name the Japanese trade body was known under in the 1980s, and they originated a specification for both wiring and connector that would allow hardware to be easily installed for any game that supported it.

[Jochen Zurborg] has created an interesting board supporting the JAMMA connector, one that interfaces it with a Raspberry Pi and offers full support of the Pi as a video source. He’s launching his Pi2Jamma as a commercial product so sadly there are no schematics or Gerbers for you to look at, but if you’d prefer to roll your own it probably wouldn’t be beyond most Hackaday readers to do so. What it does though is open up the huge world of emulation on the Pi to owners of classic cabinets, and if you don’t mind forking out for one then we can see it might make for a very versatile addition to your cabinet.

We’ve featured [Jochen]’s work before here at Hackaday with a joystick that faithfully replicates arcade items. As to the Pi, this is the first JAMMA board we’ve seen with video, but we’ve featured another board using a Pi to bring console controllers to JAMMA boards in the past.

3D Printing Permanent Magnets

Researchers at TU Wien wanted to create magnets with exactly the right magnetic field for a particular application. Their solution? 3D printing of magnets. Previously, it has been difficult to produce permanent magnets with a specific shape of the magnetic field. The resulting magnets will be a boon to magnetic sensor construction.

Previously, after designing a magnet with a specific shape and magnetic field, a researcher would have to create tooling for injection molding. This is expensive and time-consuming and often not worth it for small quantities of magnets.

Continue reading “3D Printing Permanent Magnets”