[Daniel Reetz] spent six years working as a Disney engineer during the day and on his book scanner, the archivist at night. Some time last year, [Daniel] decided enough is enough, got married, and retired from the book scanner business. There’s a bit more to it than that, but before leaving he decided to dump, not just the design, but the entire rationale behind the design into a twenty-two thousand word document.
One of his big theses in this document, is his perceived failure of the open hardware movement. The licenses aren’t adequate, as they are based on copyright law that only applies to software. This makes it impossible to enforce in practice, which is why he released the entire design as public domain. He also feels that open hardware shares design, but not rationale. In his mind this is useless when encouraging improvement, and we tend to agree. In the end rationale is the useful thing, or the source code, behind a design that truly matters. So, putting his money time where his mouth is, he wrote down the rationale behind his scanner.
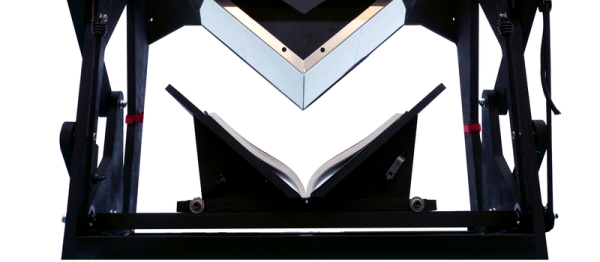
The rationale contains a lot of interesting things. At a first glance the book scanner almost seems a simple design, not the culmination of so much work. Though, once we began to read through his document, we began to understand why he made the choices he did. There’s so much to getting a good scan without destroying the book. For example, one needs a light that doesn’t lose any color information. It doesn’t have to be perfect, as the software can correct the white balance. However, it can’t lean too far away from the natural spectrum, it can’t be too bright, and it can’t be uneven, and it can’t be prohibitively expensive. A lot of thought went into the tent light design.
[Daniel]’s book scanners are immensely popular, and are being used all over the world. He’s certainly made an impact, and the community that formed around his project continues to grow without him. He made some interesting points, and if anything wrote a really good build and design log for the rest of us to learn from.