Time Bandit Clock Hits The Aesthetic Jackpot

When was the last time you looked forward to looking at a clock? Not to find out the time per se — like gee, maybe it’s beer o’ clock already — but waited with bated breath to gaze upon a particular clock? Never? We don’t blame you, but only because you haven’t seen this fruit machine clock in action yet.

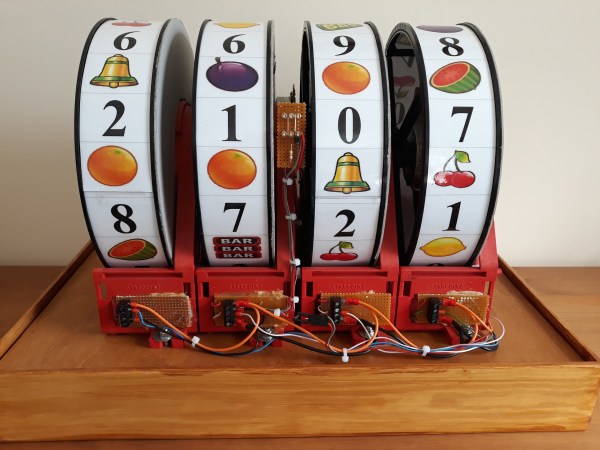
Every 60 seconds, the reels start spinning like some little man inside pulled the lever on a slot machine (or fruit machine, as they’re called across the pond). The reels slow down and stop one by one, left to right, settling on the four digits of time in 24-hour mode. Imagine the suspense of coming to see what time it is just as the reels start spinning!

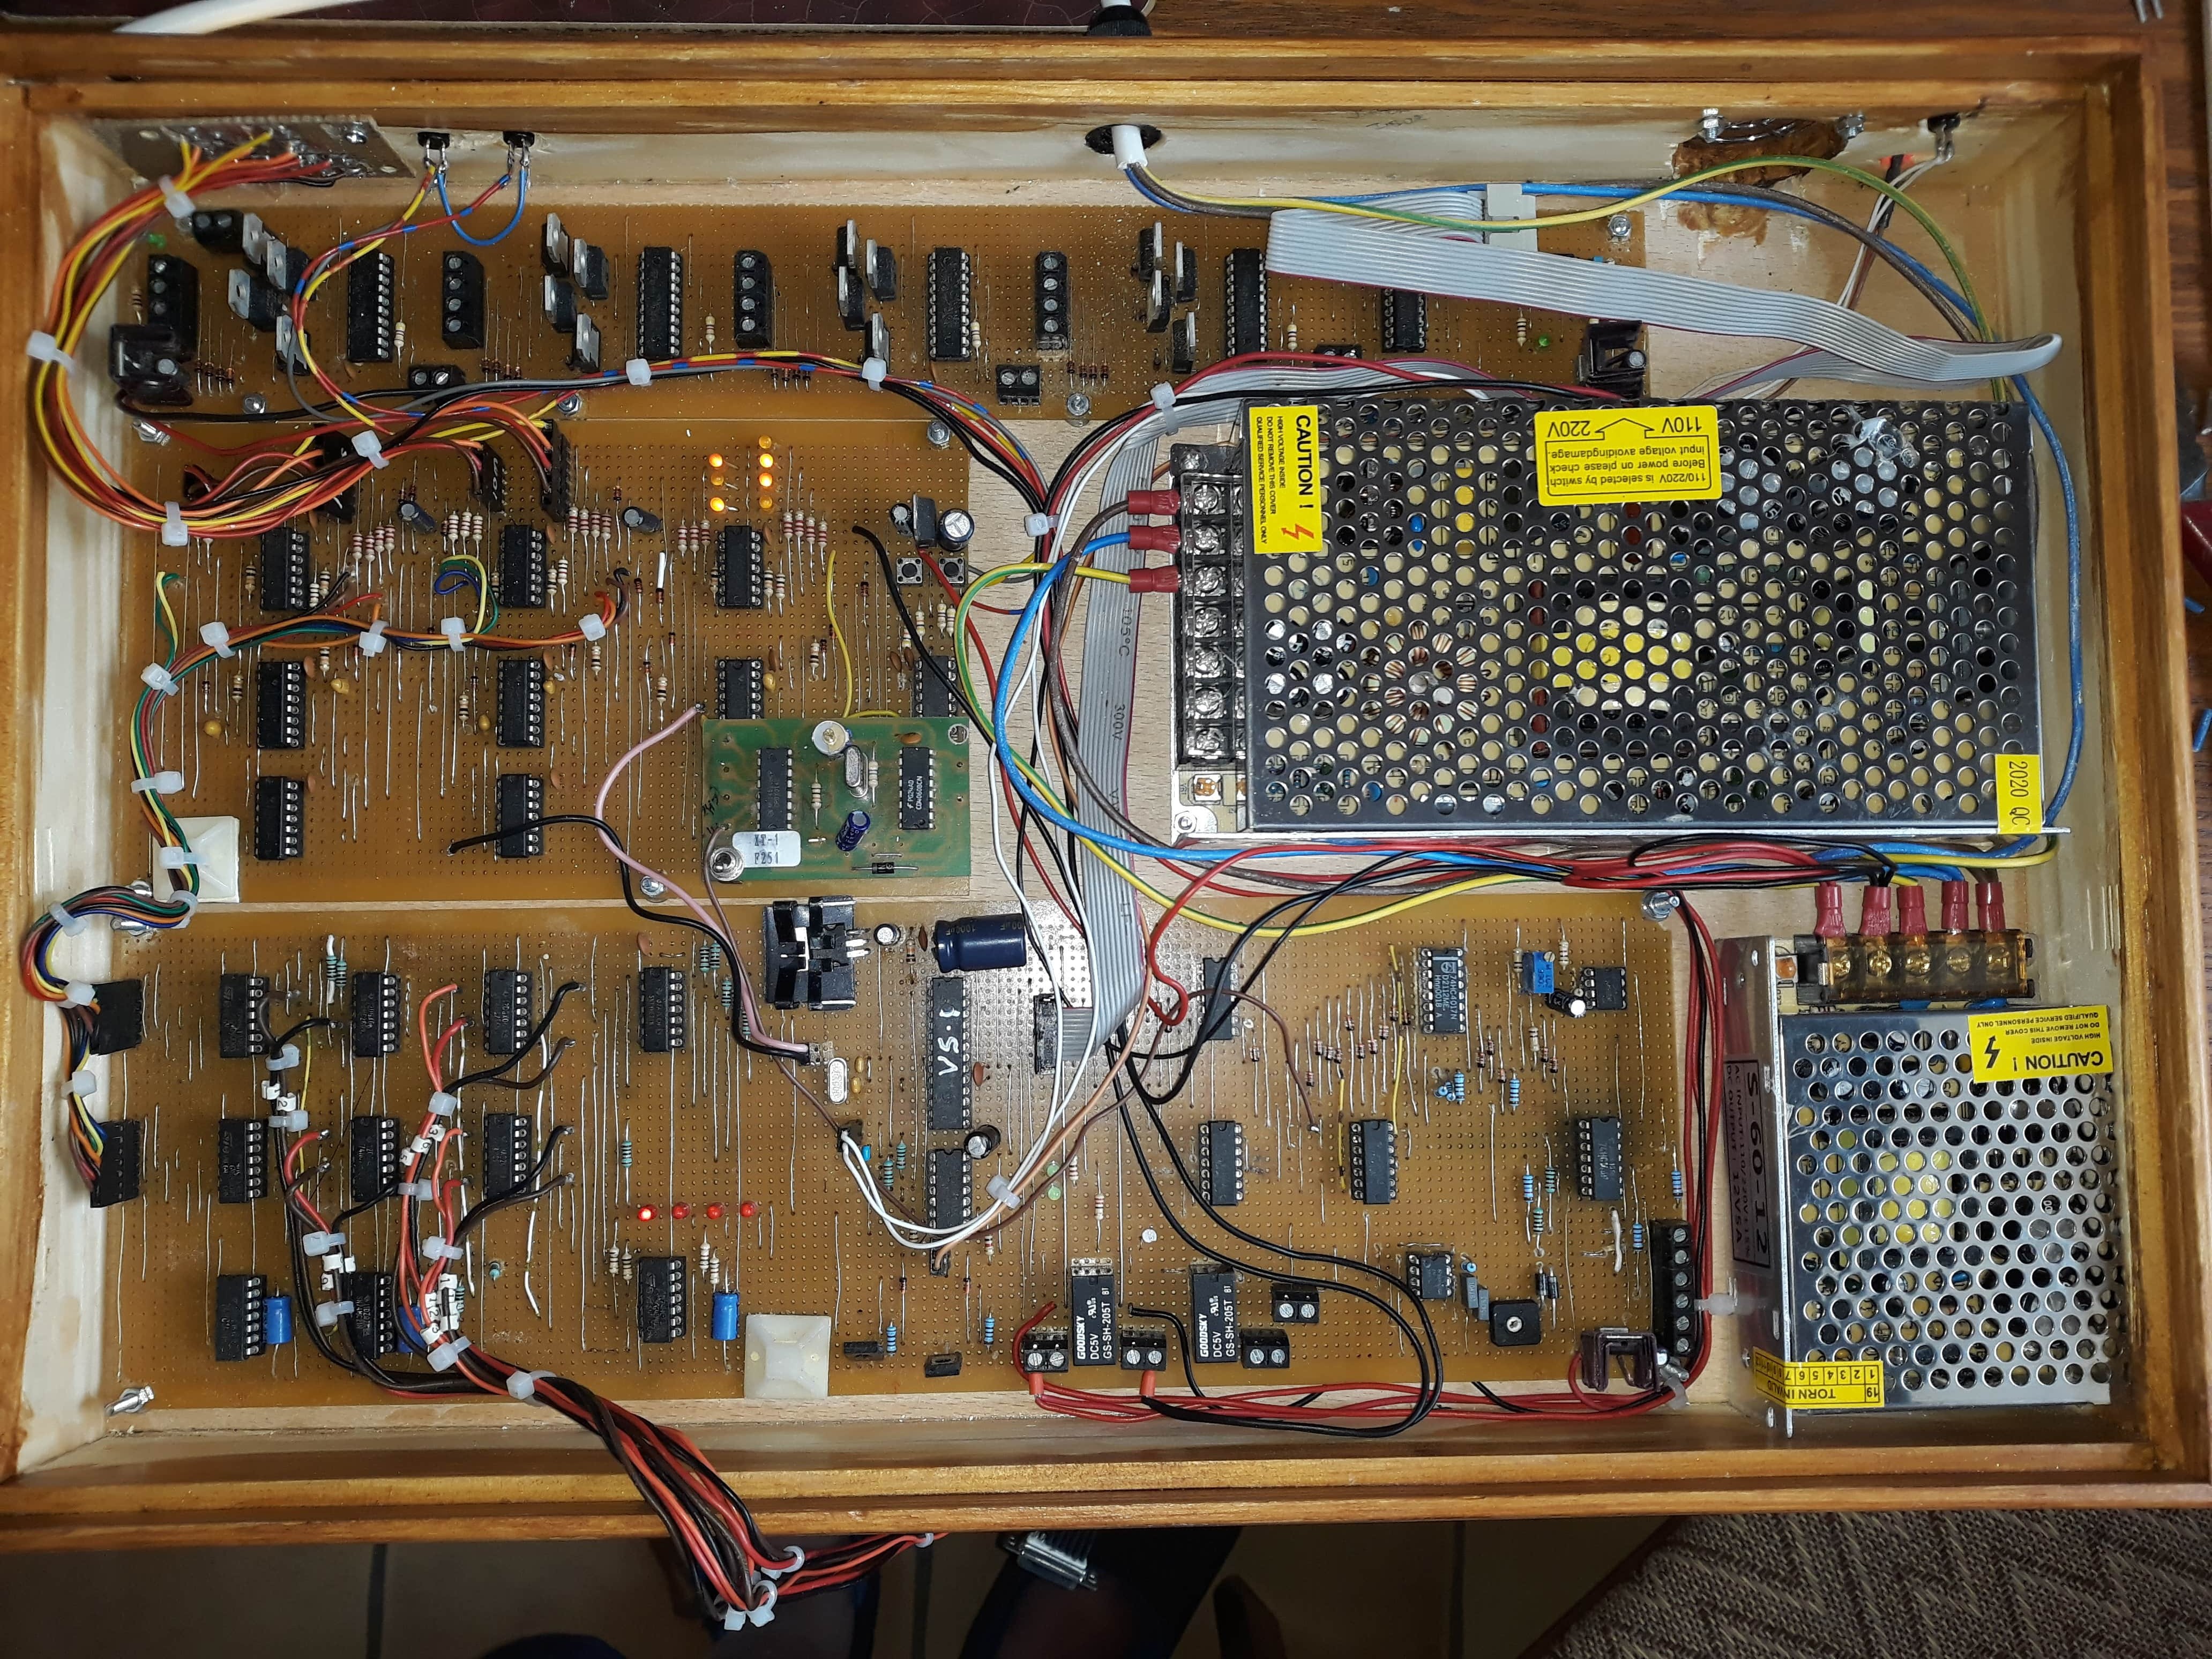
[timebanditclock] grew this fruit machine out of old-school discrete logic beautifully applied to stripboard. Each of the reels has a DIY binary encoder that uses IR transmit/receive pairs to generate a binary word. These four binary words are compared to a binary clock module using comparators.

We think this is an amazing concept already, but then [timebanditclock] worked overtime by doing it all in discrete logic. Spin past the break to see a demo and stick around for the build video.

Want a challenging clock build that’s a little less challenging? Maybe it’s time to try circuit sculpture.

Continue reading “Time Bandit Clock Hits The Aesthetic Jackpot”

A Word Clock You Don’t Have To Actually Build To Enjoy

The great thing about word clocks is that while they all follow the same principle of spelling out the time for you, they come in so many shapes, sizes, and other variations, you have plenty of options to build one yourself. No matter if your craft of choice involves woodworking, laser cutting, PCB design, or nothing physical at all. For [Yasa], it was learning 3D modeling combined with a little trip down memory lane that led him to create a fully functional word clock as a rendered animation in Blender.

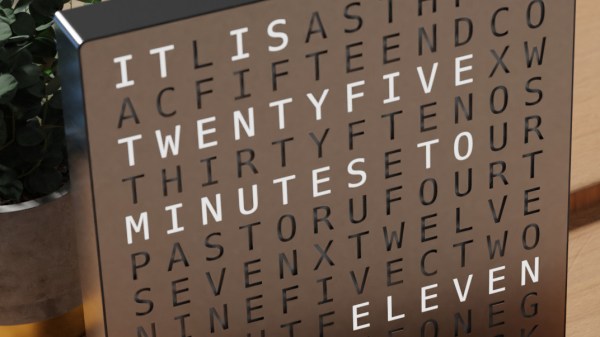
Inspired by the picture of a commercially available word clock, [Yasa] remembered the fun he had back in 2012 when he made a Turkish version for the Pebble watch, and decided to recreate that picture in Blender. But simply copying an image is of course a bit boring, so he turned it into an actual, functioning clock by essentially emulating a matrix of individually addressable LEDs using a custom texture he maps the current time to it. And since the original image had the clock positioned by a window, he figured he should have the sun move along with the time as well, to give it an even more realistic feel.

Of course, having the sun situation in real-time all year round would be a bit difficult to render, so [Yasa] choose to base the scene on the sun during spring equinox in his hometown Stockholm instead. You can see the actual clock showing your local time (or whichever time / time zone you set your device to) on his website, and his write-up is definitely a fun read you should check out if you’re interested in all the details or 3D modeling in general — or just to have a look at a time lapse of the clock itself. As he states, the general concept could be also used to model other word clocks, so who knows, maybe we will see this acrylic version or a PCB version of it in the future.

Measuring The Time Is A Breeze With This Air Flow Clock

If you’ve ever had surgery, and you’re over a certain age, chances are good you’re familiar with the dreaded incentive spirometer. It’s a little plastic device with one or more columns, each of which has a plastic ball in it. The idea is to blow into the thing to float the balls, to ensure that your lungs stay in good shape and reduce the chance of pneumonia. This unique air-powered clock reminds us a little of that device, without all the pain.

Like a spirometer, [Nir Tasher]’s clock has three calibrated tubes, each big enough to hold a foam ball loosely. At the bottom of each tube is a blower whose motor is under PWM control. A laser rangefinder sits below each ball and measures its height; the measurement is used by a PID loop to control the speed of each fan and thus the height of each ball. The video below shows that the balls are actually pretty steady, making the clock easy to read. It doesn’t, however, reveal what the clock sounds like; we’re going to go out on a limb here and guess that it’s pretty noisy. Still, we think it’s a fantastic way to keep time, and unique in the extreme.

[Nir]’s Air Flow clock is an early entry in the 2020 Hackaday Prize, the greatest hardware design contest on Earth. Everyone should enter something, or at least check out the cool things people are coming up with. It’s still early in the process, but there are so many neat projects already. What are you waiting for?

Continue reading “Measuring The Time Is A Breeze With This Air Flow Clock”

Overclocking And Watercooling The TI-84, Just Cause

The TI-84 is an enduring classic – the calculator that took many through high school, college and beyond. A hacker’s favorite, it’s been pushed to the limits in all sorts of ways. The crew at [Linus Tech Tips] decided to join in the fun, overclocking a TI-84 Plus and adding water cooling to boot. 

The TI-84 uses a simple resistor capacitor circuit to generate its clock, making it overclocking it a cinch. By changing the resistor value in the circuit, the clock can be made to run faster. The team have some issues with pads delaminating from the PCB, but manage to sub in a trimpot which lets the clock be changed on the fly. A boost of 10MHz over stock gets the calculator operating at 26MHz, with notably quicker performance in the TI port of Doom 2. Without accurate measurement of CPU temps, it’s hard to say whether watercooling the calculator is justified. However, the team do a great job of entirely overengineering the solution, with a custom-made cooling block hooked up to a massive spherical reservoir.

With the stability issues inherent in overclocking, and the unwieldy watercooling tubes, it’s not a good hack in the practicality sense. It is, however, quite amusing, and that’s always worth something. TI calculators have long been targets for hackers, and you can even get them online if you so desire. Video after the break.

Continue reading “Overclocking And Watercooling The TI-84, Just Cause”

Hackaday Podcast 071: Measuring Micrometers, The Goldilocks Fit, Little Linear Motors, And 8-bit Games On ESP32

Hackaday editors Mike Szczys and Elliot Williams fan through a fantastic week of hacking. Most laser cutters try to go bigger, but there’s a minuscule one that shows off a raft of exotic components you’ll want in your bag of tricks. Speaking of tricks, this CNC scroll saw has kinematics the likes of which we’ve never seen before — worth a look just for the dance of polar v. Cartesian elements. We’ve been abusing printf() for decades, but it’s possible to run arbitrary operations just by calling this Turing-complete function. We wrap the week up with odes to low-cost laptops and precision measuring.

Take a look at the links below if you want to follow along, and as always, tell us what you think about this episode in the comments!

Direct download (60 MB or so.)

Continue reading “Hackaday Podcast 071: Measuring Micrometers, The Goldilocks Fit, Little Linear Motors, And 8-bit Games On ESP32”

Xilinx Makes MIPI CSI And DSI Controller IP Blocks Free To Use With Vivado

If you want to use a display or camera with an FPGA, you will often end up with a MIPI-based solution. As of the Xilinx Vivado 2020.1 release, the MIPI DSI (display serial interface) and CSI (camera serial interface) IP blocks are now bundled with the IDE to be used freely with Xilinx FPGAs.

The Xilinx MIPI CSI2 receiver block implements the CSI-2 v1.1 specification, which although a bit older is essentially the same CSI implementation as on the Raspberry Pi boards. This means that it would allow one to use this IP block on an FPGA with many common CSI camera modules out there. The IP block offers a standard AXI4 interface for connecting up to the rest of a design.

Similarly, the Xilinx MIPI DSI transmitter block implements DSI v1.3 specification. This offers a maximum data rate of 1.5 Gbps, with an AXI4-lite interface to communicate with the rest of the design. Both IP blocks are subject to the Core license agreement, which doesn’t appear to preclude it from being used in a specific fashion, whether commercial or personal.

This is not the only way to use MIPI devices with an FPGA, of course. Take for example [Daveshah]’s CSRIx project on Github.

Header image: Kwapix / CC BY-SA 4.0

Finding Perfect Part Fits With The Goldilocks Approach (and OpenSCAD)

There is something to be said for brute force or trial-and-error approaches to problems, especially when finding a solution has an empirical element to it. [Tommy] perceived that to be the case when needing to design and 3D print servo horns that would fit factory servos as closely as possible, and used OpenSCAD to print a “Goldilocks array” from which it was possible to find a perfect match for his printer by making the trial and error process much more efficient. By printing one part, [Tommy] could test-fit dozens of options.

What made doing this necessary is the fact that every 3D printer has some variance in how accurately they will reproduce small features and dimensions. A 6.3 mm diameter hole in a CAD model, for example, will not come out as exactly 6.3 mm in a 3D-printed object. It will be off by some amount, but usually consistently so. Therefore, one way around this is to empirically determine which measurements result in a perfect fit, and use those for production on that specific 3D printer.

That’s exactly what [Tommy] did, using OpenSCAD to generate an array of slightly different sizes and shapes. The array gets printed out, servos are test-fitted to them, and whichever option fits best has its dimensions used for production. This concept can be implemented in any number of ways, and OpenSCAD makes a decent option due to its programmatic nature. Interested in OpenSCAD? It will run on nearly any hardware, and you can get up and running with the basics in probably less than ten minutes.