Why LLaMa Is A Big Deal

You might have heard about LLaMa or maybe you haven’t. Either way, what’s the big deal? It’s just some AI thing. In a nutshell, LLaMa is important because it allows you to run large language models (LLM) like GPT-3 on commodity hardware. In many ways, this is a bit like Stable Diffusion, which similarly allowed normal folks to run image generation models on their own hardware with access to the underlying source code. We’ve discussed why Stable Diffusion matters and even talked about how it works.

LLaMa is a transformer language model from Facebook/Meta research, which is a collection of large models from 7 billion to 65 billion parameters trained on publicly available datasets. Their research paper showed that the 13B version outperformed GPT-3 in most benchmarks and LLama-65B is right up there with the best of them. LLaMa was unique as inference could be run on a single GPU due to some optimizations made to the transformer itself and the model being about 10x smaller. While Meta recommended that users have at least 10 GB of VRAM to run inference on the larger models, that’s a huge step from the 80 GB A100 cards that often run these models.

While this was an important step forward for the research community, it became a huge one for the hacker community when [Georgi Gerganov] rolled in. He released llama.cpp on GitHub, which runs the inference of a LLaMa model with 4-bit quantization. His code was focused on running LLaMa-7B on your Macbook, but we’ve seen versions running on smartphones and Raspberry Pis. There’s even a version written in Rust! A rough rule of thumb is anything with more than 4 GB of RAM can run LLaMa. Model weights are available through Meta with some rather strict terms, but they’ve been leaked online and can be found even in a pull request on the GitHub repo itself. Continue reading “Why LLaMa Is A Big Deal”

Info Sought On A Forgotten Cuban Radio

Some of the daily normalities of life in the Cold War seem a little surreal from our perspective in 2023, when nuclear bombers no longer come in to land just down the road and you can head off to Poland or Czechia on a whim. Radio amateurs were one of the few groups of civilians whose activities crossed the geopolitical divide, and even though an operator on the other side from ours couldn’t buy a shiny Japanese radio, their homebrew skills matched anything we could do with our Western soldering irons.

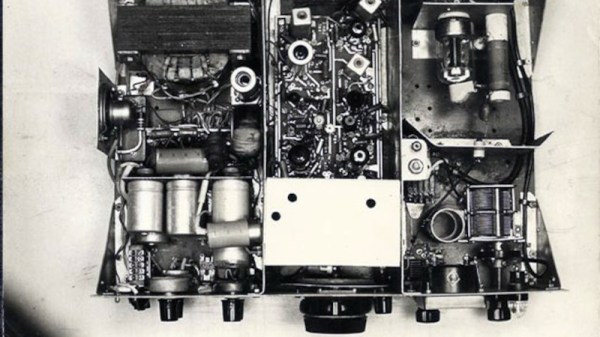
[Bill Meara N2CQR] is particularly interested in one line of Cold War-era Communist homebrew radios, the tube-based Cuban “Islander” and its solid-state “Jaguey” sibling. It’s a homebrew double-sideband transceiver design built using readily-available Soviet TV parts, and though he’s published what he can find, he’s on the lookout for more info about these interesting rigs.

The mechanics of a DSB transceiver are simple enough, in that an oscillator and balanced mixer can serve as both modulator and as direct conversion receiver. The fuzzy black and white photographs give frustratingly little detail, but we’re impressed by the quality of what we can see. We have readers all over the world (including we hope, some in Cuba), so perhaps if you know something about these radios you can give Joe a hand. It’s a design that deserves to be appreciated.

For more epic Cold War hackery on the Communist side, read our colleague [Voja Antonic]’s story of his personal computer odyssey.

Building The World’s Largest Nintendo 3DS

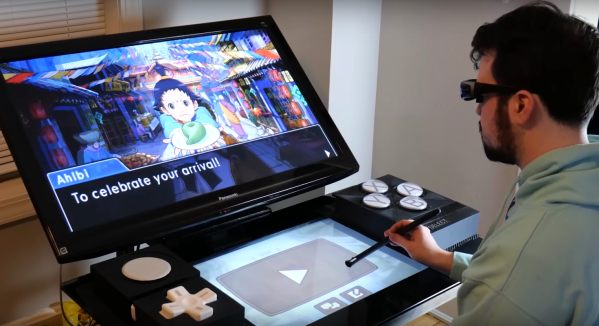
While the Nintendo 3DS was capable of fairly impressive graphics (at least for a portable system) back in its heyday, there’s little challenge in emulating the now discontinued handheld on a modern computer or even smartphone. One thing that’s still difficult to replicate though is the stereoscopic 3D display the system was named for. But this didn’t stop [BigRig Creates] from creating this giant 3DS with almost all of the features of an original console present.

The main hurdle here is that the stereoscopic effect that Nintendo used to allow the 3DS to display 3D graphics without special glasses doesn’t work well at long distances, and doesn’t work at all if there is more than one player. To get around those limitations, this build uses a 3D TV with active glasses. This TV is mounted to a bar stool with the help of some counterweights, and a second touch-sensitive screen courtesy of McDonalds makes up the other display.

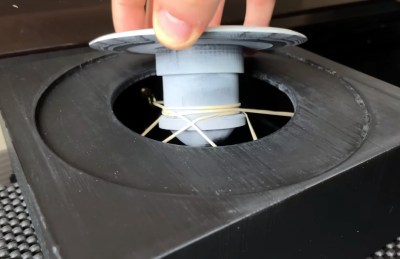
The computer driving this massive handheld console runs Citra, and also handles the scaled-up controls as well. To recreate the system’s analog touch pad, a custom joystick tipped with conductive filament is used to interact with a smartphone hidden inside the case. Opposing rubber bands are used to pull the stick back into the center when it’s not being pushed.

Plenty of 3DS games are faithfully replicated with this arcade-sized replica, and as Citra supports various 3D displays, upscaling of the graphics, and the touchscreen interface, almost everything from the original console is produced here. There are a few games that don’t work exactly right, but all in all it’s a remarkable build and, as far as we can tell, the largest 3DS in the world. Don’t forget that even though this console is out of production now, there’s still a healthy homebrew scene to take part in.

Continue reading “Building The World’s Largest Nintendo 3DS”

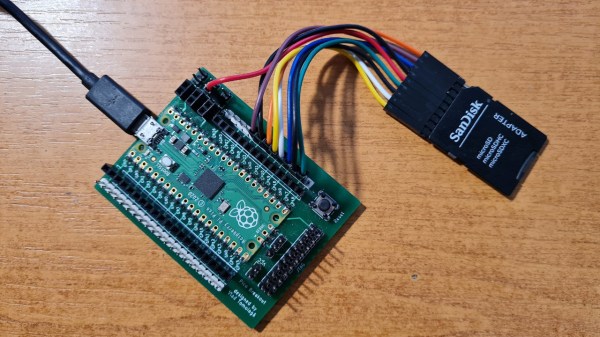
A Pi Pico soldered onto a custom breakout PCB, with an SD card connected to it using prototyping wires

RP2040 Runs Linux Through RISC-V Emulation

We’re used to running Linux on CPUs where it belongs, and the consensus is that RP2040 just isn’t up for the task – no memory controller, and nowhere near enough RAM, to boot. At least, that’s what you might believe until you see [tvlad1234]’s Linux-on-RP2040 project, reminding us there’s more than one way to boot Linux on a CPU like this! Just like with the “Linux on AVR” project in 2012 that emulated an ARM processor, the pico-rv32ima project emulates a RISC-V core – keeping up with the times.

Initially, the aforementioned “Linux on AVR through ARM” project was picked as a base – then, a newer development, [cnlohr]’s RISC-V emulator, presented itself and was too good to pass up on. Lack of RAM was fully negated by adding an SD card into the equation – coupled with a small caching layer, this is a crucial part for the project’s not-so-secret sauce. A fair amount of debugging and optimization later, [tvlad1234] got Linux to run, achieving boot times in 10-15 minutes’ ballpark – considering the emulation layer’s presence, this is no mean feat.

At this point, the boot process stalls as you enter a login shell. If Linux on RP2040 is within your area of interest, feel free to pick up the effort from here, as the project is fully open-source – you only need a Pi Pico board and a throwaway SD card! Now, if pairing a RP2040 with some classic software is your definition of an evening well-spent, you can’t go wrong with DOOM! However, if you’d rather play with something else *nix-like, we’ve seen someone port Fuzix onto the RP2040 before.

A Look At Zweikanalton Stereo Audio And Comparison With NICAM

With how we take stereo sound for granted, there was a very long period where broadcast audio and television with accompanying audio track were in mono. Over the decades, multiple standards were developed that provide a way to transmit and receive two mono tracks, as a proper stereo transmission. In a recent video, [Matt] over at [Matt’s Tech Barn] takes a look at the German Zweikanalton (also known as A2 Stereo) standard, and compares it with the NICAM standard that was used elsewhere in the world.

Zweikanalton is quite simple compared to NICAM (which we covered previously), being purely analog with a second channel transmitted alongside the first. Since it didn’t really make much of a splash outside of the German-speaking countries, equipment for it is more limited. In this video [Matt] looks at the Philips PM 5588 and Rohde & Schwarz 392, analyzing the different modulations for FM, Zweikanalton and NICAM transmissions and the basic operation of the modulator and demodulator equipment.

An interesting aspect of these modulations are the visible sidebands, and the detection of which modulation is used. Ultimately NICAM’s only disadvantage compared to Zweikanalton was the higher cost of the hardware, but with increased technological development single-chip NICAM solutions like the Philips SAA7283 (1995) began to reduce total system cost and by the early 2000s NICAM was a standard feature of TV chipsets, just in time for analog broadcast television to essentially become irrelevant.

Continue reading “A Look At Zweikanalton Stereo Audio And Comparison With NICAM”

Creating GIFs For The Channels Between Channels

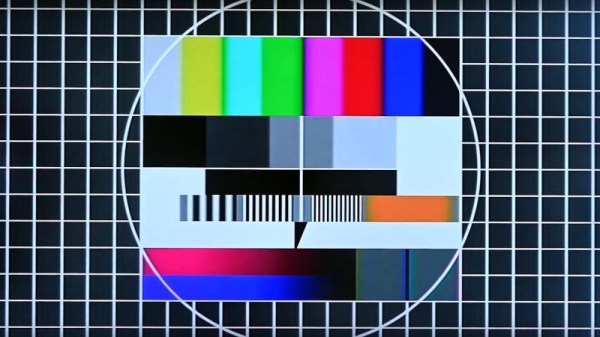
In the United States, analog TV broadcasting officially ended in 2009. While the transition wasn’t without hiccups, we did lose something along the way. For [Emily Velasco], she misses the channels between channels — where an analog TV isn’t quite tuned right and the image is smeared and distorted. A recent bug in one of her projects led to her trying to recreate the experience of the in-between on a CRT.

One of [Emily]’s other projects involved generating composite video signals from an ESP32 microcontroller. While experimenting with adding color to the output signal, the image came out incredibly scrambled. She had made an error in the stride, which smeared the image across the screen. This immediately brought back memories of old analog TV sets. A quick potentiometer allowed her to control the stride error and she wrote some code to break the GIF up into discrete bitmaps for display since the GFX library handles GIFs differently than static images. Next up was vertical hold, which was accomplished by shifting the Y coordinates. With some help from [Roger], there was now a handy GIF library that would draw GIFs line by line with the composite video effects.

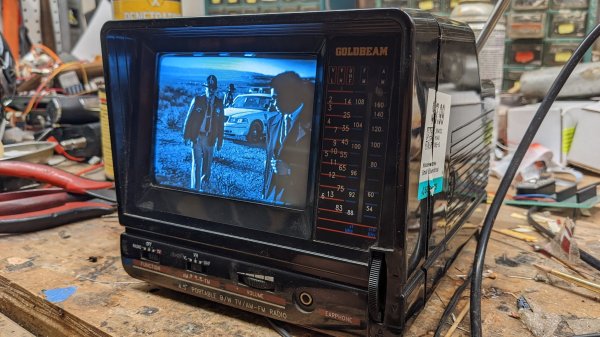
She used a Goldbeam portable CRT, soldered the tuning potentiometer to the ESP32, and set up 10 different GIFs to act as “channels” with space in between. It’s a fun and quirky idea, which is exactly the sort of thing [Emily] has been encouraging people to do.

Continue reading “Creating GIFs For The Channels Between Channels”

E-Paper Wall Paper

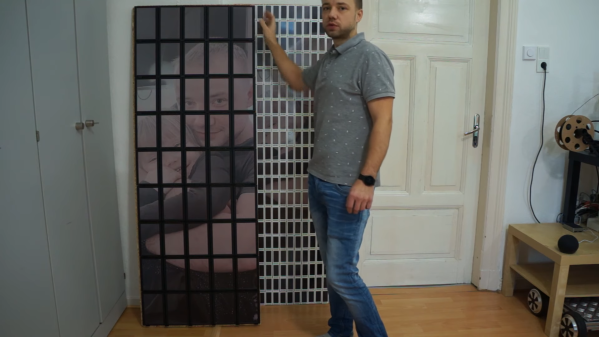
Just like the clock clock of old, there’s something magical about a giant wall of smaller pieces working together to make a larger version of that thing. The E-Paper Wall 2.0 by [Aaron Christophel] is no exception as it has now upgraded from 2.9″ to 7.4″ screens.

On the 1.0 version, the bezels made it harder to make out the image. The larger screens still have bezels but the larger screen area makes it much easier to make out the image. 3D-printed clips hold the displays onto a plywood backer. We can marvel that e-ink price tags brought the price of e-ink down so that building a wall is still expensive but not eye-wateringly so. The 5×9 array likely uses a module sold on DigiKey for $47 each.

So aside from being willing to drop some money on a custom piece of art, what’s special about this? The real magic comes with the firmware and tooling that [Aaron] developed to flash custom firmware onto each of the 45 displays. A 100MHz ZBS243/SEM9110 8051-based controller lives inside each display and [Aaron] even has a Ghidra plugin to reverse-engineer the existing firmware. It only has 64kb of flash onboard, so [Aaron] devised a clever compression technique that enabled him to store complex images on the displays. A 3D-printed jig with pogo pins means flashing them doesn’t require soldering pins or headers, just drop it on and flash it with an Arduino with a helpful library [Aaron] wrote. A central station communicates with the various displays over ZigBee to send image updates.

The 8051 has a funny way of showing up in projects like this portable soldering iron or the TV Guardian. In many ways, it is a boon for us hackers as it makes it easier to reverse engineer and write new custom firmware when so many devices use the same architecture.

Continue reading “E-Paper Wall Paper”