We all know how a conventional internal combustion engine works, with a piston and a crankshaft. But that’s by no means the only way to make an engine, and one of the slightly more unusual alternatives comes to us courtesy of a vintage Shell Film Unit film, The Free Piston Engine, which we’ve placed below the break. It’s a beautiful period piece of mid-century animation and jazz, but it’s also an introduction to these fascinating machines.
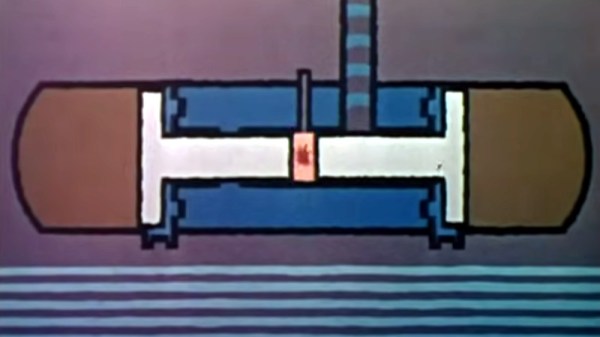
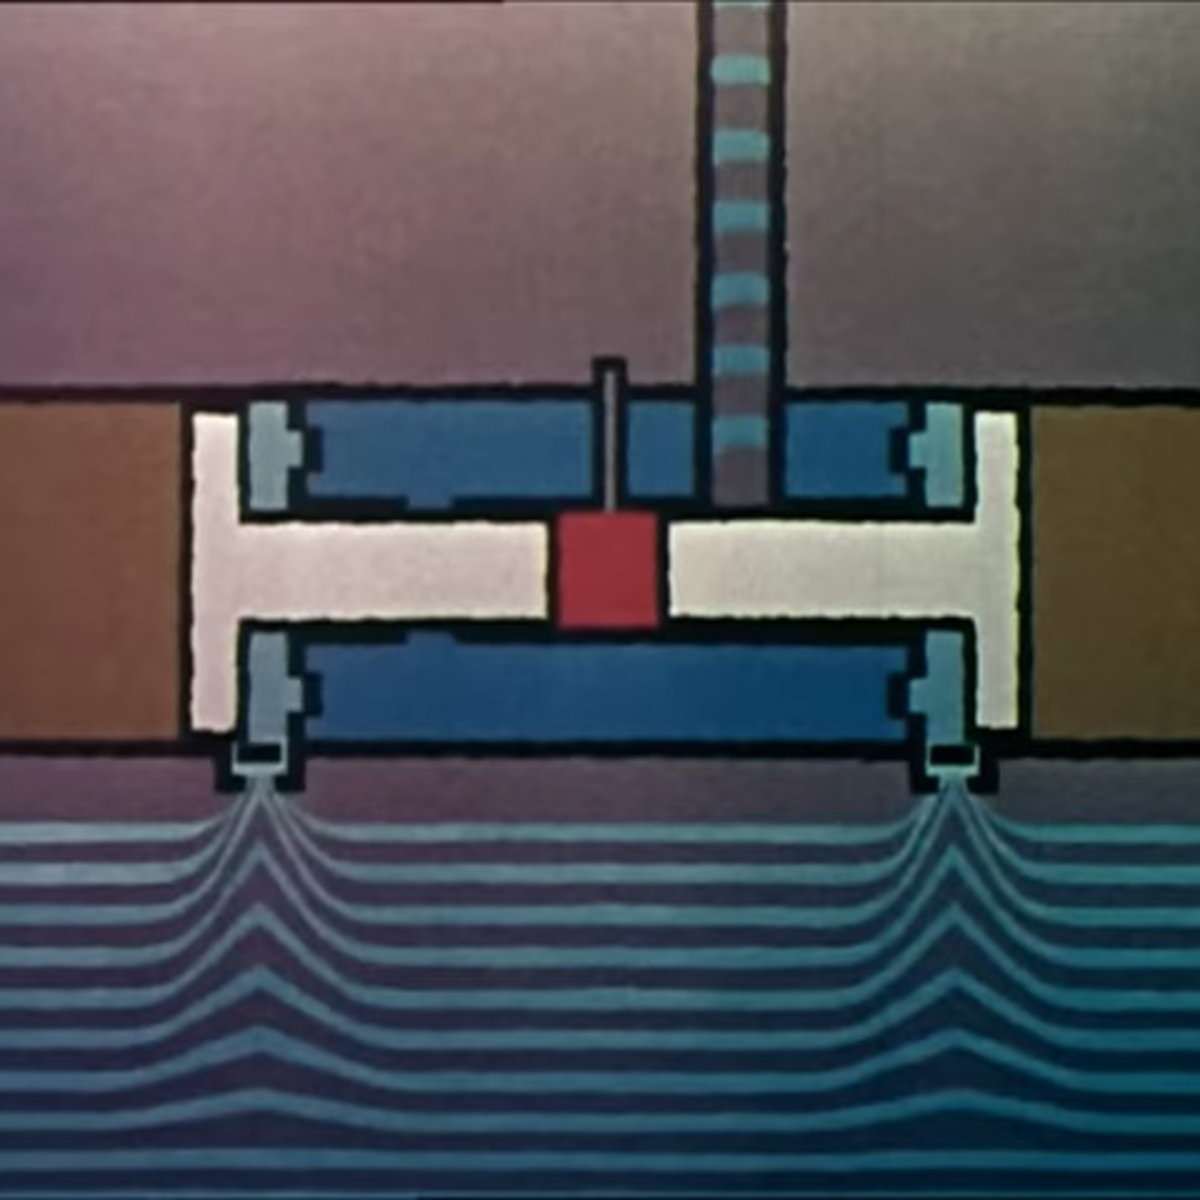
We’re introduced to the traditional two-stroke diesel engine as thermally efficient but not smooth-running, and then the gas turbine as smooth but much more inefficient. The free piston engine, a design with opposed pistons working against compressed air springs and combining both compression and firing strokes in a single axis, doesn’t turn anything in itself, but instead works as a continuous supplier of high pressure combustion gasses. The clever part of this arrangement is that these gasses can then turn the power turbine from a gas turbine engine, achieving a smooth engine without compromising efficiency.
 This sounds like a promising design for an engine, and we’re introduced to a rosy picture of railway locomotives, ships, factories, and power stations all driven by free piston engines. Why then, here in 2024 do we not see them everywhere? A quick Google search reveals an inordinately high number of scientific review papers about them but not so many real-world examples. In that they’re not alone, for alternative engine designs are one of those technologies for which if we had a dollar for every one we’d seen that didn’t make it, as the saying goes, we’d be rich.
It seems that the problem with these engines is that they don’t offer the control over their timing that we’re used to from more conventional designs, and thus the speed of their operation also can’t be controlled. The British firm Libertine claim to have solved this with their line of linear electrical generators, but perhaps understandably for commercial reasons they are a little coy about the details. Their focus is on free piston engines as power sources for hybrid electric vehicles, something which due to their small size they seem ideally suited for.
Perhaps the free piston engine has faced its biggest problem not in the matter of technology but in inertia. There’s an old saying in the computer industry: “Nobody ever got fired for buying IBM“, meaning that the conventional conservative choice always wins, and it’s fair to guess that the same applies anywhere a large engine has been needed. A conventional diesel engine may be a complex device with many moving parts, but it’s a well-understood machine that whoever wields the cheque book feels comfortable with. That’s a huge obstacle for any new technology to climb. Meanwhile though it offers obvious benefits in terms of efficiency, at the moment its time could have come due to environmental concerns, any internal combustion engine has fallen out of fashion. It’s possible that it could find a life as an engine running on an alternative fuel such as hydrogen or ammonia, but we’re not so sure. If new free piston engines do take off though, we’ll be more pleased than anyone to eat our words.
Continue reading “Retrotechtacular: The Free Piston Engine” →


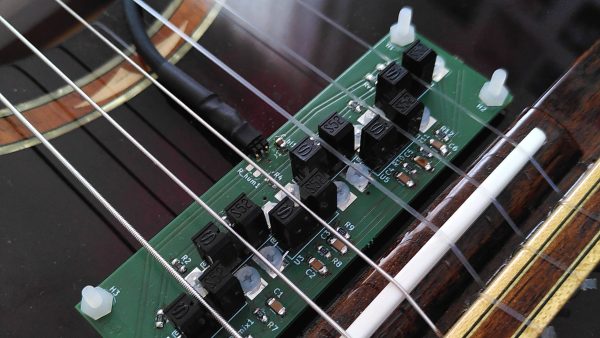
 The concept is simple. You place an LED and a phototransistor in a U-shaped channel, and place it so that the string runs through it. You repeat this for each string. Thus, as a string vibrates, it interrupts the light travelling from the LED to the phototransistor. This generates a voltage that varies with the frequency of the string’s vibration. Funnily enough, this type of pickup will work just fine on both nylon and steel strings, if you were so inclined to try it.