Every now and then we’ll see a 3D printer that can print an entire house out of concrete or print an entire rocket out of metal. But usually, for our budget-friendly hobbyist needs, most of our 3D printers will be printing small plastic parts. If you have patience and a little bit of salt water, though, take a look at this 3D printer which has been modified to cut parts out of any type of metal, built by [Morlock] who has turned a printer into a 5-axis CNC machine.
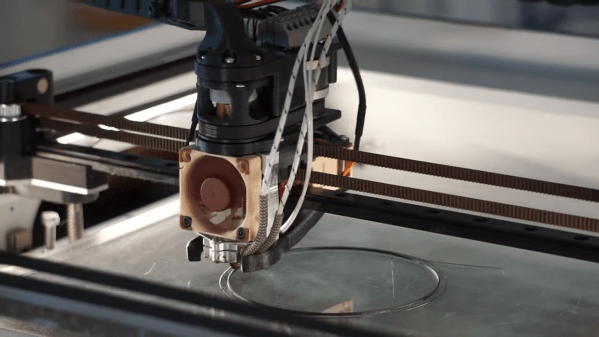
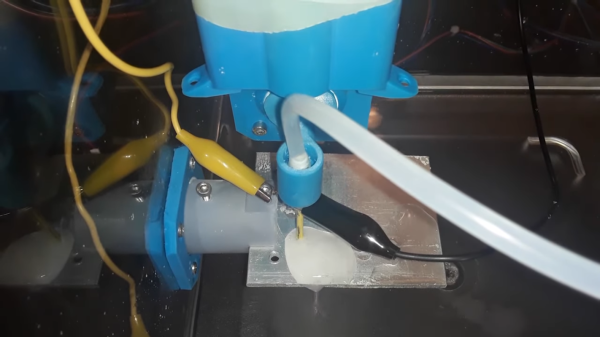
Of course, this modification isn’t 3D printing metal. It convers a 3D printer’s CNC capabilities to turn it into a machining tool that uses electrochemical machining (ECM). This process removes metal from a work piece by passing an electrode over the metal in the presence of salt water to corrode the metal away rapidly. This is a remarkably precise way to cut metal without needing expensive or heavy machining tools which uses parts that can easily be 3D printed or are otherwise easy to obtain. By using the 3D printer axes and modifying the print bed to be saltwater-resistant, metal parts of up to 3 mm can be cut, regardless of the type of metal used. [Morlock] also added two extra axes to the cutting tool, allowing it to make cuts in the metal at odd angles.
Using a 3D printer to perform CNC machining like this is an excellent way to get the performance of a machine tool without needing to incur the expense of one. Of course, it takes some significant modification of a 3D printer but it doesn’t need the strength and ridigity that you would otherwise need for a standard CNC machine in order to get parts out of it with acceptable tolerances. If you’re interested in bootstraping one like that using more traditional means, though, we recently featured a CNC machine that can be made from common materials and put together for a minimum of cost.