A Dual-purpose Arduino Servo Tester

RC flying is one of those multi-disciplinary hobbies that really lets you expand your skill set. You don’t really need to know much to get started, but to get good you need to be part aeronautical engineer, part test pilot and part mechanic. But if you’re going to really go far you’ll also need to get good at electronics, which was part of the reason behind this Arduino servo tester.

[Peter Pokojny] decided to take the plunge into electronics to help him with the hobby, and he dove into the deep end. He built a servo tester and demonstrator based on an Arduino, and went the extra mile to give it a good UI and a bunch of functionality. The test program can cycle the servo under test through its full range of motion using any of a number of profiles — triangle, sine or square. The speed of the test cycle is selectable, and there’s even a mode to command the servo to a particular position manually. We’ll bet the build was quite a lesson for [Peter], and he ended up with a useful tool to boot.

Need to go even further back to basics than [Peter]? Then check out this primer on servos and this in-depth guide.

Continue reading “A Dual-purpose Arduino Servo Tester”

A Buck-Boost Converter From The Ground Up

DC to DC conversion has come a long way. What was once took an electromechanical vibrator and transformer has been reduced to a PC board the size of a largish postage stamp that can be had for a couple of bucks on eBay. So why roll your own buck-boost converter for the ground up? Maybe because sometimes the best way to learn is by doing.

Continue reading “A Buck-Boost Converter From The Ground Up”

DIY Talkie Toaster from Red Dwarf

Red Dwarf’s Talkie Toaster Tests Tolerance

In the Red Dwarf TV series, Talkie Toaster wants to know if you want toast, and if not toast, then maybe a muffin or waffle, and it will pester you incessantly until you smash it with a 14lb lump hammer and throw it in a waste disposal. Now [slider2732] has actually gone and made one of the infernal machines!

He’s hidden a PIR sensor in the toaster handle to tell an Arduino Pro Mini when someone is unfortunate enough to be passing by. The Arduino then reads sound files from an SD card reader and plays them through a 3 watt amplifier out to a speaker. For that he uses the TMRpcm library available on github.

[slider2732] cleverly mounted the speaker to the side of the toaster along with some appropriately shaped bits and pieces, and some LEDs to make it appear and work much like the circular panel that lights up on the real Talkie Toaster. We dare you to watch the video after the break, unless you really are looking for toast. As a consolation, the video also walks through making it.

Continue reading “Red Dwarf’s Talkie Toaster Tests Tolerance”

EMG Tutorial Lets You Listen To Your Muscles

What with wearable tech, haptic feedback, implantable devices, and prosthetic limbs, the boundary between man and machine is getting harder and harder to discern. If you’re going to hack in this space, you’re going to need to know a little about electromyography, or the technique of sensing the electrical signals which make muscles fire. This handy tutorial on using an Arduino to capture EMG signals might be just the thing.

In an article written mainly as a tutorial to other physiatrists, [Dr. George Marzloff] covers some ground that will seem very basic to the seasoned hacker, but there are still valuable tidbits there. His tutorial build centers around a MyoWare Muscle Sensor and an Arduino Uno. The muscle sensor has snap connectors for three foam electrodes of the type used for electrocardiography, and outputs a rectified and integrated waveform that represents the envelope of the electrical signal traveling to a muscle. [Dr. Marzloff]’s simple sketch just reads the analog output of the sensor and lights an LED if it detects a muscle contraction, but the sky’s the limit once you have the basic EMG interface. Prosthetic limbs, wearable devices, diagnostic tools, virtual reality — the possibilities are endless.

We’ve seen a few EMG interfaces before, mainly of the homebrew type like this audio recorder recruited for EMG measurements. And be sure to check out [Bil Herd]’s in-depth discussion of digging EMG signals out of the noise.

3D Printed Moon Phase Clock

Someone once observed that the moon is a harsh mistress. But that doesn’t mean you can’t keep track of her, specially with this awesome moon phase clock that [G4lile0] designed and built.

It uses a 3D printed moon model combined with a series of LEDs to create the phases. These LEDs are driven by an Arduino that calculates the phase to show, as well as driving a small OLED display that shows the date and time. There is even a party mode for all of those lunar raves that you host.

[G4lile0] has done an excellent job of documenting the code that drives the lamp, so it would be easy to add features, or adapt this design to show the phases of another moon or add other features. It’s an excellent overall design, and kudos to [G4lile0] for doing it all with open source tools like FreeCAD.

Continue reading “3D Printed Moon Phase Clock”

Only One Button? No Problem!

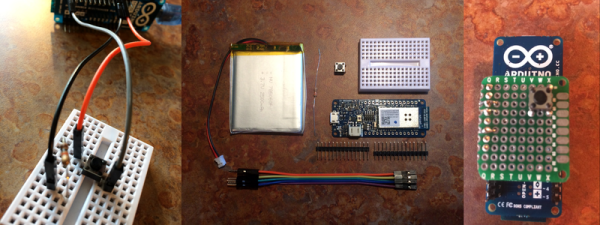
Sometimes less is more. This is especially true when dealing with microcontrollers with limited I/O pins. Even if you have lots of I/O, sometimes you are need to pack a lot into a little space. [Hugatry] was inspired by the simple interface found on a lot of flashlights: one button. Push it and it turns on. Push it again, and it switches modes. You cycle through the modes until you finally turn it back off. One button provides mutliple functions. The question is how can you use a power switch as an I/O device? After all, when you turn the power off, the microprocessor stops operating, right?

[Hugatry’s] answer is quite simple. He connects a resistor/capacitor network to an I/O pin (or multiple pins). When the processor turns on initially, the pin will read low and the capacitor will charge up. If you turn the power off, the CPU voltage will fall rapidly to zero, but the voltage on the capacitor will discharge slower. If you wait long enough and turn the power on, there’s no difference from that first power on event. But if you turn the power on quickly, the capacitor voltage will still be high enough to read as a logic one.

What that means is that the processor as part of its start up can detect that it was recently turned off and take some action. If it remembers the previous state in nonvolatile memory, you can have the code cycle through multiple states, just like a flashlight. You can see a video of the setup, below.

Continue reading “Only One Button? No Problem!”

A Laser Effect Projector Built With Safety In Mind

There’s just something about wielding a laser pointer on a dark, foggy night. Watching the beam cut through the mist is fun – makes you feel a little Jedi-esque. If you can’t get enough of lasers and mist, you might want to check out this DIY “laser sky” effect projector.

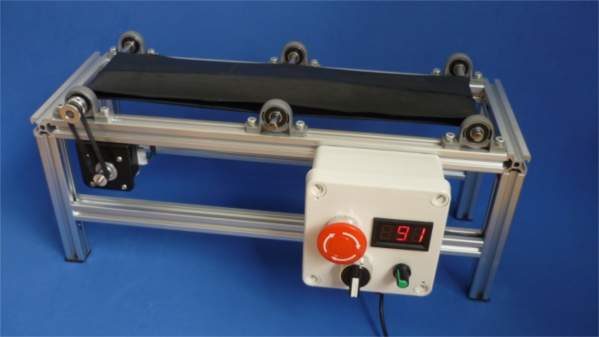
The laser sky effect will probably remind you of other sci-fi movies – think of the “egg scene” from Alien. The effect is achieved by sweeping a laser beam in a plane through swirling smoke or mist. The laser highlights a cross section of the otherwise hidden air currents and makes for some trippy displays. The working principle of [Chris Guichet]’s projector is simplicity itself – an octagonal mirror spun by an old brushless fan motor and a laser pointer. But after a quick proof of concept build, he added the extras that took this from prototype to product. The little laser pointer was replaced with a 200mW laser module, the hexagonal mirror mount and case were 3D printed, and the mirrors were painstakingly aligned so the laser sweeps out a plane. An Arduino was added to control the motor and provide safety interlocks to make sure the laser fires only when the mirror is up to speed. The effect of the deep ruby red laser cutting through smoke is mesmerizing.

If laser sky is a little too one-dimensional for you, expand into two dimensions with this vector laser projector, and if monochrome isn’t your thing try an RGB vector projector.

Continue reading “A Laser Effect Projector Built With Safety In Mind”