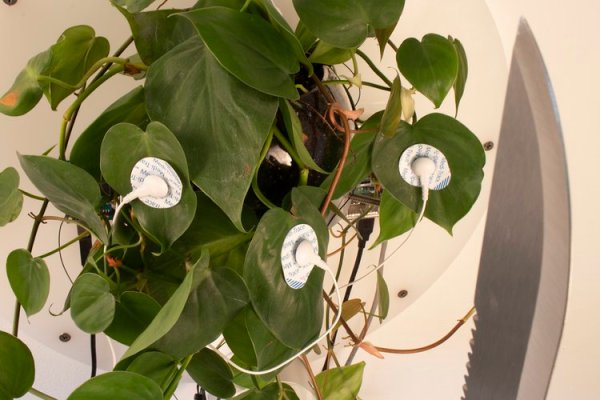
In a straight fight between a houseplant and a human, you might expect the plant to be at a significant disadvantage. So [David Bowen] has decided to even the odds a little by arming this philodendron with a robot arm and a machete.
The build is a little short on details but, from the video, it appears that adhesive electrodes have been attached to the leaves of the recently-empowered plant and connected directly to analog inputs of an Arduino Uno. From there, the text tells us that the signals are mapped to movements of the industrial robot arm that holds the blade.
It’s not clear if the choice of plant is significant, but an unarmed philodendron appears to be otherwise largely innocuous, unless you happen to be a hungry rodent. We hope that there is also a means of disconnecting the power remotely, else this art installation could defend itself indefinitely! (or until it gets thirsty, at least.) We at Hackaday welcome our new leafy overlords.
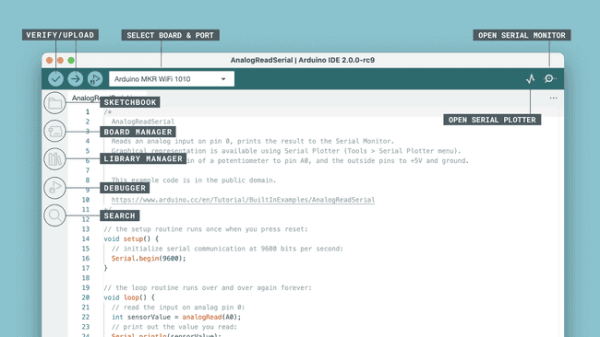
Arduino have released the latest version of their Integrated Development Environment (IDE), Version 2.0 and it is a big step up from the previous release, boasting plenty of new features to help you to develop your code more easily.
As the de-facto way for beginners to get into programming hardware, more experienced users have sometimes complained about what they see as the over-simplistic IDE — even lacking relatively basic features such as autocomplete. The new version provides this, and much more besides. Continue reading “Arduino IDE 2.0 Is Here”→
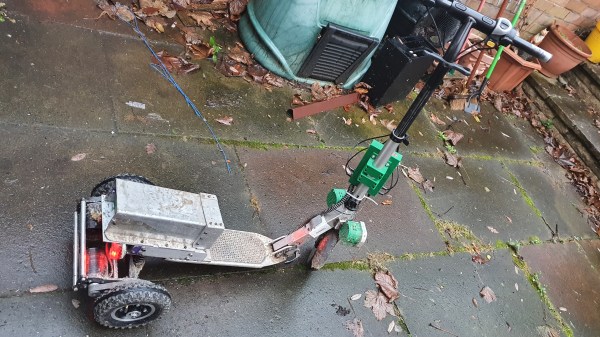
The story of how [Tony]’s three-wheeled electric scooter came to be has a beginning that may sound familiar. One day, he was browsing overseas resellers and came across a new part, followed immediately by a visit from the Good Ideas Fairy. That’s what led him to upgrade his DIY electric scooter to three wheels last year, giving it a nice speed boost in the process!
The part [Tony] ran across was a dual brushless drive unit for motorizing a mountain board. Mountain boards are a type of off-road skateboard, and this unit provided two powered wheels in a single handy package. [Tony] ended up removing the rear wheel from his electric scooter and replacing it with the powered mountain board assembly.
He also made his own Arduino-based interface to the controller that provides separate throttle and braking inputs, because the traditional twist-throttle of a scooter wasn’t really keeping up with what the new (and more powerful) scooter could do. After wiring everything up with a battery, the three-wheeled electric scooter was born. It’s even got headlights!
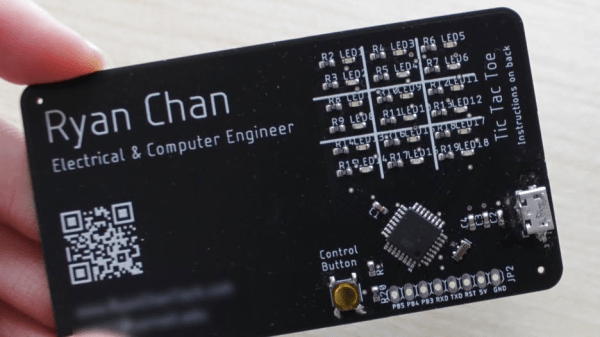
[Ryan] decided that an OLED display was too expensive for something to hand out and an LED matrix too thick, so he decided to keep it simple and use an array of 18 LEDs—9 in each of two colors laid out in a familiar 3×3 grid. An ATmega328p running the Arduino bootloader serves as the brains of the operation. To achieve a truly minimal design [Ryan] uses a single SMD pushbutton for control: a short press moves your selection, a longer press finalizes your move, and a several-second press switches the game to a single-player mode, complete with AI.
If you’d like to design a Tic-Tac-Toe business card for yourself, [Ryan] was kind enough to upload the schematics and code for his card. If you’re still pondering what kind of PCB business card best represents you, it’s worth checking out cards with an updatable ePaper display or a tiny Tetris game.
When [Stephen Cass] found himself with a broken Tandy TRS-80 Model 100 portable computer, the simplest solution was to buy another broken one and make one working computer from two non-working computers. However, this left him with a dilemma — what to do with the (now even more) broken one left over?
LCD layout is unusual by modern standard, but optimized for fast updates
Luckily, the Model 100 has a substantial fanbase and there’s a lot of helpful information available online, including the detailed service manual, that helped [Stephen] to understand how to drive the unusual display. The LCD has a resolution of 240×64 pixels, which are broken down into eight zones of 50×32 pixels, and two zones of 40×42 pixels. Each zone is then further divided into four banks, eight pixels tall, so that each column of eight pixels corresponds to a single byte.
Every one of the ten zones is controlled by an individual HD44102 driver IC, connected to a 30-bit wide bus for selecting the correct chip, bank and column.
With the Arduino handling the data, the old LCD still needed a -5 V supply for contrast and an RC filter to smooth out the PWM signal [Stephen] is using to adjust the viewing angle.
With the new interface, [Stephen] is able to access all of the pixels on the original display, and to use modern graphics libraries such as displayio. With the display issue solved, he intends to use a separate Teensy 4.1 to connect with the keyboard matrix and provide a VT100 terminal interface.
Schematic of the HD44102 driver circuit
Upcycling old, broken hardware can be a lot of fun and is always educational. Understanding why certain design decisions were made at a time when the engineering trade-offs were different can lead to insights that are directly relevant to modern designs when resources get tight. In this case, the quirky LCD drivers were a response to making the display of text as efficient as possible, so as not to overburden the processor.
The TRS-80 computers are ripe for hacking, with their “built-for-service” designs, and we’ve featured a few in the past. Some have replaced the motherboard with something newer, like [Stephen], whereas others have also replaced the display, or connected them to the cellphone network.
Have you found new ways to get old hardware working? Tell us in the comments below or send us a message on the Hackaday tips line.
If there’s one thing we’ve learned over the years, it’s that if it’s got a silicon chip inside, it could be carrying a virus. Research by one group focused on hiding a trojan inside an AVR Arduino bootloader, proving even our little hobbyist microcontrollers aren’t safe.
The specific aim of the research was to hide a trojan inside the bootloader of an AVR chip itself. This would allow the trojan to remain present on something like a 3D printer even if the main firmware itself was reinstalled. The trojan would still be able to have an effect on the printer’s performance from its dastardly hiding place, but would be more difficult to notice and remove.
The target of the work was the ATmega328P, commonly used in 3D printers, in particular those using the Marlin firmware. For the full technical details, you can dive in and read the research paper for yourself. In basic terms, though, the modified bootloader was able to use the chip’s IVSEL register to allow bootloader execution after boot via interrupt. When an interrupt is called, execution passes to the trojan-infected bootloader’s special code, before then returning to the program’s own interrupt to avoid raising suspicion. The trojan can also execute after the program’s interrupt code too, increasing the flexibility of the attack. Continue reading “Trojans Can Lurk Inside AVR Bootloaders”→
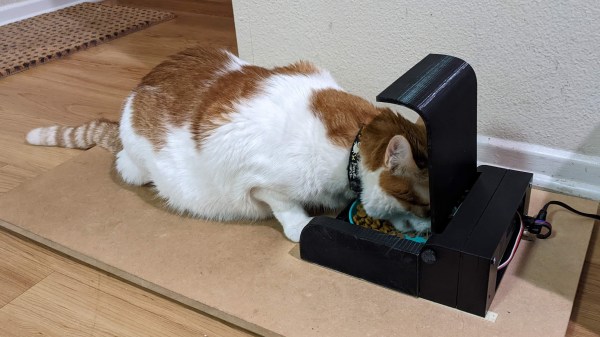
If you have more than one pet, you may know how hard it is to tell how much each furry friend is eating. If you introduce prescription foods, then this minor annoyance can have a major impact on your pet’s health. Facing this dilemma, [tomasdiazwahl] set out to make a pet feeder that feeds his pets exactly what they need when they approach the feeder.
Using the ever-popular Arduino Uno, the feeder is connected to a platform that uses load cells to detect the pet’s weight. The weight data is then used to identify which animal is looking for food. Once the pet is identified, the correct food bowl opens. It seems this prototype only has one food chamber to keep unauthorized pets from eating the special food, but the basic idea should be extensible to two or more chambers. While some existing solutions read the pet’s microchip or NFC collars to determine who’s at the feeder, [tomasdiazwahl] decided against these given the fickleness of trying to reliably get a reader at the correct position relative to the pet. As long as you don’t have multiple pets with the same weight, it should work just fine.
This project has a nice mix of woodworking, 3D printing, and electronics showing what can be accomplished when you aren’t afraid to mix techniques. We also really appreciate that [Tomasdiazwahl] spent the extra time to include a testing procedure and safety mechanism into the project. Designing a device to improve your pet’s health shouldn’t come with a safety risk!