Upgrading A USB Soldering Iron!

Seeing the popularity of the TS-100 soldering iron, GitHub user [ole00] found himself desirous of a few of its features, but was put off by its lack of a power supply. What is a hacker to do? Find a cheaper option, and hack it into awesomeness.

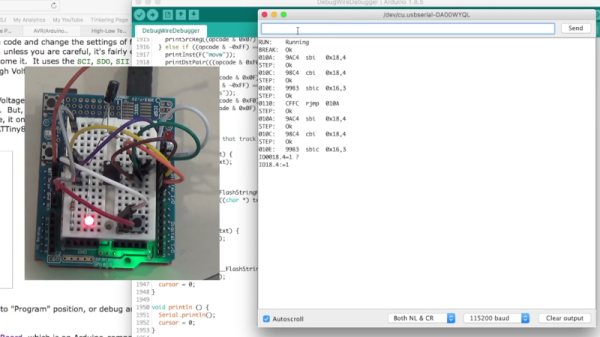
[ole00] stumbled across the inexpensive ZD-20U and — despite a handful (sorry!) of issues — saw potential: it’s compact, lightweight, and powered via a USB power cable. Wanting to use as much of the ZD-20U’s original board as possible, the modifications were restricted to a few trace cuts and component swaps. The major change was swapping out the 555 timer IC controlling the iron with am ATtiny13a MCU to give it a bit more control.

Continue reading “Upgrading A USB Soldering Iron!”

Finally, A Fidget Spinner We Can Love

We’ve been frankly mystified at the popularity of fidget spinners. After all, we can flip an ink pen around just fine. However, [MakersBox] just sold us on what he calls the geek spinner. The fact that the spinner is actually a PCB and has parts on it, would probably have been cool enough. However, the spinner also has a persistence of vision LED set up and can display 12 characters of text as it spins. Because the board is simple and uses through hole components, it would be a great project for a budding young hacker. You can see a video below.

The instructions are geared towards someone attempting their first project, too. If you know how to solder and insert a DIP IC, you might find you’ll skim them, but it is pretty straightforward. The 8 LEDs on one side operate from an ATTiny CPU, which you can program with an Arduino. The spinner has a hall effect sensor and a magnet to figure out the index position of the spin — crucial for displaying text.

Although the board attempts to balance the components, the battery side is apparently a little heavy. The suggestion is to add some weight using some hardware or solder to that side. Speaking of solder, the bearing in the center solders to the PCB. That’s going to take a lot of heat, so maybe you can finally use Dad’s soldering gun that has been gathering dust under your bench.

We liked the polar graph provided to help you set up the code for your own messages. The text implies there is a picture of one of these graphs filled out, but we think he forgot to include that picture. However, it is clear enough how to use it, and it would make it very easy to make your own text or any design that the spinner could produce.

This isn’t the first POV spinner, by the way. [MakersBox] has a nice set of acknowledgments for projects he’s seen or borrowed from, but the other one he mentions uses surface mount. Granted, surface mount isn’t a problem for most people these days, but starting out, it might be nice to stick with a through-hole design. If you want a more useful spinner, you can always make some music.

Continue reading “Finally, A Fidget Spinner We Can Love”

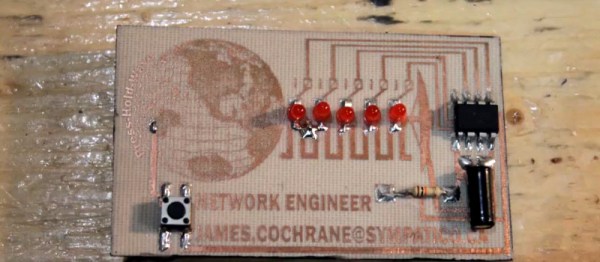
Continuity Tester Uses The ATtiny85’s Comparator

There’s an inside joke among cyclists – the number of bikes you need is “n+1”, where “n” is your current number of bikes. The same probably also applies to the number of tools and equipment a hacker needs on their workbench. Enough is never enough. Although [David Johnson-Davies] has a couple of multimeters lying around, he still felt the urge to build a stand-alone continuity tester and has posted details for a super-simple ATtiny85 based Continuity Tester on his blog. For a device this simple, he set himself some tall design goals. Using the ATtiny85 and a few SMD discretes, he built a handy tester that met all of his requirements and then some.

The ATtiny85’s Analog Comparator function is perfectly suited for such a tester. One input of the comparator is biased such that there is a 51 ohm resistor between the input and ground. The output of the comparator toggles when the resistance between the other input and ground is either higher or lower than 51 ohms. Enabling internal pullup resistors in the ATtiny85 not only takes care of proper biasing of the comparator pins, but also helps reduce current consumption when the ATtiny85 is put to sleep. The test current is limited to 100 μA, making the tester suitable for use in sensitive electronics. And enabling the sleep function after 60 seconds of inactivity reduces standby current to just about 1 μA, so there is no need for a power switch. [David] reckons the CR927 button cell ought to last pretty long.

For those interested in building this handy tester, [David] has shared the Eagle CAD files as well as the ATtiny85 code on his Github repository or you could just order out some boards from OSHpark.

DIY Pyrography Power Supply

Ever wanted to try your hand at wood burning? If you already threw away your first soldering iron—you know the one: plugged straight in to the wall, no temperature control, came with a thick piece of tin foil to rest it on—don’t despair. Pyrography pens don’t cost that much. The variable power supply they plug into, though: that’s another story. Those cost more than they probably should.

[td0g] took the plunge into pyrography a while back, and wanted to build his own controller from an old ATX power supply. Why not? It should be more than capable of doing the job. Even the most heavy-duty pyrography pens only draw 10A, and the 3.3V line showed to be rated for 30A. All [td0g] had to do was add a PWM with a MOSFET and a ‘Tiny85.

The project nearly became Fail of the Week fodder after [td0g] saw huge voltage spikes across the MOSFET. A 47kΩ resistor took care of those, and a heat sink salvaged from the junk bin will prolong the transistor’s life. [td0g] added a push button that cycles through five heat settings, and an LED to show the status. After that, all he had to do was add a male RCA input to connect the pens he already has.

Okay, so you wouldn’t be caught dead dropping money on some fancy power supply for this new hobby. Don’t want to buy pens, either? Roll your own from a plasma arc lighter.

Bluetooth Bedroom Clock!

When [decino]’s old bedroom clock finally bit the dust, he built himself a new one from scratch for fun and functionality.

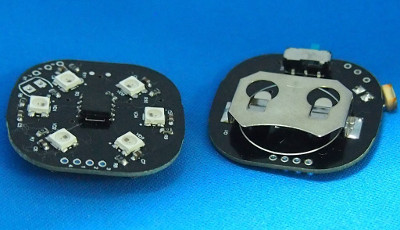
Initially, he wanted to solder Adafruit NeoPixel lights onto four prototype boards, using a mini-USB for power and a DS1307 to keep the time. However, after soldering the board for the first digit and realizing that carrying on with the other three would be a huge pain, he switched to etching the boards instead — a far more efficient solution. In keeping with this time-saving mindset, he added a Bluetooth module that would allow him to update the clock from his phone whenever the DS1307 started dropping minutes or whenever daylight savings time is in effect.

Continue reading “Bluetooth Bedroom Clock!”

Test your speed

Modern Strongman Games Test Your Speed Instead

Step right up! What would a Makerfaire be without some carnival games? And being a Makerfaire, they could of course be modernized versions. In [avishorp]’s case, he made a series of games that test your speed and look very much like the old strongman game, aka high striker or strength tester.

In the strongman game, you smash a lever with all your might using a hammer. A puck on the other end of the lever then shoots up a tower, hopefully high enough to hit a bell, winning you a prize. In [avishorp]’s games the puck, tower and bell are all replaced with an LED strip. In the swipe game, the faster you swipe your hand sideways over two optical proximity sensors, the higher the LEDs light up. In the drum game, the speed with which you drum on a rubber disk with embedded accelerometer, the higher the LEDs light up. The chase and response games both involve buttons that you have to rapidly hit, to similar effect.

For the brains, each game is controlled by an Adafruit Trinket board. [Avishorp] chose to use the PlatformIO IDE instead of the Arduino IDE to write them, preferring its modern editor, but he didn’t like that it doesn’t print and that it doesn’t tell you the final file size. The latter issue caused him to overwrite the bootloader, something that he understandably considered a major inconvenience.

Check out his page for more details, Fritzing diagrams, links to code, and all game videos. Meanwhile we’ve included clips of the drum and swipe games below.

And if it’s more carnival games you’re looking for, how about this adult-sized Sit ‘n Spin made using a rear differential and axle assembly out of an old car or truck. Or maybe you prefer something less likely to make you woozy, in which case you can try fishing with the Bass Master 3000.

Continue reading “Modern Strongman Games Test Your Speed Instead”

USB + μC = Peril?

You hear about people finding USB drives and popping them into a computer to see what’s on them, only to end up loading some sort of malware onto their computer. It got me to thinking, given this notorious vulnerability, is it really a great idea to make electronics projects that plug into a computer’s USB port? Should I really contribute to the capitulation-by-ubiquity that USB has become?

A of couple years ago I was working on an innocuous project, a LED status light running off of USB. It ran off USB because I had more complicated hopes for it–some vague notion about some kind of notification thing and also it was cool to have access to 5 V right from the ‘puter. This was about the time that those little RGB LEDs connected to USB were all the rage, like blink(1), which raised $130,000 on Kickstarter. I just wanted to make a status light of some sort and had the parts, so I made it.

My version was a small rectangular PCB from OSHPark packing a Tiny85, with a 10 mm RGB LED providing pretty much all of the functionality — no spare pins broken out. Honestly, for the amount of code on it, even the Tiny85 was overpowered. I recall thinking at the time, could my creation be misused for evil? Could some wicked programmer include malware alongside my LED-lighting Arduino sketch?

It’s absurd, of course. My meager engineering skills ought not interest anyone. On the other hand, couldn’t some heartless poltroon, the hardware equivalent of a script kiddie, make my creation into a malware-spewing Typhoid Mary of a project? It has always been the realistic consequence of building anything–that it could be misused. I’d be thrilled to the point of giddiness if someone remade one of my projects into something cool, but I’d really hate for a USB light I designed to turn into some vector into someone’s computer. But how much of that is my responsibility?

If you think I’m the only one who thinks this, go to SparkFun or Adafruit and count all of the boards with microcontrollers and USB A male plugs. Even the tiny boards like the Huzzah and Gemma use USB cables, rather than plugging directly into the computer. Granted, they are microcontrollers that realistically would be connected to a project and it might not be possible to physically move them into position and plug them in. Also requiring a charging cable does not in any way make a microcontroller board work any differently than one plugged right into the computer. I’m left wondering if I’m spazzing out over nothing, and there’s nothing we can do about our tendency to treat any electronic gizmo with a shiny case as being safe to plug into the same computer we use to pay bills.

If there is no data transfer taking place, and I’m just getting power, wouldn’t it be enough to disable (or not connect) the data pins of the USB on the circuit board? Or maybe we really have no business connecting a data connection to a microcontroller if we’re not reflashing the chip with fresh code–think I’m paranoid? Maybe you should just get power from a wall wart and leave the USB cord in the drawer. It’s one thing to urge our friends and family to steer clear of mystery plugs, but as engineers and tinkerers, do we not owe the community the benefit of our knowledge?

Of course, Hackaday contains numerous examples of USB projects, including canary for USB ports, tips on protecting your ports with two microcontrollers, a guide to stopping rubber ducky attacks, and removing security issues from untrusted USB connections. Also, has anyone used the USB condom?

Friends, let me know your thoughts on the subject. Am I a freak to steer clear of USB-powered project like my dumb LED? Leave your comments and weigh in with your opinions.