Open Source Hardware Video Game Music Player

[Aidan Lawrence] likes classic synthesized video game music in the same way that other people “like” breathing and eating. He spent a good deal of 2017 working on a line of devices based on the Yamaha YM2612 used in the Sega Genesis to get his feet wet in the world of gaming synths, and is now ready to take the wraps off his latest and most refined creation.
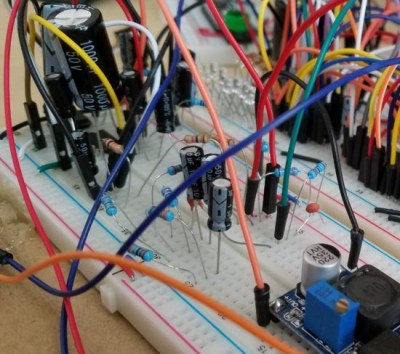
One of his earlier attempts at a hardware VGM player.

The YM2151 Arcade Classic is an open source hardware player for Video Game Music (VGM) files. It uses no emulation, the files are played on the device’s YM2151 chip in the same way they would have been on a real arcade cabinet at the time of their release. Interestingly, as some arcade machines were exceedingly rare or even scrapped before release, [Aidan] believes that his player may be the first time some of these songs have ever been played (at least in public) on real hardware.

The YM2151 synthesizer is powered by a STM32 “Blue Pill” board, which was selected as much for its capabilities as it was its low cost. The STM32 loads the VGM files from an SD card, and puts track information for the currently playing song on the 128×32 OLED display. A few tactile switches under the screen allow for shuffling through the songs stored on the card, and a slide switch for mute rounds out the simplistic but functional user interface.

In the GitHub repository, [Aidan] has provided the source code, schematics, Bill of Materials, and KiCad-generated Gerber files; everything you need to create your own version of his player. After listening to it rock out for a few minutes in the video after the break, we’re tempted to take him up on that offer.

This player reminds us of a similar design, also using original hardware, that we covered last year. The logical next step for this project would be to flesh out the UI and put it into an enclosure like this SNES chiptune player.

Continue reading “Open Source Hardware Video Game Music Player”

A Faster Grave Digger For Your Child

Children love speed, but so few of those electric ride on toys deliver it. What’s a kid to do? Well, if [PoppaFixit]’s your dad, you’re in luck.

This project starts with an unusually cool Power Wheels toy, based on the famous Grave Digger monster truck. During the modification process, it was quickly realised that the original motor controller wasn’t going to cut the mustard. With only basic on/off control, it gave a very jerky ride and was harsh on the transmission components, too. [PoppaFixit] decided to upgrade to an off-the-shelf 24 V motor controller to give the car more finesse as well as speed. The controller came with a replacement set of pedals, both accelerator and brake, to replace the stock units. On the motor side, a couple of beefier Traxxas units were substituted for the weedy originals.

Acceleration is now much improved, not just due to the added power, but because the variable throttle allows the driver to avoid wheelspin on hard launches. It also makes the car much more comfortable and safe to drive, thanks to the added controllability. Another way to tell the project was a success is the look of pure joy on the new owner’s face!

This was a fairly basic install, very accessible to the novice. These sort of electric vehicle hop-ups are commonplace enough that there are a wide variety of suppliers who sell easy-to-use kits for this sort of work. For that reason, we’ve seen plenty of hacks of this sort – like this modified scooter, or these Power Wheels set up for racing.

Continue reading “A Faster Grave Digger For Your Child”

A Relay Calculator With DIY Neon Displays, Just Because

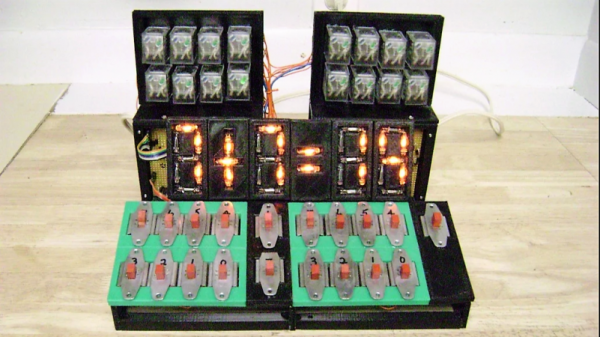
This looks like one of those projects that started out as a glimmer of an idea and led down a rabbit hole. But it’s a pretty cool rabbit hole that leads to homebrew neon seven-segment displays on a calculator with relay logic.

It’s a little thin on documentation so far, but that’s because [Mark Miller]’s build is one of those just-for-the-fun-of-it things. He started with a bag full of NE-2 tubes and the realization that a 3D-printed frame would let him create his own seven-segment displays. The frames have a slot for each segment, with a lamp and current limiting resistor tucked behind it; with leads brought out to pins and some epoxy potting, these displays would be hard to tell from a large LED seven-segment. Rolling your own displays has the benefit of being able to extend the character set, which [Mark] did with plus-minus and equal sign modules. All of these went together into a two-banger calculator — addition and subtraction only so far — executed in relays and vacuum tubes. Version 2.0 of the calculator regressed to all-relay logic, which must sound great.

We heartily regret the lack of a satisfyingly clicky video, but we’ll give it a pass since this is so cool. We’ll be watching for more on this project, but in the meantime, if you still need to get your click on, this electromechanical BCD counter should help.

Hijacking A Sony Watchman For Pong

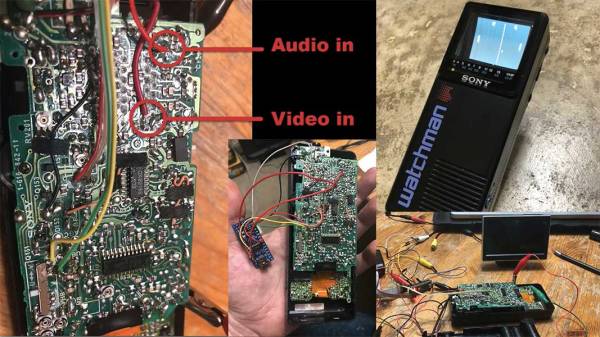
The era of the vintage television was a great one, and one of the transitional by-products was the Sony Watchman. It was a portable TV which Sony started selling in 1982, and the amazing thing about it was that it had an actual 4-inch cathode ray tube or CRT. [Sideburn] just posted a video in which he hijacks the internals of a Watchman to make it into a portable game of Pong.

The hack begins with removing the TV tuner module inside to make some room for the new residents. Next comes the M51364P which is VIF video decoder chip, and for which surprisingly there is not a lot of info on the web. They were able to find a part of the schematic, which though it was in Russian may still be useful for enthusiasts. Removing the VIF revealed the audio and video pins that needed the appropriate signals for the hack to be successful. In an age of multilayer boards it is amazing how a two-layer PCB makes life so easier for the tinkerer.

For the new brains an Arduino Nano clone was selected, and instead of adding modern buttons the existing volume and band select switches were convinced to be the paddle control and play/pause button. Getting everything to fit was easy with the absence of the tuner module, and voila! New(ish) hardware. For the firmware, [Sideburn] turns to Hackvision firmware which has a host of games such as Space Invaders, Asteroids, and even Tetris.

We covered Hackvision a few years ago as a hardware/firmware bundle, and if you are more into CRTs then check out the Arduino driven 6845 CRT controller.

Continue reading “Hijacking A Sony Watchman For Pong”

An Old Way To Make A New Crank Handle

When the crank handle on [Eric Strebel]’s cheapo drill press broke in two, did he design and print a replacement? Nah. He kicked it old school and cast a new one in urethane resin.

In his newest video, [Eric] shows us his approach to molding and casting a handle that’s likely stronger than the original. The old crank handle attached to the shaft with a brass collar and a grub screw, so he planned around their reuse. After gluing the two pieces together and smoothing the joint with body filler, he packs the back of the handle with clay. This is a great idea. The original handle just has hollow ribbing, which is probably why it broke in the first place. It also simplifies the cast a great deal.

Here’s where things get really interesting. [Eric] planned to make a one-piece mold instead of two halves. At this point it becomes injection molding, so before he gets out the reusable molding box, he adds an injection sprue as an entry point for the resin, and a plug to support the sprue and the handle. Finally, [Eric] mixes up some nice bright Chevy orange resin and casts the new handle. A few hours later, he was back to drilling.

Crank past the break to watch [Eric]’s process, because it’s pretty fun to watch the resin rise in the clear silicone mold. If you want to take a deeper dive into injection molding, we can fill that need.

Continue reading “An Old Way To Make A New Crank Handle”

Investigating The World’s Rarest Game Boy

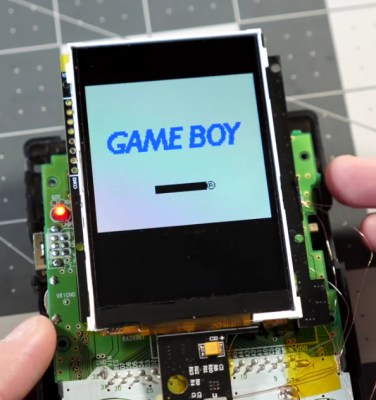
Early last year, a very unique Game Boy Color showed up on Chinese shopping site Taobao. Rather than the rather anemic-looking display of the original GBC, this version was modified with a modern IPS LCD. Even in the pictures shown on the product page, it was clear the display on this unit was far more advanced than anything Nintendo ever packed into a Game Boy. The retro gaming community went wild, and soon the site was overwhelmed with orders. The majority of the sales were canceled by the seller, and it’s believed as few as 75 of these hacked GBCs were actually shipped out.

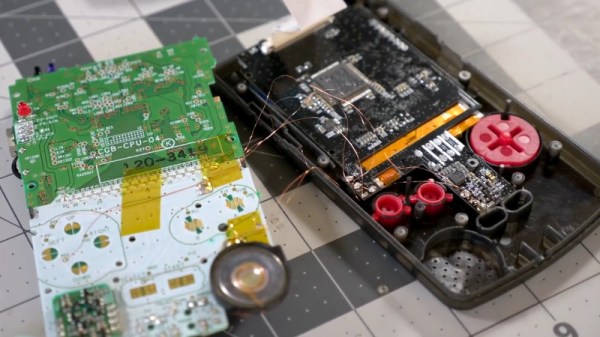
Thanks to one of his viewers, [Colin] was able to get his hands on one of these extremely rare customized handhelds. Clearly a man after our own heart, his first inclination was to tear the thing apart and see how they built it. While he had a fairly good idea of how they managed this hybrid of modern and classic technology, there were a couple of surprises inside.

The device has a completely stock main board, and as such works and plays like a normal GBC. But upon flipping the main board over, [Colin] found a nest of thin magnet wire connecting the new display controller to individual buttons on the front panel. As he later confirmed when he reassembled the system, this allows the user to adjust the display’s brightness by holding “Select” and using the directional pad.

As for the screen itself, the big surprise was that it’s clearly pulled out of a relatively recent smartphone. The screen is physically much larger than the opening in the GBC’s front panel, but through some software trickery the image is displayed only in the area that’s visible to the player. [Colin] managed to get a hold of a few contacts “in the know” who confirmed to him that both the hardware and software for the display controller were specifically created for this application, and are unlikely to be duplicated by anyone else.

Considering most of the Game Boy hacks we cover are about somebody jamming modern hardware into them, it’s an interesting change of pace to see a group that was so adamant about retaining as much original hardware as possible while still managing to improve the user experience.

[Thanks to Doc Oct for the tip]

Continue reading “Investigating The World’s Rarest Game Boy”

x86 emulation running DOS on ESP8266

PC-XT Emulator On ESP8266

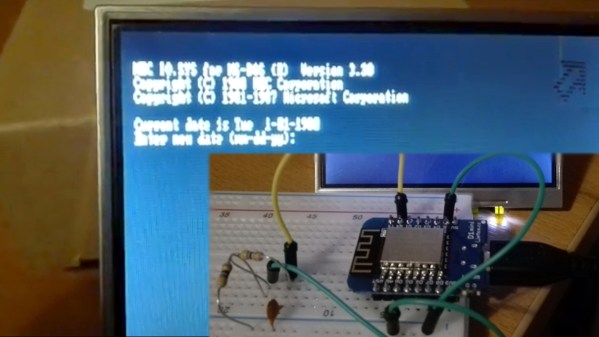
Do you remember the simpler times when you had a DOS command line, a handful of commands, and you talked to the hardware through a few BIOS and DOS interrupts? Okay, maybe it was a little limited, but nostalgia doesn’t care. Now [mcuhacker] is working on bringing some of those memories back by getting a PC-XT emulator running on an ESP8266.

For the x86 CPU emulator, he ported Fake86 which is written in C, and created an Arduino IDE environment for it. The MS-DOS 3.3 bootdisk image is stored in flash and is accessed as the A: drive. There’s no keyboard yet but he has 640×200 CGA working with 80×25 characters on a 3.5″ TFT display with the help of a low pass filter circuit. In the video below he shows it booting to the point where it asks for the date.

Continue reading “PC-XT Emulator On ESP8266”