Printable Fix For Time Card Clock Has Owner Seeing Red Again

When [Morley Kert] laid eyes on a working time card-punching clock, he knew he had to have it for a still-secret upcoming project. The clock seemed to work fine, except that after a dozen or so test punches, the ink was rapidly fading away into illegibility. After a brief teardown and inspection, [Morley] determined that the ribbon simply wasn’t advancing as it should.

This clock uses a ribbon cassette akin to a modern typewriter, except that instead of a feed spool and a take-up spool, it has a short length of ribbon that goes around and around, getting re-inked once per revolution.

When a card is inserted, a number of things happen: a new hole is punched on the left side, and an arm pushes the card against the ribbon, which is in turn pushed against the mechanical digit dials of the clock to stamp the card.

Finally, the ribbon gets advanced. Or it’s supposed to, anyway. [Morley] could easily see the shadow of a piece that was no longer there, a round piece with teeth with a protrusion on both faces for engaging both the time clock itself and the ribbon cassette. A simple little gear.

After emailing the company, it turns out they want $95 + tax to replace the part. [Morley] just laughed and fired up Fusion 360, having only caliper measurements and three seconds of a teardown video showing the missing part to go on. But he pulled it off, and pretty quickly, too. Version one had its problems, but 2.0 was a perfect fit, and the clock is punching evenly again. Be sure to check it out after the break.

Okay, so maybe you don’t have a time card clock to fix. But surely you’ve had to throw out an otherwise perfectly good coat because the zipper broke?

Continue reading “Printable Fix For Time Card Clock Has Owner Seeing Red Again”

Tetris Clock Gets Talkative Upgrade

Tetris is arguably one of the most popular video games of all time, and its famous bricks have become cultural icons in themselves, as seen in this clock build from [The Electronic Engineer].

The web interface allows the various sound options to be easily configured.

The basic concept of the Tetris clock is that falling bricks stick together in the shape of numbers to display the time. In this case, the clock is based on the version created by [Brian Lough] which we featured previously. It relies on an RGB LED matrix as a display.

However, the build has had a few upgrades courtesy of [The Electronic Engineer]. With the help of an I2S audio breakout board, the clock can play sounds at various times of day. It’s currently set up with clips from various cartoons announcing lunch and coffee break times. There’s also a web interface added in for configuration purposes, and some text tickers too.

It’s fun to see a popular open project get some upgrades as others dive in to build their own version. We’ve seen some other fun Tetris clocks before, too. Continue reading Tetris Clock Gets Talkative Upgrade”

A Simple Binary Coded Decimal Watch

Analog and LCD watches are both useful designs, but ultimately are mainstream timepieces. Using a binary watch is an easy way to set one’s self apart as a tech enthusiast, while impressing your hacker friends to boot.

One such build comes to us from [vishalsoniindia], and it uses a single bare PCB which is designed to mate directly to a traditional watch strap. The single tactile button on board is used to activate the watch, showing the current time in hours and minutes in binary-coded decimal on the watch’s LEDs. Long-pressing the button puts the watch in setting mode to correct the time as needed.

The watch relies on an ATtiny85 microcontroller, a lightweight and compact design which is more than powerful enough to run a simple watch. It’s paired with a 74HC595 shift register to run all the LEDs from a minimum number of pins, and there’s also a TP4056 charging circuit on board to keep the lithium-polymer battery topped off.

A project like this is a great way to learn all manner of basic electronics skills, from PCB design, to SMD soldering and even working with basic logic parts like shift registers. As a bonus, you get a cool watch out of it to boot.

We’ve seen some similar designs over the years, as varied as the hackers that build them. Video after the break.

Continue reading “A Simple Binary Coded Decimal Watch”

A six digit Nixie clock on a desktop

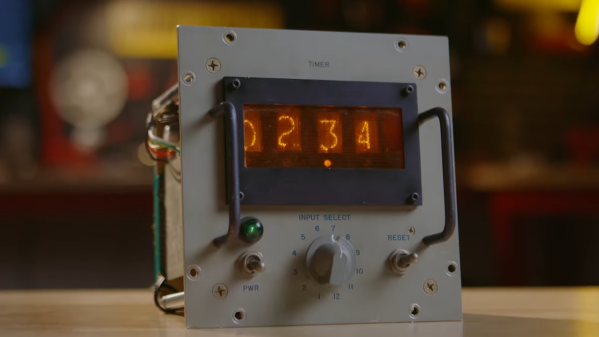
Upcycled Nixie Clock Fit For A Friend

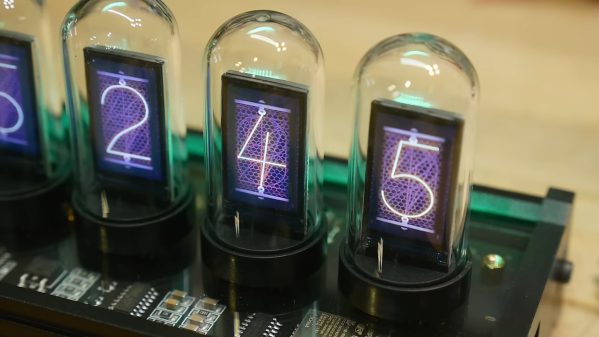
Building a clock from parts is a rite of passage for makers, and often represents a sensible introduction into the world of electronics. It’s also hard to beat the warm glow of Nixie tubes in a desktop clock, as [Joshua Coleman] discovered when building a Nixie tube clock for a friend.

The original decision to upcycle the chassis from an unrepairable Heathkit function generator came a little undone after some misaligned cutting, so the front panel ended up being redesigned and 3D printed. This ended up being serendipitous, as the redesigned front panel allowed the Nixie tubes to be inset within the metal chassis. This effect looks great, and it also better protects the tubes from impact damage.

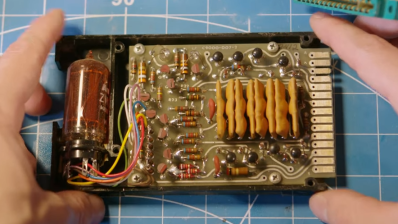
Sourcing clones of the 74141 Nixie driver ICs ended up being easier than anticipated, and the rest of the electronics came together quickly. The decoders are driven by an Arduino, and the IN-4 Nixie tubes are powered by a bespoke 170 volt DC power supply.

Unfortunately four of the tubes were damaged during installation, however replacements were readily available online. The gorgeous IN-4 Nixie tube has a reputation for breaking easily, but is priced accordingly on auction sites and relatively easy to source.

The build video after the break should get any aspiring Nixie clock makers started, but the video description is also full of extra information and links for those needing help getting started.

We’re not short on clock hacks here at Hackaday, so why not check out a couple more? This retro-inspired LED clock looks like its right out of a parallel universe, or maybe this stunning Nixie clock driven by relays will strike your fancy.

Continue reading “Upcycled Nixie Clock Fit For A Friend”

Inside An 11 Ton Clock With 1,000 Pieces

We aren’t ashamed to admit it, but we like clocks. We’ve built quite a few and clock projects show up regularly in the pages of Hackaday. But there is one clock that is among the most famous in the world: Britain’s Big Ben. It has been getting some repairs and the BBC was nice enough to make a video of the giant mechanism.

Actually, the clock is not called Big Ben. That’s the name of one of the five bells in the Elizabeth Tower since 2012. Before that it was the Clock Tower, but everyone always calls it Big Ben. The giant clock weighs over 11 tons and has more than 1,000 pieces. Hard to imagine what it took to build such a thing in 1859.

Big Ben itself — the bell — weighs even more than the clock at over 15 short tons. But, of course, we are mostly interested in the clock itself. The design was apparently from a lawyer and an astronomer, both of whom liked clocks. Construction, however, fell to a professional clockmaker and — after his death — his stepson. Dennison, the lawyer, developed a superior gravity escapement that quickly became the standard for future tower clocks and was hailed as one of the great horological inventions of the 19th century.

The clock now has an electric motor that it can use as a backup. However, it is normally hand-wound three times a week. Winding the clock takes about 90 minutes. Adjusting the clock is also an interesting event. On top of the pendulum is a stack of penny coins. Adding a penny makes the clock run a little faster, removing one slows it down. Each penny is worth about 0.2 seconds/day.

It is great to see such a recognizable piece of 19th century tech get its 15 minutes of fame. Not that the tower isn’t famous, but very few people know what’s inside. The old clock is full of odd stories. The original bell broke when Dennison wanted to test it with a bigger hammer. The new bell made from the old metal also has a crack in it, but still is operational.

You probably aren’t going to reproduce this clock, but you can make something that works on the same principle. Or, try something a bit more steam-punk.

Continue reading “Inside An 11 Ton Clock With 1,000 Pieces”

A clock made with LED filaments inside clear plastic tubes

LED Filaments Make A Retro Clock Without Any Retro Parts

We love clock projects here at Hackaday, and we’ve seen many beautiful designs based on a wide variety of display technologies. There are various types of glass tubes like Nixies, Numitrons and classic VFD displays, all of which have that warm “retro” glow to them. Then there’s LEDs, which are useful for making cool pixel-based timepieces and easy to drive with low-voltage electronics. So how about combining the best of both worlds, by using LEDs to make a Numitron-like display? That’s exactly what [Jay Hamlin] did when he built a digital clock based on LED filaments.

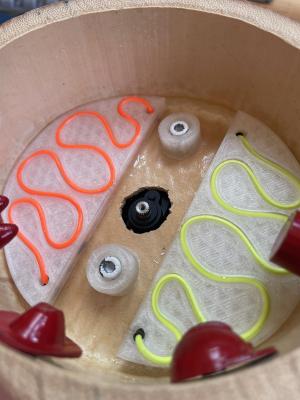
The heart of the project consists of orange LED filaments similar to the ones used in vintage-style LED light bulbs. [Jay] bought a bunch of them online and tried various ways of combining them into seven-segment displays, eventually settling on a small PCB with a black finish to give good contrast between the LEDs and the background. To make the displays look like they’re encased in glass, [Jay] bought a set of plastic test tubes and cut them to size.

The base of the clock is formed by a slick black PCB that holds an ESP32. The segments are driven through a set of 74LV595 shift registers to keep the required number of GPIOs to a minimum. There are no buttons: thanks to a WiFi connection and the Network Time Protocol the ESP32 automatically keeps the correct time.

The end result looks remarkably like a Numitron display at first glance, and remains a beautifully-made clock even if you notice that there’s no glass to be found. If you’re into LED filament clocks (and who isn’t?), check out this analog wall clock, or this spiderweb-like digital clock.

Continue reading “LED Filaments Make A Retro Clock Without Any Retro Parts”

Cool Mechanism Day: Two-Way To One-Way

The internal mechanisms that are used in timepieces have always been fascinating to watch, and are often works of art in their own right. You don’t have to live in the Watch Valley in Switzerland to appreciate this art form. The mechanism highlighted here (from Mechanistic on YouTube) is a two-way to one-way geared coupler (video, embedded below) which can be found at the drive spring winding end of a typical mechanical wristwatch.  It is often attached to a heavily eccentrically mounted mass which drives the input gear in either direction, depending upon the motion of the wearer. Just a little regular movement is all that is needed to keep the spring nicely wound, so no forgetting to wind it in the morning hustle!

The idea is beautifully simple; A small sized input gear is driven by the mass, or winder, which drives a larger gear, the centre of which has a one-way clutch, which transmits the torque onwards to the output gear. The input side of the clutch also drives an identical unit, which picks up rotations in the opposite direct, and also drives the same larger output gear. So simple, and watching this super-sized device in operation really gives you an appreciation of how elegant such mechanisms are. Could it be useful in other applications? How about converting wind power to mechanically pump water in remote locations? Let us know your thoughts in the comments down below!

If you want to play with this yourselves, the source is downloadable from cults3d. Do check out some of the author’s other work!

We do like these super-sized mechanism demonstrators around here, like this 3D printed tourbillon, and here’s a little thing about the escapement mechanism that enables all this timekeeping with any accuracy.

Continue reading “Cool Mechanism Day: Two-Way To One-Way”