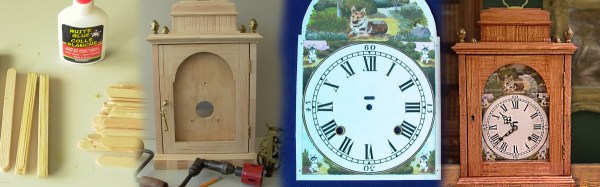
[alvenh] has come a long way since he was a kid, but he kept the bag of popsicle sticks from his childhood. When he set out to build a clock for himself, he remembered his stored treasure and made something unexpectedly good out of the humble material. We’ve seen some neat stuff made with popsicle sticks before, but they usually retain their familiar shape.
[alvenh] began by choosing a style for his clock. We don’t know how he looked at a bag of sticks and thought, “Old English Georgian bracket clock with a bell top,” but if Hackaday teaches anything, it’s that some people just have a wider vision for the world. Next he laminated the sticks together or used them as a veneer for a thinner sheet of plywood to make his base materials.
An incredible amount of work went into the clock as he did things like sanding large contours using a jar for a form, or cutting mortise and tenons into craft sticks. [alvenh] even painted the face of the clock using his German Shepard as a model. Finally he installed an antique movement into the creation. The final result is stunning, and the build log is fun to read through.
Continue reading “An Incredible Clock Made Of Popsicle Sticks”