Desk-Sized CNC Engraver Does The Job

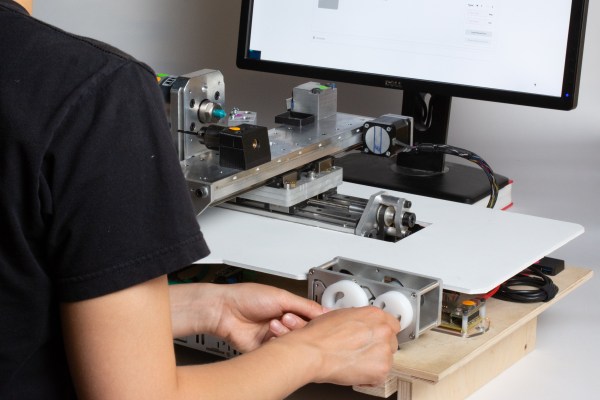
CNC machine tools are highly useful for when you want to take a CAD design and make real parts as quickly and as easily as possible. Typically, they’re employed in large-scale industrial settings, but CNC machines come in all shapes and sizes. It’s possible to build a useful machine that’s just right to sit on your desk, as [More Than User] demonstrates.

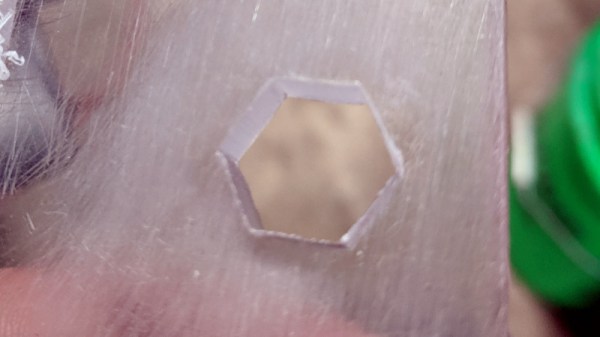
The holes pictured were made with a 0.5mm tool, showing off the precision and accuracy of the machine.

The build consists of an aluminium-framed CNC engraver, designed primarily for the production of PCBs. However, it can also handle plastic jobs, and aluminium if run slowly enough. Like most garage CNC projects, it runs with a combination of stepper motors and an Arduino. The cutting area is 16 cm x 16cm – more than enough for most hobby PCBs.

There are plenty of interesting details, such as the T-slot bed made from U-section steel bolted together, and the simple probe made from a microswitch. Perhaps most impressive though is the tight precision of the cuts. This is particularly important for PCB work, where otherwise minor issues could cause short or open circuits and make the resulting parts useless.

It’s a project that we’re sure will come in handy for [More Than User]’s future projects, and there’s nothing quite like making your own tools. If you’re new to CNC as a whole, consider picking up some design tips before you get started.

Building A Googie-Style Sign With The Help Of CNC

The Googie style was a major architectural trend of the post-war period in the United States. It remains popular to throwback to this style, and [Wesley Treat] got the job to create a sign in this vein for a local trailer motel (Youtube link, embedded below).

CNC tools make just about any job easier, and this one is no exception. The smooth curves of the sign were carved out of several sections of PVC sheet, and stacked up to form the body of the sign. These were then sanded, coated in putty, and given a lick of  paint. Steps like these could likely be skipped in the interest of saving time, especially given that few will see those parts once the sign is installed. However, [Wesley] takes pride in his work, and the final piece is all the better for it. It’s also important for the piece to impress the client, not just the public.

The front of the sign is also produced in PVC sheet, and given a coat of paint with brush techniques used to create a faux-wood finish. Vinyl is then applied to the textual and graphical elements in order to create a colored backlit effect. The sign is lit with off-the-shelf LED strips, and the whole assembly is weather sealed to protect it from the elements.

The final product is a beautiful piece, harking back to the classic Googie aesthetic and serving as a testament to [Wesley]’s skills. It’s a great example of how easy it is to create great work with the right tools and the proper attention to detail. It also goes to show how great LEDs are for signage, whether you’re at the beach or the lab. Video after the break.

Continue reading “Building A Googie-Style Sign With The Help Of CNC”

Wire Bender Aims To Take Circuit Sculptures To The Next Level

It doesn’t seem as though bending wire would be much of a chore, but when you’re making art from your circuits, it can be everything. Just the right angle in just the right place can make the difference between a circuit sculpture that draws gasps and one that’s only “Meh.”

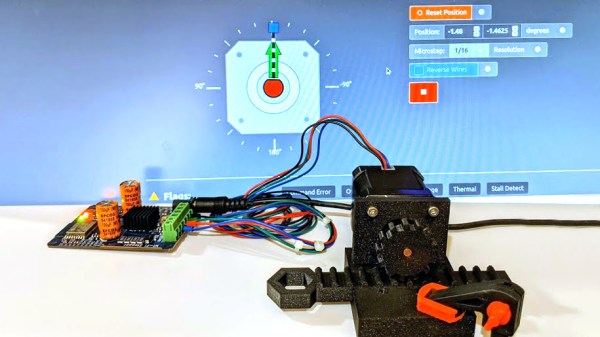
[Jiří Praus] creates circuit sculptures that are about as far away from the “Meh” end of the spectrum as possible. And to help him make them even more spectacular, he has started prototyping a wire-bending machine to add precision to his bends. There’s no build log at the moment, but the video below shows progress to date. All the parts are 3D-printed, with two NEMA 17 steppers taking care of both wire feed and moving the bending head. It appears that the head has multiple slots for tools of different shapes. For now, the wire is rotated around its long axis manually, but another stepper could be added to take care of that job.

[Jiří] tells us that while he loves making circuit sculptures like his amazing mechanical tulip, he hates repeating himself. He hopes this bender will make repeat jobs a little less tedious and a lot more precise, and we hope he goes forward with the build so we get to see both it and more of his wonderful works of circuit art.

Continue reading “Wire Bender Aims To Take Circuit Sculptures To The Next Level”

Syringe Pump Turns CNC Machine Into A Frosting Bot

“Amazing how with only the power of 3D-printing, two different computers, hundreds of dollars in CNC machinery, a lathe, and modern microcontroller magic, I can almost decorate a cupcake as well as a hyperactive ten-year-old.”  We can think of no better way to sum up [Justin]’s experiment in CNC frosting application, which turns out to only be a gateway to more interesting use cases down the road.

Granted, it didn’t have to be this hard. [Justin] freely admits that he took the hard road and made parts where off-the-shelf components would have been fine. The design for the syringe pump was downloaded from Thingiverse and does just about what you’d expect – it uses a stepper motor to press down on the plunger of a 20-ml syringe full of frosting. Temporarily attached in place of the spindle on a CNC router, the pump dispenses onto the baked goods of your choice, although with an irregular surface like a muffin top the results are a bit rough. The extruded frosting tends to tear off and drop to the surface of the cake, distorting the design. We’d suggest mapping the Z-height of the cupcake first so the frosting can dispense from a consistent height.

Quality of the results is not really the point, though. As [Justin] teases, this hardware is in support of bioprinting of hydrogels, along with making synthetic opals. We’re looking forward to those projects, but in the meantime, maybe we can all just enjoy a spider silk beer with [Justin].

Continue reading “Syringe Pump Turns CNC Machine Into A Frosting Bot”

Custom Machined Pump Keeps CNC Lubrication Under Control

Rub two pieces of metal against each other hard enough, and it won’t be long before they heat up sufficiently to cause problems. That’s especially true when one is a workpiece and one is a tool edge, and the problems that arise from failing to manage the heat produced by friction can cost you dearly.

The traditional way of dealing with this is by pumping heavy streams of liquid coolant at the workpiece, but while that works, it creates problems of its own. That’s where minimum quantity lubrication comes in. MQL uses a fine mist of lubricant atomized in a stream of compressed air, which saves on lube and keeps swarf cleaner for easier recycling. The gear needed for MQL can be pricey though, so [brockard] decided to add homebrew MQL to his CNC router, with great results.

The video below shows the whole process, from raw metal to finished system – skip ahead to about 12 minutes if you just want to see final testing, but be warned that you’ll be missing some high-quality machining. The finished pump is a double-piston design, with each side driven by a cam rotated by a servo. An Arduino controls the speed of the motor based on the current settings; the pump is turned on and off through G-code control of a relay.

The lubricant stream is barely visible in the video, as opposed to the sloshing mess of traditional flood coolants, and seems much more suitable for a hobbyist-grade CNC setup. Need to build a CNC router before you build this? You can do much worse than this one.

Continue reading “Custom Machined Pump Keeps CNC Lubrication Under Control”

The Cheese Grater In Fusion 360

By now you will all have heard so much about the grille on Apple’s new “Cheese grater” Mac Pro that you might think there was nothing more to say. Before we move on though there’s one final piece of work to bring to your attention, and it comes from [Andy Pugh]. He’s replicated the design in Fusion 360, and used it to produce rather an attractive Raspberry Pi case.

It seems that for Fusion 360 users the problem lies in that package’s method of placing spheres which differs from that of some other CAD software. Using the page linked in our previous coverage of the grille he’s taken its geometry information and produced a video detailing every step in recreating it for Fusion 360. This is where following someone who really knows your CAD package pays dividends, because we suspect it would take us days to figure out some of the tricks he shows us.

The result is the Raspberry Pi case, which is for the Pi 3 and others like it. Sadly we couldn’t break our embargo and tell him about the Pi 4 and its different connector layout, but we’re guessing a halfway competent CAD operator could put together a Pi 4 case. Andy’s files can be found on Thingiverse, so you can all make one for yourselves.

Andy’s appeared here before a few times, not least for his Ner-A-Car motorcycle, and for designing a Robot Wars robot.

Continue reading “The Cheese Grater In Fusion 360”

Does The Cheese Grater Do A Great Grate Of Cheese?

Apple’s newest Mac Pro with its distinctive machined grille continues to excite interest, but until now there has been one question on the lips of nobody. It’s acquired the moniker “Cheese grater”, but can it grate cheese? [Winston Moy] set out to test its effectiveness in the kitchen with a piece of Pecorino Romano, a great cheese.

Of course, the video is not really about cheese grating, but about the machining process to create that distinctive pattern of intersecting spherical holes. He doesn’t have a real Mac Pro because nobody does as yet, so like others his approach was to reverse engineer the manufacturing process. He takes us through the entire thing and the rationale behind his decisions as he makes a 13-hole piece of Mac Pro-like grill from a billet of aluminium. It’s first roughly cut with a pair of decreasing-size end mills, then finished with a ball mill. He’s added an extra cut to round off the sharp edge of the hole that isn’t there on the Mac.

An unexpected problem came when he machined the bottom and the holes began to intersect, it was clear that they were doing so wrongly. Turning the piece over must be done in the correct orientation, one to note for any other would-be cheese-grater manufacturers. Finally the piece is blasted for a satin finish, and then anodised for scratch-resistance.

So, the important question must be answered: does it grate? The answer’s no, the best it can manage is something close to a crumble. He doesn’t seem bothered though, we get the impression he likes eating cheese whatever its form. The whole process is in the video below the break.

For more Apple grille examination, take a look at this mathematical analysis.

Continue reading “Does The Cheese Grater Do A Great Grate Of Cheese?”