When we need actuators for a project, a servo from the remote-control hobby world is a popular solution. Though as the number of servos go up, keeping their wires neat and managing their control signals become a challenge. Once we start running more servos than we have fingers and toes, it’s worth considering the serial bus variety. Today we’ll go over what they are and examine three products on the market.
Congratulations and thank you go to Theodore Yapo for authoring the first paper to complete the peer review process for the Hackaday Journal. You can read the standalone paper here; it will be included in the first volume of the Hackaday Journal officially released later this year.
The Hackaday Journal is an open access, peer reviewed journal that seeks to ensure hard-won domain knowledge is preserved and made available for the benefit of all. Before jumping into Ted’s topic, please take a moment to consider submitting your own paper for the journal.
Paper Submissions Wanted
We have other submissions in the pipleline now but we still need more papers to round out the first volume of the Hackaday Journal. Please consider authoring a paper on any creative research, engineering, or entertaining discovery in the areas of interest to the Hackaday community. The full name of our journal is the Hackaday Journal of What You Don’t Know — it will be a tome of infinite appeal to any who seek to broaden their minds in the engineering space. But for that to happen we need you to share your knowledge.
We are in an age of unparalleled opportunity for individuals and small teams to make interesting discovery. You should not need to be working on a degree to have your findings published, but of course students and faculty are encouraged to submit their papers. Do not hesitate to get in touch with us about topics you want to write about.
Scalar Network Analyzer Leakage Correction by Theodore Yapo
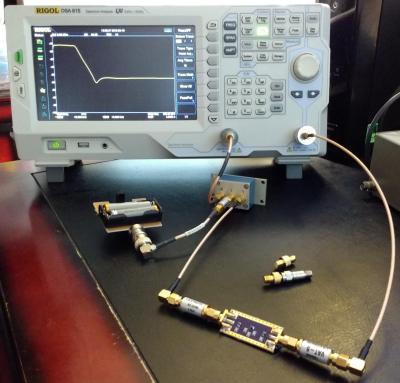
Low-pass filter being tested by a Rigol DSA-815 using the phase shifting correction technique
The title of Ted’s paper is a mouthful and the subject material wades into radio frequency knowledge with gusto. We applaud him, and the peer reviewers, for the attention to detail while moving toward publication.
In his work, Ted finds an interesting opportunity to get more performance out of relatively inexpensive bench equipment used to characterize RF components. This task is often reserved for Vector Network Analyzers (VNA) but with a heafty price tag these tools aren’t available to everyone. Spectrum Analyzers with Tracking Generators (SA/TG) have come onto the market, but especially with early versions, there is a leakage problem that causes inaccuracy. Ted found a simple technique that can correct for the leakage.
The solution is based on phase shifting the measurement. Starting with a properly calibrated machine, Ted uses a small board he built to electronically shift the phase of the Tracking Generator where the leakage is a problem. The signal is first measured, then measured again with a phase shift of 180 degrees. This effectively cancels out the error while preserving the signal being measured.
This paper goes into great technical detail in the RF domain. It is worth noting that the Hackaday Journal is open to discovery on multiple topics and levels of complexity. Don’t let what you think is a simple, useful idea go unpublished. We’re interested in a wide range of the simple, the obscure, and the frighteningly technical as long as the ideas of both novel and well supported.
This is Your Journal
You, yes you reading this right now, embody a movement of inventive and curious people working both inside and outside of formal academic structures. This is our time to contribute to the knowledge base of humanity. Pour yourself a refreshing beverage, saddle up your headphones, crack those knuckles, and let the writing process begin. Let us now what we don’t know. Submit your paper now.
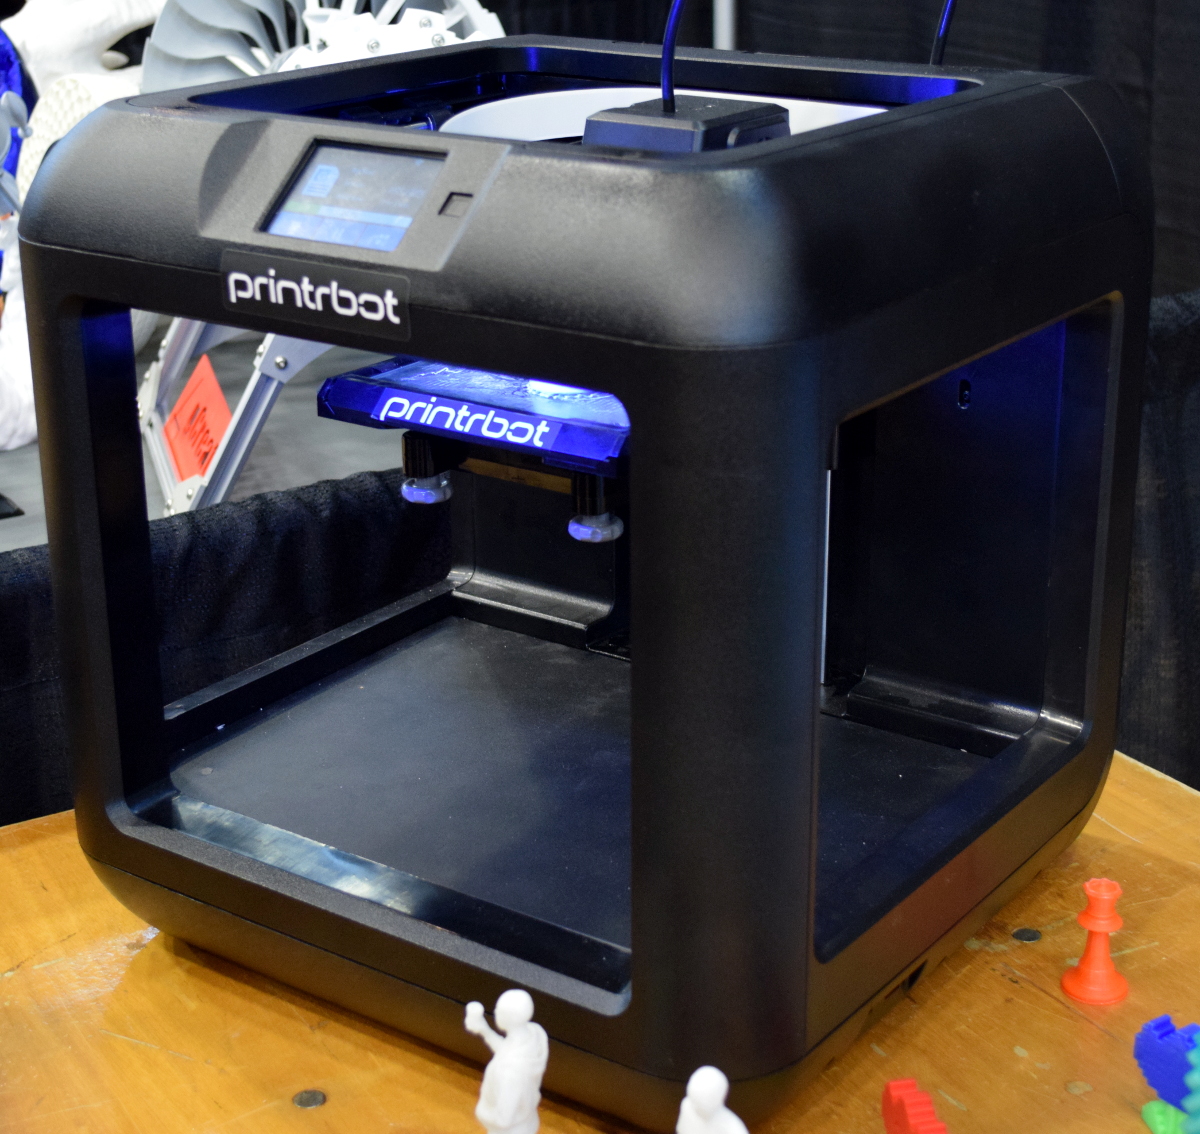
If you follow the desktop 3D printer market, it probably won’t surprise you to hear that nearly every 3D printer on display at the inaugural East Coast RepRap Festival (ERRF) was made in China. Even Printrbot CEO Brook Drumm had to admit that this was the year his company may finally bite the bullet and begin selling a branded and customized printer built overseas.
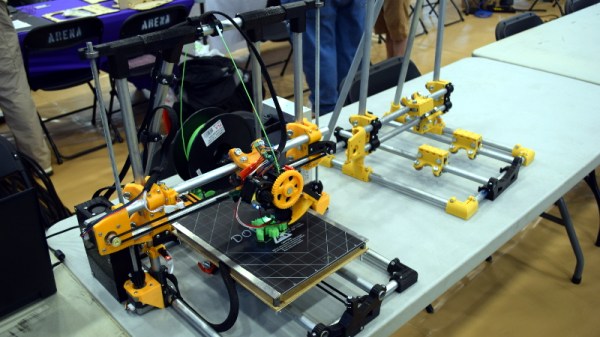
When you can get a decent (but let’s be clear, not great) 3D printer for $200 USD, it’s no surprise that American and European manufacturers are having a hard time staying competitive. But not everyone is seduced by low-cost printers. They know they could buy a decent printer for a couple hundred bucks, but for them that’s not the point. Some hackers are just as (if not more) interested in designing and building the machines than they are churning out little plastic boats with the finished product.
Luckily for us, these are also the type of folks who document their builds and make all their collected information and design files available for others under an open source license. Such builders exemplify the true spirit of the RepRap movement, and we’re happy to report that in a sea of imported printers, there were several interesting home built open source printers.
Whether you want to build your own copy of one of these machines, or simply get inspired by some of the ideas their creators had, these machines are physical proof that just because you can order a cheap 3D printer on eBay right now doesn’t mean you have to.
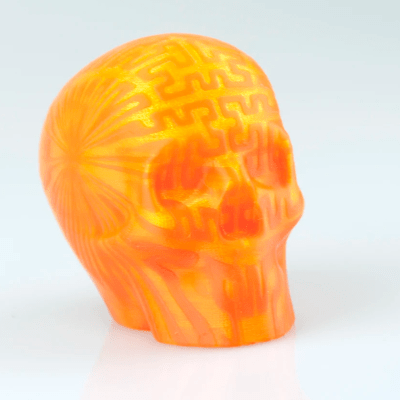
Just when it seems like we’ve juiced all the creative potential out of our 3D printers, a bold new feature lands on the table. Enter Velocity Painting, a concept brought to life by [Mark Wheadon] that textures our 3D prints with greyscale images.
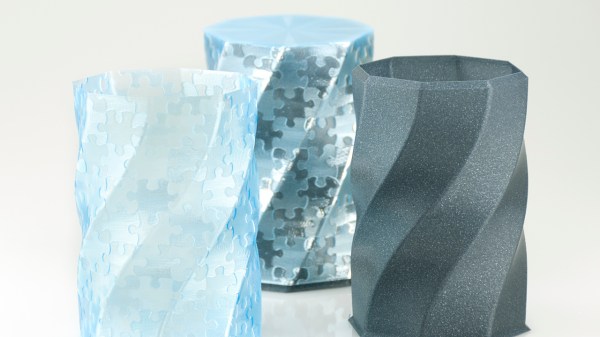
At its core, the technique is straightforward: skin an image onto a 3D print by varying the print speed in specific locations and, thereby, varying just how much plastic oozes out of the nozzle. While the concept seems simple, the result is stunning.
Velocity Painting opens up new ways of expression on top of an existing print with all the skinning opportunities. Imagine adding a texture for realism like this rook that’s been patterned with a brick layout, or imagine an aesthetic embellishment like the flames on [Mark’s] dragon print.
The results speak for themselves, and the growing number of users are proving it. Head on over to the gallery to indulge yourself in this delightful oozing aesthetic that’s sure to turn a few heads.
[Mark Wheadon’s] hack takes the mechanics of how we print and adds another creative tuning knob. If you’re looking for other embellishments for your prints, have a look at [David Shorey’s] work on texturizing fabrics.
One of the promises of 3D printing is that you can mass produce objects at home, printing out multiple copies of whatever you want. Unfortunately, the reality is a bit different: once you have printed something out, you usually need to remove it manually from the print bed. Unless you are [Replayreb], that is: he’s come up with a neat hack to remove a print from the print bed by using a custom bit of G-code to move the print head to knock the print off, into a waiting box.
If you search through an electrical engineering textbook, you probably aren’t going to find the phrase “gimmick capacitor” but every old ham radio operator knows about them. They come in handy when you need a very small capacitor of unknown value. For example, if you are trying to balance the stray capacitance in a circuit, you might not know exactly what value you need, but you know it won’t be very much. That’s when you want a gimmick capacitor.
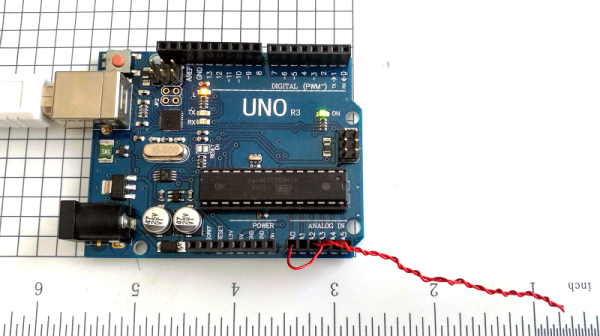
A gimmick capacitor is made by taking two strands of insulated wire and twisting them together; the length and the tightness of the twist determine the capacitance. Tightening or loosening the twist, or trimming some of the wire off, makes it tunable.
These are most commonly found in RF equipment or high-speed logic because of the small capacitance involved — usually about 1 to 2 pF per inch of twist or so. The thicker the insulation, the less capacitance you’ll get, so it is common to use magnet wire or something else with a thin insulating layer. You can take this one step further and decrease the spacing by stripping down one wire as long as it isn’t going to touch anything else.
Obviously, the insulation needs to be good enough for the voltage on them, an important consideration in tube circuits, for instance. But other than that, a gimmick capacitor is a straightforward tool to have in your box of design tricks. Can we take this further? Continue reading “These Capacitors Are A Cheap Gimmick”→
Octoprint is a household name for anyone into 3D printing and anyone regularly reading Hackaday. Described by creator Gina Häußge as “the snappy web interface for your 3D printer”, Octoprint allows you to control effectively any desktop 3D printer over the local network or Internet. It even has webcam support so you can watch your printer while it works, meaning you can finally put that video baby monitor back into the crib with Junior.
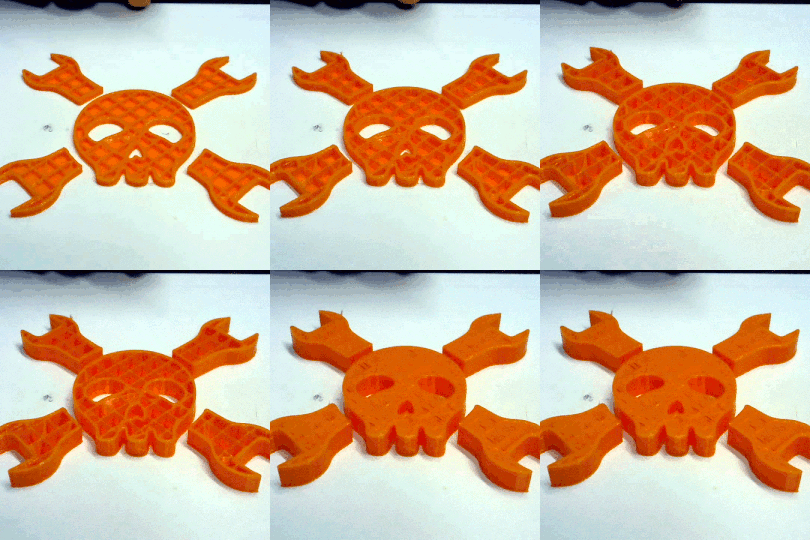
While the core functionality of Octoprint is fantastic alone, its true power is unlocked through the plugin system and the community that’s sprung up around it. With plugins, Octoprint can do everything from control RGB light strips in your printer’s enclosure to sending status messages via Discord. One particularly popular plugin that has been making the rounds lately is Octolapse by [FormerLurker]. This plugin provides a comprehensive intelligent system for creating time-lapse videos of prints.
What does that mean? Well, instead of simply taking a picture every few seconds like you’d do traditionally, Octolapse actually keeps track of the printer’s motions while its running. It can then take a picture at the opportune moment to create a number of user-selected effects. More importantly, it can even take control of the printer directly; moving the hotend away from the print before taking a picture. The effect is that the print simply “grows” out of the bed.
I thought it would be interesting to take a closer look at Octolapse and see just what it takes to create one of those awesome time-lapse videos. It turned out to be somewhat trickier than I anticipated, but the end results are so fantastic I’d say it’s a technique worth mastering.



 At its core, the technique is straightforward: skin an image onto a 3D print by varying the print speed in specific locations and, thereby, varying just how much plastic oozes out of the nozzle. While the concept seems simple, the result is stunning.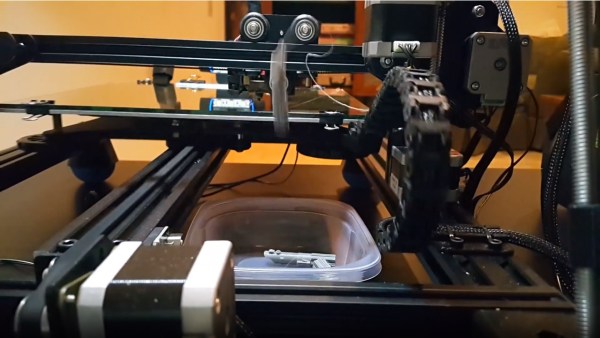

 While the core functionality of Octoprint is fantastic alone, its true power is unlocked through the plugin system and the community that’s sprung up around it. With plugins, Octoprint can do everything from control RGB light strips in your printer’s enclosure to sending status messages via Discord. One particularly popular plugin that has been making the rounds lately is







