33C3: Hunz Deconstructs The Amazon Dash Button

The Amazon Dash button is now in its second hardware revision, and in a talk at the 33rd Chaos Communications Congress, [Hunz] not only tears it apart and illuminates the differences with the first version, but he also manages to reverse engineer it enough to get his own code running. This opens up a whole raft of possibilities that go beyond the simple “intercept the IP traffic” style hacks that we’ve seen.
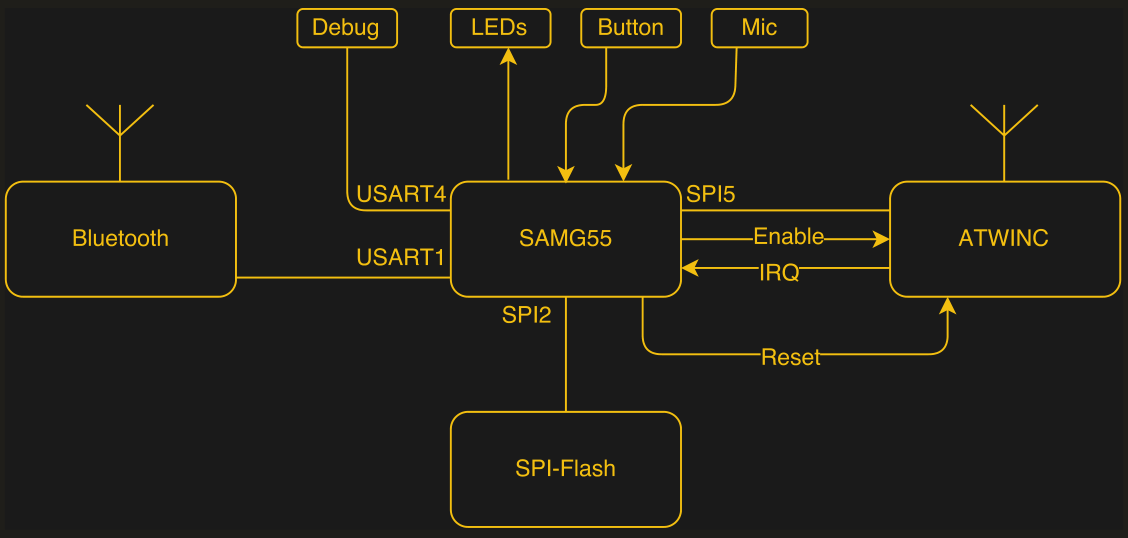
dash_block_diagramJust getting into the Dash is a bit of work, so buy two: one to cut apart and locate the parts that you have to avoid next time. Once you get in, everything is tiny! There are a lot of 0201 SMD parts. Hidden underneath a plastic blob (acetone!) is an Atmel ATSAMG55, a 120 MHz ARM Cortex-M4 with FPU, and a beefy CPU all around. There is also a 2.4 GHz radio with a built-in IP stack that handles all the WiFi, with built-in TLS support. Other parts include a boost voltage converter, a BTLE chipset, an LED, a microphone, and some SPI flash.

The strangest part of the device is the sleep mode. The voltage regulator is turned on by user button press and held on using a GPIO pin on the CPU. Once the microcontroller lets go of the power supply, all power is off until the button is pressed again. It’s hard to use any less power when sleeping. Even so, the microcontroller monitors the battery voltage and presumably phones home when it gets low.
Continue reading “33C3: Hunz Deconstructs The Amazon Dash Button”
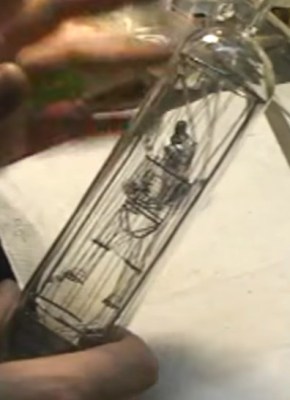
Darth Vader, In A Nixie Tube

This may be a controversial statement, but Nixie tubes have become a little passé in our community. Along comes another clock project, and oh look! It’s got Nixie tubes instead of 7-segment displays or an LCD. There was a time when this rediscovered archaic component was cool, but face it folks, it’s been done to death. Or has it?

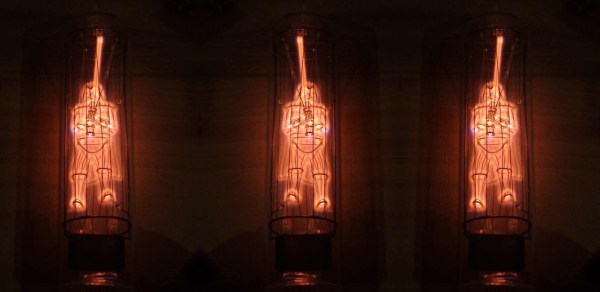
vadar-nixie-tube-unlitSo given a disaffection with the ubiquity of Nixies you might think that no Nixie project could rekindle that excitement. That might have been true, until the videos below the break came our way. [Tobias Bartusch] has made his own Nixie tube, and instead of numerals it contains a 3D model of [Darth Vader], complete with moving light saber. Suddenly the world of Nixies is interesting again.

The first video below the break shows us the tube in action. We see [Vader] from all angles, and his light saber. Below that is the second video which is a detailed story of the build. Be warned though, this is one that’s rather long.

The model is made by carefully shaping and spot welding Kanthal wire into the sculpture, a process during which (as [Tobias] says) you need to think like neon plasma. It is then encased in a cage-like structure which forms its other electrode. He takes us through the process of creating the glass envelope, in which the wire assembly is placed. The result is a slightly wireframe but very recognisable [Vader], and a unique tube.

Continue reading “Darth Vader, In A Nixie Tube”

An Awesome Interactive LED Table

If you want to create a large display with a matrix of LEDs, it’s a relatively straightforward process. Thanks to addressable LED tape and microcontrollers it becomes more of a software issue than one of hardware. [Vincent Deconinck] had some inexpensive WS2812 strips, so he sliced into an inexpensive IKEA coffee table  and mounted them in a grid beneath an acrylic sheet. Some work with Arduino Nanos and a Raspberry Pi later, and he had a very acceptable LED matrix table.

An attractive hack, you might say, and leave it at that. But he wasn’t satisfied enough to leave it there, and so to make something rather special he decided to add interactivity. With an infra-red emitter and receiver as part of each pixel, he was able to turn an LED table into an LED touchscreen, though to be slightly pedantic it’s not sensing touch as such.

The design of the IR sensors was not entirely straightforward though, because to ensure reliable detection and avoid illumination from the LED they had to be carefully mounted and enclosed in a tube. He also goes into some detail on the multiplexing circuitry he used to drive the whole array from more Arduinos and a GPIO expander.

The write-up for this project is a long one, but it’s well worth the read as the result is very impressive. There are several videos but we’ll show you the final one, the table playing touch screen Tetris.

Continue reading “An Awesome Interactive LED Table”

Cheap DIY FPV Micro-Drone

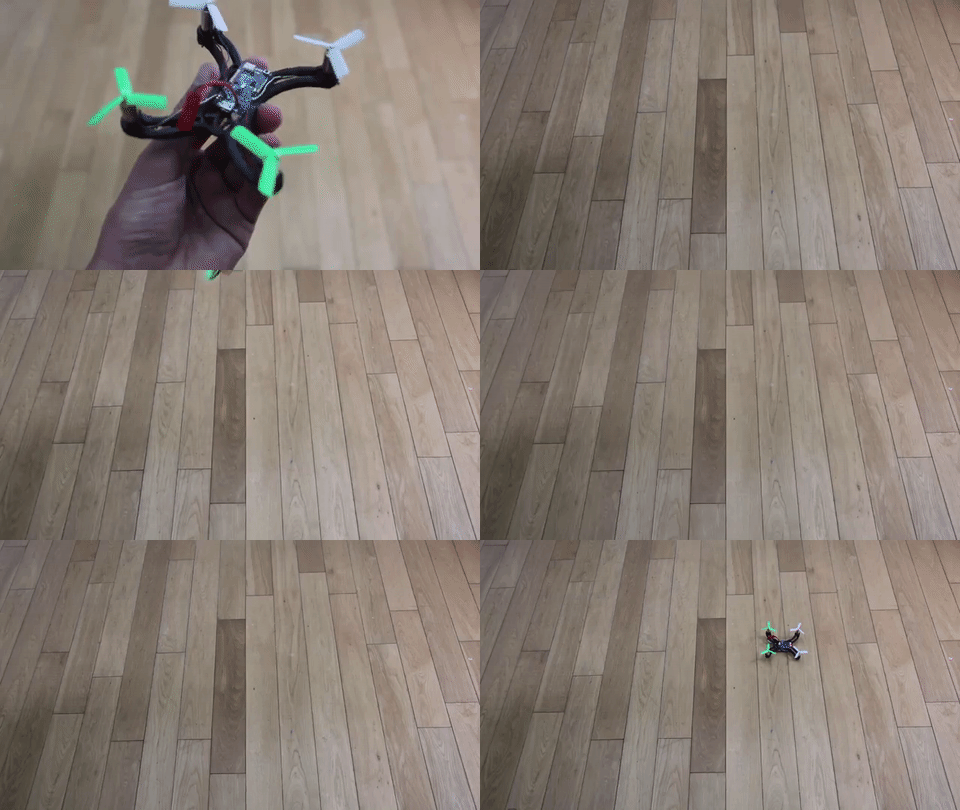
FPV drones are a fun but often costly hobby for beginners. Opting for a smaller drone will reduce the chance of damaging the drone when one invariably crashes and the smaller props are also a lot safer if there are any innocent bystanders. YouTuber and Instructables user [Constructed] wanted a cheap FPV capable drone that they could comfortably fly in-and-out of doors, so of course they built their own.

Once the drone’s frame was 3D printed, the most complex part about soldering four small-yet-powerful 8.5 mm motors to the Micro Scisky control board is ensuring that you attach them in the correct configuration and triple-checking them. A quick reshuffling of the battery connections and mounting the FPV camera all but completed the hardware side of the build.

Before plugging your flight controller into your PC to program, [Constructed] warns that the battery must be disconnected unless you want to fry your board. Otherwise, flashing the board and programming it simply requires patience and a lot of saving your work. Once that’s done and you’ve paired everything together, the sky — or ceiling — is the limit!

Continue reading “Cheap DIY FPV Micro-Drone”

GSM Sniffing On A Budget With Multi-RTL

If you want to eavesdrop on GSM phone conversations or data, it pays to have deep pockets, because you’re going to need to listen to a wide frequency range. Or, you can just use two cheap RTL-SDR units and some clever syncing software. [Piotr Krysik] presented his work on budget GSM hacking at Camp++ in August 2016, and the video of the presentation just came online now (embedded below). The punchline is a method of listening to both the uplink and downlink channels for a pittance.

[Piotr] knows his GSM phone tech, studying it by day and hacking on a GnuRadio GSM decoder by night. His presentation bears this out, and is a great overview of GSM hacking from 2007 to the present. The impetus for Multi-RTL comes out of this work as well. Although it was possible to hack into a cheap phone or use a single RTL-SDR to receive GSM signals, eavesdropping on both the uplink and downlink channels was still out of reach, because it required more bandwidth than the cheap RTL-SDR had. More like the bandwidth of two cheap RTL-SDR modules.

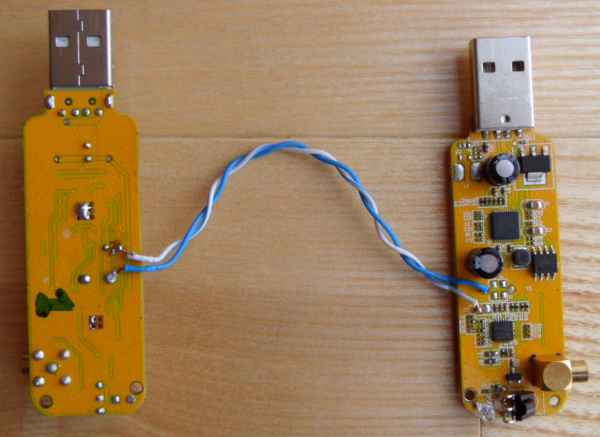
Getting two RTL-SDR modules to operate in phase is as easy as desoldering a crystal from one and slaving it to the other. Aligning the two absolutely in time required a very sweet hack. It turns out that the absolute timing is retained after a frequency switch, so both RTL-SDRs switch to the same channel, lock together on a single signal, and then switch back off, one to the uplink frequency and the other to the downlink. Multi-RTL is a GnuRadio source that takes care of this for you. Bam! Hundreds or thousands of dollar’s worth of gear replaced by commodity hardware you can buy anywhere for less than a fancy dinner. That’s a great hack, and a great presentation.
Continue reading “GSM Sniffing On A Budget With Multi-RTL”

Fixing My 4×4: The Battle Of The Bent Valves

If you know me at all, you know I’m a car guy. I’m pretty green as far as hardcore wrenching skills go, but I like to tackle problems with my vehicles myself – I like to learn by doing. What follows is the story of how I learned a few hard lessons when my faithful ride died slowly and painfully in my arms over the final months of 2016.

For context, my beast of a machine was a 1992 Daihatsu Feroza. It’s a 4WD with a 1.6 litre fuel injected four-cylinder engine. It had served me faithfully for over a year and was reading around 295,000 kilometers on the odometer. But I was moving house and needed to pull a trailer with all my possessions on an 800 km journey. I didn’t want to put the stress on the car but I didn’t have a whole lot of choice if I wanted to keep my bed and my prized Ricoh photocopier. I did my best to prepare the car, topping up the oil which had gotten perilously low and fitting new tyres. I’d had a hell of a time over the winter aquaplaning all over the place and wasn’t in the mood for a big ugly crash on the highway. Continue reading “Fixing My 4×4: The Battle Of The Bent Valves”

Increase The Range Of An ESP8266 With Duct Tape

For the longest time now, I’ve wanted to build a real, proper radio telescope. To me, this means a large parabolic reflector, a feed horn made of brass sheet, coat hanger wire, and at least for the initial experiments, an RTL-SDR dongle. I’ve done the calculations, looked at old C-band antennas on Craigslist, and even designed a mount or two that would make pointing the dish possible. I’ve done enough planning to know the results wouldn’t be great. After months of work, the best I could ever hope for is a very low-resolution image of the galactic plane. If I get lucky, there might be a bright spot corresponding to Sagittarius A.

There are better ways to build a radio telescope in your back yard, but the thought of having a gigantic parabolic dish out back, peering into the heavens, has stuck with me. I’ve even designed a dish that can be taken apart easily and transported because building your own dish is far cooler than buying a West Virginia state flower from a guy on Craigslist.

Recently, I was asked to come up with a futuristic, space-ey prop for an upcoming video. My custom-built, easily transportable parabolic antenna immediately sprang to mind. The idea of a three-meter diameter parabolic dish was rejected for something a little more practical and a little less expensive, but I did go so far as to do a few more calculations, open up a CAD program, and start work on the actual design. As a test, I decided to 3D print a small model of this dish. In creating this model, I inadvertently created the perfect WiFi antenna for an ESP8266 module using nothing but 3D printed parts, a bit of epoxy, and duct tape.

Continue reading “Increase The Range Of An ESP8266 With Duct Tape”