The phrase “Tesla vs. Edison” conjures up images of battling titans, mad scientists, from a bygone age. We can easily picture the two of them facing off, backed by glowing corona with lightning bolts emitting from their hands. The reality is a little different though. Their main point of contention was Tesla’s passion for AC vs. Edison’s drive to create DC power systems to power his lights. Their personalities also differed in many ways, the most relevant one here being their vastly different approaches to research. Here, then, is the story of their rivalry.
Wood may seem like a soft, weak material if you’re used to working with steel, but to do good work, you’ll quickly learn you need your tools sharp. Buying and maintaining a good set of tools can be expensive for the home gamer, so [shopbuilt] put together an Instructable on how to sharpen your woodworking tools on a budget.
The trick is to use sandpaper. It’s a good quality abrasive material and is readily available. You’ll want a selection of different grits – low grits to get started, higher grits when finishing. The reason this is cheaper is that you can get a selection of 5-10 different sandpapers for under $20. Getting even a couple of decent sharpening stones wouldn’t be possible at that price. In the long run, they’ll last longer but this is a budget option we’re talking about.
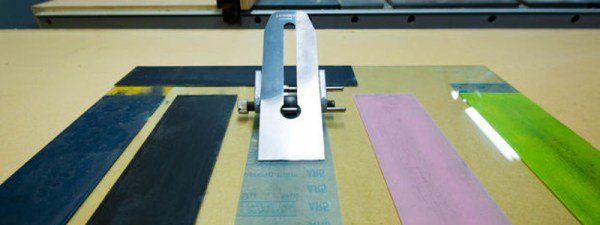
Obviously you can’t just sharpen something with sandpaper – [shopbuilt] suggests mounting the paper to the flattest surface you can find. The use of a tempered glass panel from a fridge shelf is, in our mind, an inspired choice here. 3D printer enthusiasts have been using similar techniques for heated beds for the best part of a decade now.
Hackaday is primarily a place for electronics hackers, but that’s not to say that we don’t see a fair number of projects where woodworking plays a key role. Magic mirror builds come to mind, as do restorations of antique radios, arcade machines built into coffee tables, and small cases for all manner of electronic and mechanical gadgets. In some of these projects, the woodworking really shines and makes the finished project pop. In others — well, let’s just say that some woodwork looks good from far, but is far from good.
In the almost five years since the launch of the original Raspberry Pi we have seen a huge array of competitors emerge in the inexpensive single board computer market. Many have created their own form factors, but an increasing number have gone straight for the jugular of the fruity board from Cambridge by copying its form factor and interfaces as closely as possible. We’ve seen sterling efforts from the likes of Banana Pi, Odroid, and several others, but none have yet succeeded in toppling it from its pedestal.
The ASUS Tinker specification.
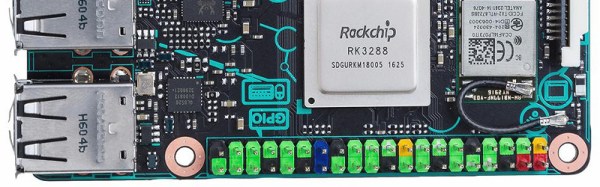
The latest contender in this arena might just make more of an impact though, because it comes from a major manufacturer, a name you will have heard of. Asus have quietly released their Tinker, board that follows the Pi form factor very closely, and packs a 1.8 GHz quad-core ARM Cortex A17 alongside an impressive spec we’ve captured as an image for this article. Though they are reticent about it on their website, there is a SlideShare presentation with some of the details, which we’ve placed below the break.
At £55 (about $68) where this is being written it’s more expensive than the Pi, but Asus go to great lengths to demonstrate that it is significantly faster. We will no doubt verify the accuracy of that claim as the boards find their way into the hands of our community. Still, it features a mostly-Pi-compatible I/O header, and the same display and camera connectors as the Pi. There is no information as to how compatible these last two are though.
Other boards in this arena have boasted impressive hardware, but have fallen down when it comes to the support for their operating systems. When you buy a Raspberry Pi it is not just the hardware you are taking on but the Raspbian operating system and its impressive community support. The Tinker supports Debian, so if Asus is to make a mark they must ensure that its support rivals that of the board it is targeting. If they succeed in that endeavor then the result can only be good news for us.
Recharging your mobile phone or your electric vehicle in a few minutes sure sounds appealing. Supercapacitor technology has the potential to deliver that kind of performance that batteries currently can’t, and while batteries are constantly improving, the pace of development is not very fast. Just remember your old Nokia mobile with Ni-Cad batteries and several days of usage before a recharge was needed. Today we have Lithium-Ion batteries and we have to charge our phones every single day. A better energy storage option is clearly needed, and supercapacitors seem to be the only technology that is close to replace the battery.
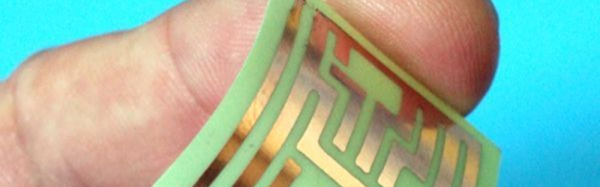
Let’s get it out of the way right up front: you still need to etch the boards. However, [Mikey77] found that flexible plastic (Ninjaflex) will adhere to a bare copper board if the initial layer height is set just right. By printing on a thin piece of copper or conductive fabric, a resist layer forms. After that, it is just simple etching to create a PCB. [Mikey77] used ferric chloride, but other etchants ought to work, as well.
Sound simple, but as usual, the devil is in the details. [Mikey77] found that for some reason white Ninjaflex stuck best. The PCB has to be stuck totally flat to the bed, and he uses spray adhesive to do that. Just printing with flexible filament can be a challenge. You need a totally constrained filament path, for one thing.
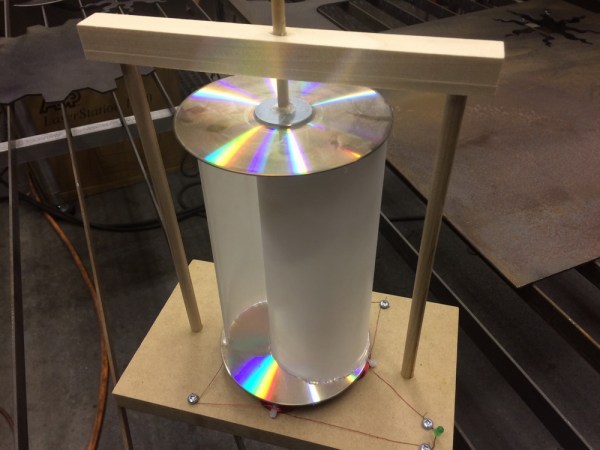
When we see a new build by [Gord] from Gord’s Garage, we never know what to expect. He seems to be pretty skilled at whatever he puts his hand to, with a great design sense and impeccable craftsmanship. You might expect him to tone it down a little for a STEM-outreach wind turbine project then, but when you get a chance to impress 28 fifth and sixth graders, you might as well go for it.
Starting with an idea from his daughter’s teacher for wind turbines each kid could make, [Gord] applied a little lean methodology so the kids would be able to complete the build in the allotted time. The design is simple – a couple of old CDs holding vertical sections of PVC tubing to catch the breeze and spin neodymium magnets over four flat coils of magnet wire. It’s enough to light a single LED and perhaps a kid’s imagination.
As simple as the turbine is, the process of building it needed to be stripped of as much unnecessary work as possible, and [Gord] really shines here. He built jigs and fixtures galore, pre-built some assemblies, and set up well-organized workstations for each step of the build. Everything was clearly labeled, adult volunteers were trained using the video after the break, and a good time was had by all.
Sometimes the hack isn’t in the product but in the process, and [Gord] managed to hack a success out a potential disaster of disappointed kids. If getting a taste of [Gord]’s style makes you want to see more, check out his guitar fretting jig or his brake rotor mancave clock.