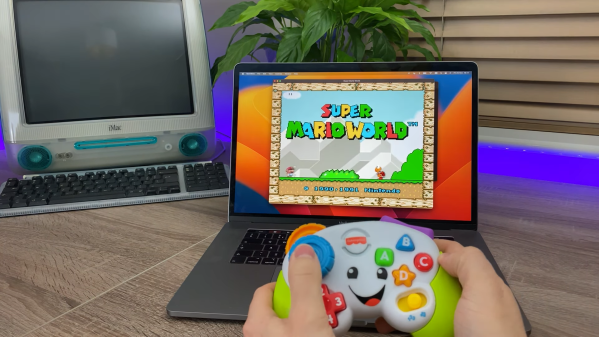
It’s important to instill healthy habits in your children when they’re still young. Preferences for sports, snacks and dinosaurs are typically formed in early childhood, as is loyalty to a specific gaming platform. [RetrogradeScene] apparently wished to steer his young daughter towards the Nintendo camp, but wasn’t looking forward to having her grubby hands touch his prized controllers. So he built her her own kid-friendly controller out of a Fisher-Price toy.
The toy in question is an imitation game controller that just makes funny sounds when you press the buttons. Converting it into a real, working game controller was a matter of soldering some wires onto the existing PCB and hooking them up to a microcontroller board, in this case a DFRobot FireBeetle. After loading the ESP32-BLE-Gamepad library and assigning the correct pin-button combinations in software [RetrogradeScene] ended up with a big, brightly-coloured gamepad that actually functioned as one.
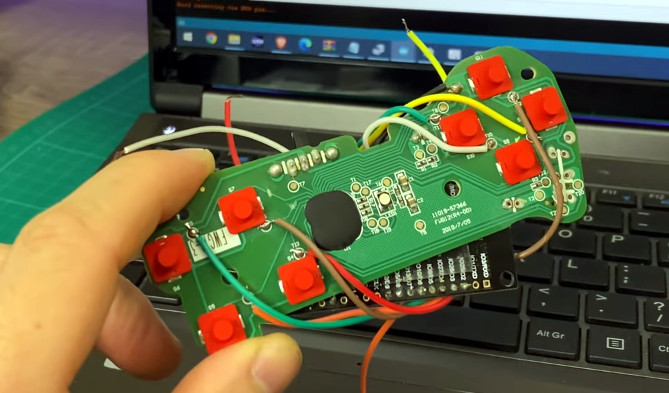 Unfortunately, the FireBeetle took up space where the original AAA batteries were sitting, so the hacked gamepad needed a new power source. Classic batteries are heavy and inconvenient anyway, so [RetrogradeScene] installed a modern lithium battery plus a USB-C port for charging. Of course, no Bluetooth gadget is complete without an accompanying smartphone app either: [RetrogradeScene] wrote one for his iPhone that enables him to quickly change the button layout between the Nintendo and Xbox styles.
This might be a rare example of someone making a gamepad from, well, a gamepad. We’ve seen a few more unusual things being converted into game controllers, ranging from a handful of LEGO bricks to entire cars.
Continue reading “Turning A Toy Gamepad Into A Real One, With Bluetooth”