This excellent content from the Hackaday writing crew highlights recurring topics and popular series like Linux-Fu, 3D-Printering, Hackaday Links, This Week in Security, Inputs of Interest, Profiles in Science, Retrotechtacular, Ask Hackaday, Teardowns, Reviews, and many more.
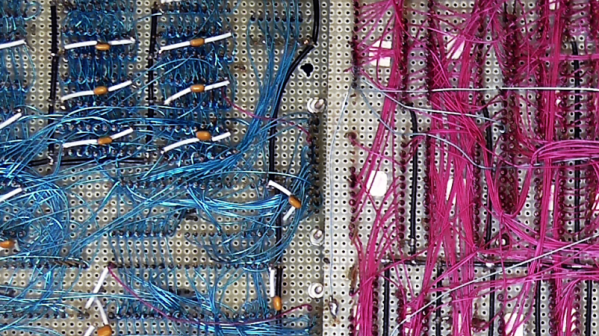
Back in the 70s when I started getting interested in electronics, tons of magazines catered to the hobbyist market. Popular Electronics was my favorite, and I think I remember the advertisements more than anything, probably because they outnumbered articles by a large margin. Looking back, it seemed like a lot of ad space was sold to companies hawking the tools and materials needed for wire wrapping, which was very popular for prototyping in the days before solderless breadboards were readily available. I remember beauty shots of neat rows of small, gold posts, with stripped wires wrapped evenly around them.
To the budding hobbyist, wire wrapping looked like the skill to have. With a huge selection of posts, terminals, and sockets for ICs and discrete components, as well as a wide range of manual and powered wrapping tools, it seemed like you could build anything with wire wrapping. But fast forward just a decade or so, and wire wrapping seemed to drop out of favor. And today — well, does anyone even wire wrap anymore?
If you got your start in electronics sometime after 1980 your first project might well have been to light up an LED. Microcontroller projects often light up an LED, too, and a blinking LED is something of the “hello world” program for embedded systems. If you tried lighting up your LED with a 9 V battery directly — not that you’d admit to it — you found it would light up. Once, anyway. The excess current blows up the LED which is why you need a current-limiting resistor. However, those current limiting resistors are really a poor excuse for a current source or sink. In many applications, you need a real current source and luckily, they aren’t hard to create.
As always with Circuit VR, we’ll be using LT Spice to examine the circuits. If you need a quick tutorial, start here and come back after that. If you use Linux, don’t be dismayed. I run LT Spice under WINE and it works great. You can find all the Spice files on GitHub.
OctoPrint is arguably the ultimate tool for remote 3D printer control and monitoring. Whether you simply want a way to send G-Code to your printer without it being physically connected to your computer or you want to be able to monitor a print from your phone while at work, OctoPrint is what you’re looking for. The core software itself is fantastic, and the community that has sprung up around the development of OctoPrint plugins has done an incredible job expanding the basic functionality into some very impressive new territory.
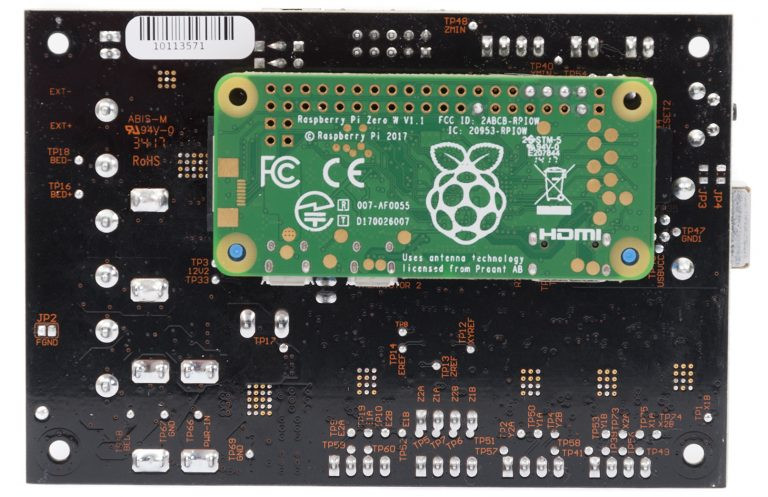
RAMBo 3D controller with Pi Zero Integration
But all that is on the software side; you still need to run OctoPrint on something. Technically speaking, OctoPrint could run on more or less anything you have lying around the workshop. It’s cross platform and doesn’t need anything more exotic than a free USB port to connect to the printer, and people have run it on everything from disused Windows desktops to cheap Android smartphones. But for many, the true “home” of OctoPrint is the Raspberry Pi.
As I’ve covered previously, the Raspberry Pi does make an exceptional platform for OctoPrint. Given the small size and low energy requirements of the Pi, it’s easy to integrate into your printer. The new Prusa i3 MK3 even includes a header right on the control board where you can plug in a Raspberry Pi Zero.
But while the Raspberry Pi is more than capable of controlling a 3D printer in real-time, there has always been some debate about its suitability for slicing STL files. Even on a desktop computer, it can sometimes be a time consuming chore to take an STL file and process it down to the raw G-Code file that will command the printer’s movements.
In an effort to quantify the slicing performance on the Raspberry Pi, I thought it would be interesting to do a head-to-head slicing comparison between the Pi Zero, the ever popular Pi 3, and the newest Pi 3 B+.
Right now, we’re running the greatest hardware competition on the planet. The Hackaday Prize is the Academy Awards of Open Hardware, and we’re opening the gates to thousands of hardware hackers, makers, and artist to create the next big thing.
Last week, we wrapped up the first challenge in this year’s Hackaday Prize. We’re now happy to announce twenty of those entries that have been selected to move to the final round and have been awarded a $1000 cash prize. Congratulations to the winners for the Open Hardware Design Challenge portion of the Hackaday Prize. Here are winners, in no particular order:
Open Hardware Design Challenge Hackaday Prize Finalists:
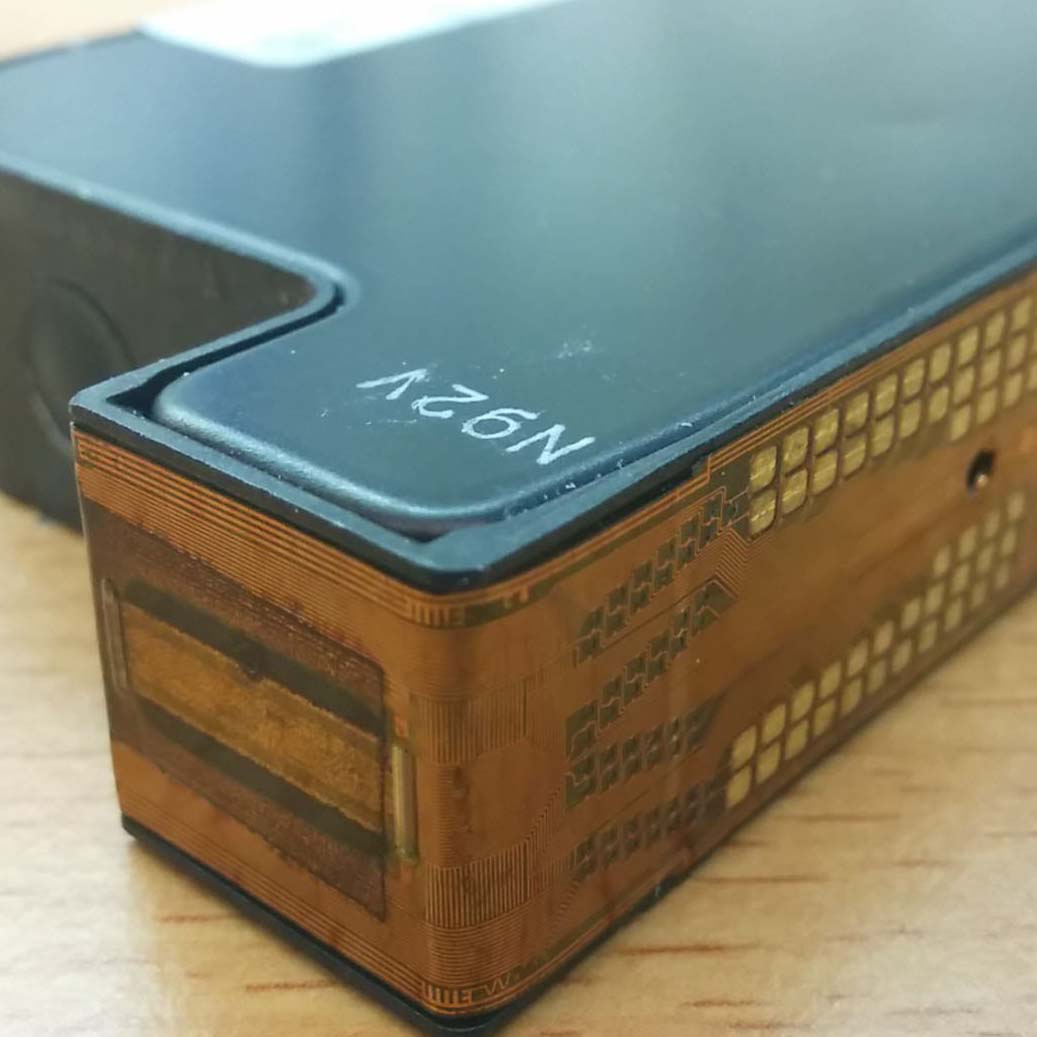
The Oasis 3D Printer repurposes HP ink cartridges to build a powder-baseed 3D printer
Just take a look at these projects. They are the best of the best, and there’s still more to come. We enjoyed seeing projects that repurpose off-the-shelf technology to vastly extend the capabilities of home manufacturing with the Oasis 3DP. This project from [Yvo de Haas] takes ink cartridges from HP printers and uses it to build a powder-based 3D printer. That’s something that really hasn’t been done in the world of homebuilt 3D printers, and the Oasis 3DP already has working hardware. It truly is one of the more interesting projects we’ve ever seen, and not just because [Yvo] is dealing with dozens of tiny micro pumps squirting binder out of microscopic nozzles.
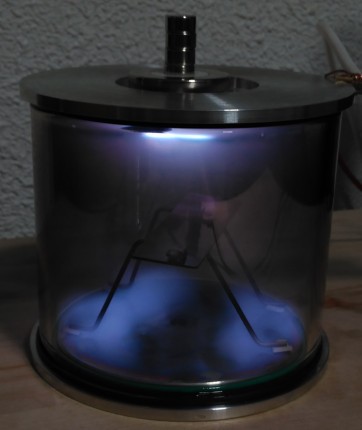
But that’s not all. There were hundreds of projects entered in the Hackaday Prize for this round, and our only regret is that we could only pick twenty winners for the Open Hardware Design Challenge. Just check out Semiconductors @ Home, a project from [Nixie] — it’s a project trying to make sand blink. [Nixie] is building all the tools to make semiconductors at home. Being able to build a simple FET is amazing, and to do that you need a fume hood to contain the dangerous hydrofluoric acid, a vacuum chamber for sputtering deposition, and a fancy oven with a controlled atmosphere. These tools are [Nixie’s] entry in the design challenge. This isn’t your garden variety hardware hacking; this is advanced hardware hacking.
Not impressed with DIY semiconductors? You’re a terrible person, but okay. How about an easy way to read rotary encoders? [fattore.saimon] and [Atikaimu] are building an I2C Encoder, an easy way to read multiple rotary encoders with just two microcontroller pins. Reading rotary encoders is one of the deceptively difficult tasks in electrical engineering; you really need some interrupts to do it right, and a microcontroller really only has a few of those to spare. [fattore] and [atikaimu]’s project does away with that problem, and puts rotary encoders on a board that can be read with a normal I2C bus. This means anyone can add a dozen rotary encoders to any project easily. Did anyone say MIDI controllers? Yes, that is possible. Everything from musical instruments to impressive control panels is possible with the I2C encoder, and it’s all Open Hardware.
Are you still not entertained? [Carl Bugeja] built a motor out of a PCB. Over the last decade, the price of custom fabricated printed circuit boards has dropped precipitously, and that means anyone can experiment with copper foil and fiberglass. [Carl] figured that since you can put coils on a PCB, you could also make a motor. While we’re only looking at a 1 Watt motor here, this is a brushless motor made out of printed circuit boards. It’s amazing, you’ve never seen it before, and we have absolutely no idea how many uses people will find a use for this amazing technology.
These are the winners of the Open Hardware Design Challenge in the Hackaday Prize, and we have a fondness for Open tools that are capable of building even more open hardware. If you want an example of that, you need only look at the Arcus-3D-P1 from [Daren Schwenke]. This is a project to add a lightweight pick and place head to any 3D printer. Below a certain size, a pick and place machine is necessary to create electronics, and almost everyone has a 3D printer these days. The Arcus-3D-P1 is an attachment for any 3D printer to turn it from a CNC hot glue gun into a machine that builds electronics. It’s Open Hardware, and hardware that creates hardware. It’s astonishing, and it’s happening on Hackaday.io.
Congratulations to all who entered the first challenge, and the twenty excellent entries that are moving to the finals. We can’t wait to see what other projects will make it to the finals in the Hackaday Prize, the greatest hardware competition on the planet.
Who will win the 2018 Hackaday Prize?
Who will win the Hackaday Prize? These finalists in the Open Hardware design challenge are now in the running for the final round of the Hackaday Prize where they will have the chance to win the Grand Prize $50,000 USD. That doesn’t mean you still can’t get in on the action; there are four more challenges left in the Hackaday Prize.
Right now, we’re in the middle of the Robotics Module Challenge, and after that, we’ll launch into the Power Harvesting Challenge, the Human Computer Interface Challenge, and finally the Musical Instrument challenge. There’s still time to win your place among the hardware greats, so start your Hackaday Prize entry now.
For as busy as things can get at the grocery store on a typical afternoon just before the dinner hour, at least the modern experience has one thing going for it: it’s relatively quiet. Aside from the mumbled greetings and “Paper or plastic?” questions from the cashier, and the occasional screaming baby in the next aisle, the only sound you tend to hear is the beeping of the barcode scanner as your purchase is tallied up.
Jump back just 40 years and the same scene was raucous, with cashiers reading price tags and pounding numbers into behemoth electromechanical cash registers. Back then, if you wanted help with any arithmetic with more than just a few operations, some kind of mechanical calculator was your only choice. From simple “one-banger” adding machines to complex analog computers, mechanical devices were surprisingly capable data processing tools. Here’s a brief look at how some of the simpler ones worked.
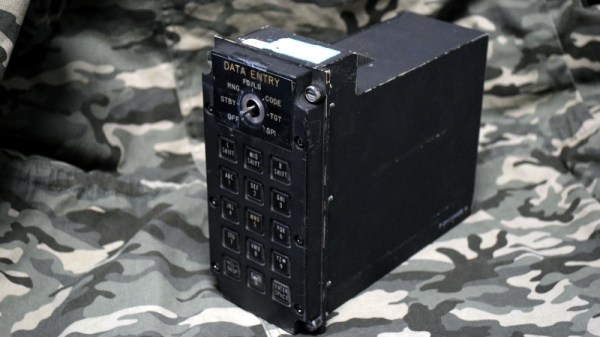
It’s time once again to see how those tax dollars are spent, this time in the form of a “Data Entry Keyboard” manufactured by Hughes Helicopters. This device was built circa 1986 or so, and was used in the AH-64A Apache. Specifically, this panel would have been located by the gunner’s left knee, and served as a general purpose input device for the Apache’s Fire Control System. Eventually the Apache was upgraded with a so-called “glass cockpit”; consolidating various vehicle functions into a handful of multi-purpose digital displays. As such, this particular device became obsolete and was pulled from the active Apache fleet.
The military vehicle aficionados out there may know that while the Apache is currently a product of Boeing, it was originally designed by Hughes Helicopter. In 1984, McDonnell Douglas purchased Hughes Helicopter and took over production of the Apache, and then McDonnell Douglas themselves were merged with Boeing in 1997.
So it’s somewhat interesting that this device bears the name of Hughes Helicopter, as of the time it was manufactured, they would have been known as McDonnell Douglas Helicopter Systems. Presumably they had to work through existing stock of components that already had Hughes branding on them, leaving some transitional examples such as this one.
But you didn’t come here for a history lesson on the American military-industrial complex, you want to know about the hardware itself. So let’s crack it open to see what we can learn about this piece of aviation history.
Hackaday Belgrade preparations have now passed the flash point and the hacker village that is set to descend on Serbia in a few weeks grows larger and more awesome by the day. Prepare for a massive data dump on what is in store. But before you go any further, make sure you have a ticket.