A fully stocked freezer can be a blessing, but it’s also a disaster waiting to happen. Depending on your tastes, there could be hundreds of dollars worth of food in there, and the only thing between it and the landfill is an uninterrupted supply of electricity. Keep the freezer in an out-of-the-way spot and your food is at even greater risk.
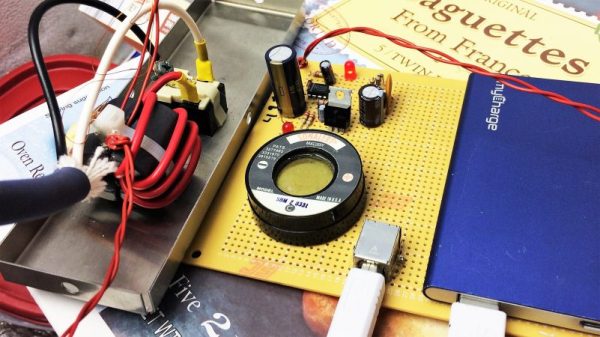
Mitigating that risk is the job of this junkbox power failure alarm. [Derek]’s freezer is in the garage, where GFCI outlets are mandated by code. We’ve covered circuit protection before, including GFCIs, and while they can save a life, they can also trip accidentally and cost you your steaks. [Derek] whipped up a simple alarm based on current flow to the freezer. A home-brew current transformer made from a split ferrite core and some magnet wire is the sensor, and a couple of op-amps and a 555 timer make up the detection and alarm part. And it’s all junk bin stuff — get a load of that Mallory Sonalert from 1983!
Granted, loss of power on a branch circuit is probably one of the less likely failure modes for a freezer, but the principles are generally applicable and worth knowing. And hats off to [Derek] for eschewing the microcontroller and rolling this old school. Not that there’s anything wrong with IoT fridge and freezer alarms.