A cold boot attack is a way to extract RAM contents from a running system by power cycling it and reading out RAM immediately after loading your own OS. How easy is it for you to perform such an attack? As [anfractuosity] shows, you can perform a cold boot attack with a Raspberry Pi, with a reasonably simple hardware setup and a hefty chunk of bare-metal code.
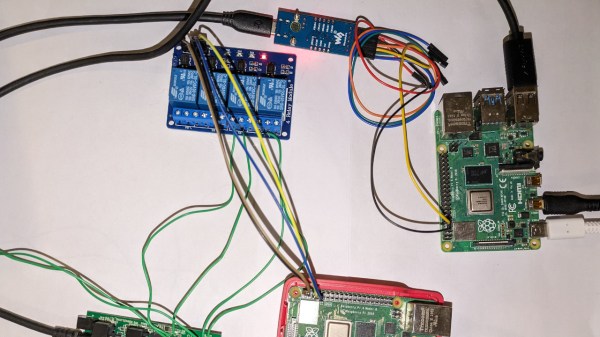
[anfractuosity]’s setup is simple enough. The Pi 4 under attack is set up to boot from USB drive, and a relay board has it switch between two possible USB drives to boot from: one with a program that fills RAM with , and another with a program that extracts RAM out through UART. The process is controlled by another Pi controlling the relays through GPIOs, that also monitors the target Pi’s UART and uses it as a channel to extract memory.
The outcomes are pretty impressive. After 0.75s of power-down, most of the image could be extracted. That’s without any cooling, so abusing a can of electronics duster is likely to improve these results dramatically. Want to play with cold boot attacks? [anfractuosity]’s code is great for getting your feet wet. Furthermore, the code examples provided serve as a wonderful playground for general memory attack research.
Raspberry Pi not fun enough for you anymore? Well then, you can always start playing with Android phones!