Analog Noise Generator, Fighter Of Other Noises

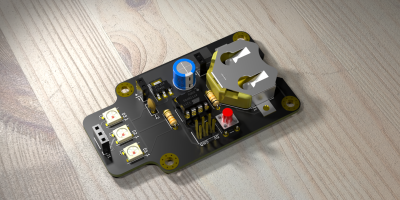
A chaotic drone of meaningless sound to lull the human brain out of its usual drive to latch on to patterns can at times be a welcome thing. A nonsense background din — like an old television tuned to a dead channel — can help drown out distractions and other invading sounds when earplugs aren’t enough. As [mitxela] explains, this can be done with an MP3 file of white noise, and that is a solution that works perfectly well for most practical purposes. However he found himself wanting a more refined hardware noise generator with analog controls to fine tune the output, and so the Rumbler was born.

It’s a tight fit, but it does fit.

The Rumbler isn’t just a white noise generator. White noise has a flat spectrum, but the noise from the Rumbler is closer to Red or Brownian Noise. The different colors of noise have specific definitions, but the Rumbler’s output is really just white noise that has been put through some low pass filters to create an output closer to a nice background rumble that sounds pleasant, whereas white noise is more like flat static.

Why bother with doing this? Mainly because building things is fun, but there is also the idea that this is better at blocking out nuisance sounds from neighboring human activities. By the time distant music (or television, or talking, or shouting) has trickled through walls and into one’s eardrums, the higher frequencies have been much more strongly attenuated than the lower frequencies. This is why one can easily hear the bass from a nearby party’s music, but the lyrics don’t survive the trip through walls and windows nearly as well. The noise from the Rumbler is simply a better fit to those more durable lower frequencies.

[Mitxela]’s writeup has quite a few useful tips on analog design and prototyping, so give it a read even if you’re not planning to make your own analog noise box. Want to hear the Rumbler for yourself? There’s an embedded audio sample near the bottom of the page, so go check it out.

For a truly modern application of white noise, check out the cone of silence for snooping smart speakers.

DIY Filtered Positive Pressure Suit Shows Fine Workmanship

[Andrew]’s Air filtering unit & positive pressure supply might look like something off the set of Ghostbusters, but it’s an experiment in making a makeshift (but feasible) positive pressure suit. The idea is to provide an excess of filtered air to what is essentially an inflatable soft helmet. The wearer can breathe filtered air while the positive pressure means nothing else gets in. It’s definitely an involved build that uses some specific hardware he had on hand, but the workmanship is great and shows some thoughtful design elements.

The unit has three stacked filters that can be easily swapped. The first stage is medical mask material, intended to catch most large particles, which is supported by a honeycomb frame. The next filter is an off-the-shelf HEPA filter sealed with a gasket; these are available in a wide variety of sizes and shapes so [Andrew] selected one that was a good fit. The third and final stage is an activated carbon filter that, like the first stage, is supported by a honeycomb frame. The idea is that air that makes it through all three filters is safe (or at least safer) to breathe. There isn’t any need for the helmet part to be leakproof, because the positive pressure relative to the environment means nothing gets in.

Air is sucked through the filters and moved to the helmet by an HP BLc7000 server fan unit, which he had on hand but are also readily available on eBay. These fan units are capable of shoveling a surprising amount of air, if one doesn’t mind a surprising amount of noise in the process, so while stacked filter stages certainly impede airflow, the fan unit handles it easily. The BLc7000 isn’t a simple DC motor and requires a driver, so for reference [Andrew] has a short YouTube video of how the fan works and acts.

All the 3D models and design files are available online should anyone wish to take a closer look. It’s certainly a neat experiment in making a filtered positive pressure supply and head cover with materials that are fairly common. If [Andrew] ever wants to move to a whole-body suit, maybe repurpose an old Halloween costume into a serviceable positive pressure suit.

How To Retrofit A Pick And Place Machine For OpenPnP, In Detail

[Erich Styger] owns a Charmhigh CHM-T36VA pick and place machine, which he describes as well-built and a great value of hardware for the money. However, the software end is less impressive, with a proprietary controller that is functional but not great. The good news is that it is possible to retrofit the machine to use the OpenPnP framework, which is open-source and offers more features. Even better, [Erich] has already done and documented all the hard parts!

The CHM-T36VA has two heads, vision system, and uses drag feeders.

The conversion requires upgrading a few hardware parts such as the cameras, replacing the controller’s firmware, then installing and configuring OpenPnP (which runs on an attached PC.)

[Erich] does not recommend this conversion for anyone who is not very familiar with electronics, or has any worries about voiding warranties. Barring that, he suspects the conversion could be done in about a day or two’s worth of focused work. It took him two weeks, including time spent fine-tuning the first production job. He says the bulk of the time was spent on configuration, but he has shared his configuration on GitHub in the hopes that it will save a lot of time for anyone using the same hardware.

After populating some 300 boards and placing over 7000 parts, he’s very happy with the results. The machine places between 600 and 700 parts per hour, so speed might not be amazing but it’s perfectly serviceable. [Erich] finds that while the machine runs a little slower than it did with the original controller, it also runs much smoother and quieter overall. In return he gets what he truly wanted: a pick and place machine whose operation and configuration is entirely open and accessible. You can see it in action in the video, embedded below.

Continue reading “How To Retrofit A Pick And Place Machine For OpenPnP, In Detail”

Day Clock Monitors Air Quality Of The Great Indoors

As the world settles into this pandemic, some things are still difficult to mentally reckon, such as the day of the week. We featured a printed day clock a few months ago that used a large pointer to provide this basic psyche-grounding information. In the years since then, [Jeff Thieleke] whipped up a feature-rich remix that adds indoor air quality readings and a lot more.

Like [phreakmonkey]’s original day tripper, an ESP32 takes care of figuring out what day it is and moves a 9 g servo accordingly. [Jeff] wanted a little more visual action, so the pointer moves a tad bit every hour. A temperature/humidity sensor and a separate CO₂ sensor output their readings to an LCD screen mounted under the pointer. Since [Jeff] is keeping this across the basement workshop from the bench, the data is also available from a web server running on the ESP32 via XML and JSON, and the day clock can get OTA updates.

Need a little more specificity than just eyeballing a pointer? Here’s a New Times clock that gives slightly more detail.

Cast Metal From Prints To Solidify Childhood Memories

As far as the hacker’s toolbox goes, the 3D printer is way up there in terms of utility. Sure, it takes time to learn the ins and outs of designing, slicing, and extruding, but after that, the world is pretty much your additive oyster. Follow those design dreams, or use it to replace the things that break. The icing on the cake? You can chase those dreams into other materials, because 3D prints can be used to cast metal.

[RetroTech Journal] wanted to fry up some rosette cookies, a Scandinavian delight from his youth that look a lot like fancy, personal funnel cakes. They’re made with special aluminium irons that shape the dough while it fries, as opposed to the jumbled chaos that is funnel cake.

Rosette irons come in a few traditional shapes, but once you get tired of those, it’s up to you to cast them in aluminium. And how would you go about doing that? By creating a firmly-packed sand mold using a mounted 3D print.

In the endlessly entertaining video after the break, [RetroTech Journal] takes you through the entire process from CAD to cookies. It has everything you could possibly want: LEGO stop-motion, claymation, a little bit of cooking, and a whole lot of knowledge. We can’t wait to see what comes next.

We’ve seen quite a few sand casting projects over the years, but this lathe is among the most useful.

Continue reading “Cast Metal From Prints To Solidify Childhood Memories”

Beautiful Sourdough Bread At Home Thanks To Dynamic Recipe Parameterization

More people are making sourdough at home than ever before, and while it may not take a lot of effort to find a decent recipe, it’s quite another thing to try using recipes to figure out how and why bread actually works. Thankfully, [Makefast Workshop] has turned copious research and hundreds of trials into a dynamic sourdough (and semi-sourdough) bread recipe chock-full of of drop-down options to customize not just ingredients, but baking methods and other recipe elements as well. Want to adjust quantities or loaf styles? Play with hydration or flour type? It’s all right there, and they even have quick-set options for their personal favorites.

In order to do all this, [Makefast Workshop] needed to understand bread at a deeper level than is usually called for. During research, they observed that the format of recipes was often an obstacle to understanding how good bread actually gets made. The reason for this is simple: recipes are presented as standalone documents describing a fixed process; a set of specific steps that, when followed, yield a particular result. What they do not normally do is describe the interplay and balance between ingredients and processes, which makes it difficult to understand how and why exactly the recipe produces what it does. Without that knowledge, it’s impossible to know what elements can be adjusted, and how. The dynamic recipe changes all that.

[Makefast Workshop] performed hundreds of tests, dialing in parameters one by one, to gain the insights needed to populate their dynamic recipe. It’s got clear processes and drop-down options that dynamically update not just the recipe steps, but also the URL. This means that one can fiddle the recipe to one’s desire, then simply copy and paste the URL to keep track of what one has baked.

When it comes to thoughtful approaches to food, this certainly isn’t [Makefast Workshop]’s first rodeo. We covered their beautiful directions for creating delicious speculoos, complete with effective 3D printed molds for a modern twist on a Belgian classic.

Ironclad Tips For Copper-Clad Prototyping

The idea of trying to prototype with SMD parts on the fly sounds like insanity, right? But then we watched [Leo Fernekes] walk calmly and carefully through his process (video, embedded below). Suddenly, SMD prototyping jumped onto our list of things to try soon.

[Leo] speaks from a lot of experience and tight client timelines, so this video is a fourteen-minute masterclass in using copper-clad board as a Manhattan-style scratch pad. He starts by making a renewable tool for scraping away copper by grinding down and shaping an old X-Acto blade into a kind of sharpened Swiss Army knife bottle opener shape. That alone is mind-blowing, but [Leo] keeps on going.

In these prototypes, he uses the through-hole version of whatever microcontroller is in the design. For everything else, he uses the exact SMT part that will end up on the PCB that someone else is busy designing in the meantime.

After laying the board out on paper, [Leo] carves out the islands of conductivity, beep-checks them for shorts, shines the whole thing with steel wool, and goes to town.

The tips and tricks keep coming as he makes jumps and joins ground planes with bare copper wire insulated with heat-proof Teflon tubing, and lays out the benefits of building up a stash of connectors and shelling out the money for a good crimp tool.

And why do you need a good crimp tool? Because when they’re done properly, crimped connections are stronger and more reliable than solder. There’s a lot more to them than you might think.

Continue reading “Ironclad Tips For Copper-Clad Prototyping”