Hacking The ZH03B Laser Particle Sensor

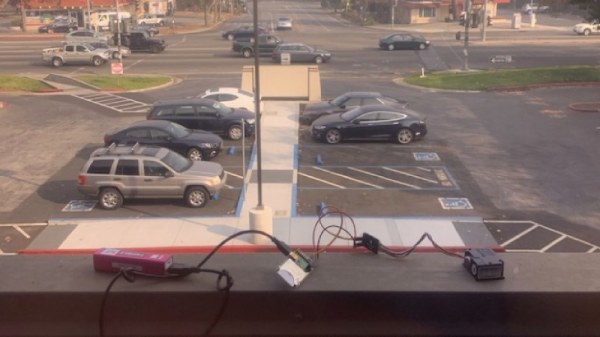
Laser particle detectors are a high-tech way for quantifying whats floating around in the air. With a fan, a laser, and a sensitive photodetector, they can measure smoke and other particulates in real-time. Surprisingly, they are also fairly cheap, going for less than $20 USD on some import sites. They just need a bit of encouragement to do our bidding.

[Dave Thompson] picked up a ZH03B recently and wanted to get it working with his favorite sensor platform, Mycodo. With a sprinkling of hardware and software, he was able to get these cheap laser particle sensors working on his Raspberry Pi, and his work was ultimately incorporated upstream into Mycodo. Truly living the open source dream.

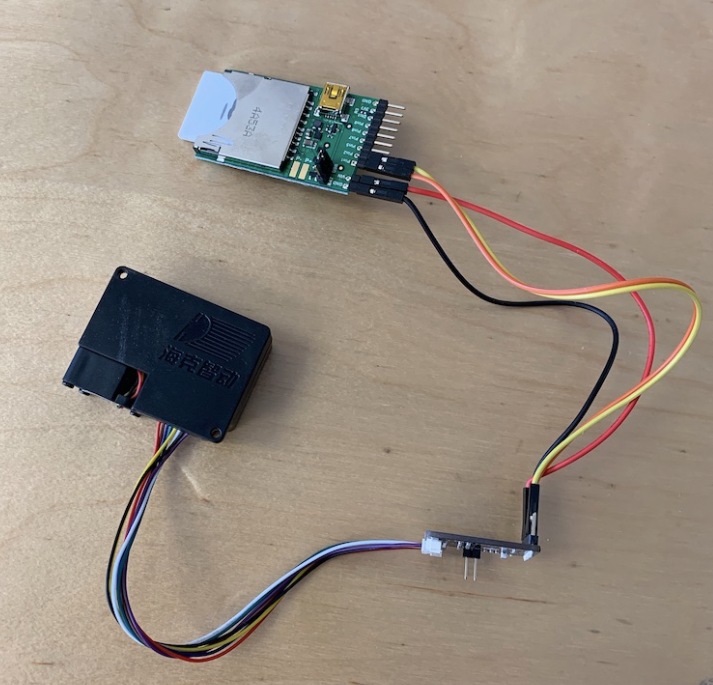
The ZH03B has PWM and UART output modes, but [Dave] focused his attention on UART. With the addition of a CP2102 USB-UART adapter, he was able to connect it to his Pi and Mac, but still needed to figure out what it was saying. He eventually came up with some Python code that lets you use the sensor both as part of a larger network or service like Mycodo and as a stand-alone device.

His basic Python script (currently only tested on Linux and OS X), loops continuously and gives a running output of the PM1, PM2.5, and PM10 measurements. These correspond to particles with a diameter of 1, 2.5, and 10 micrometers respectively. If you want to plug the sensor into another service, the Python library is a bit more mature and lets you do things like turn off the ZH03B’s fan to save power.

These sensors are getting cheap enough that you can build distributed networks of them, a big breakthrough for crowd-sourced environmental monitoring; especially with hackers writing open source code to support them.

Turn A Cheap 3D Printer Into A Cheap Laser Cutter

We know it’s hard to hear it, but the days of you being a hotshot at the local Hackerspace because you’ve got a 3D printer at home are long gone. While they’re still one of the most persnickety pieces of gear on the hacker’s bench, they’re certainly not the rarest anymore. Some of these printers are so cheap now they’re almost impulse buys. Like it or not, few people outside of your grandmother are going to be impressed when you tell them you’ve got a personal 3D printer anymore; and we wouldn’t be surprised if even granny picked up a Monoprice Mini during the last open box sale.

But while 3D printer ownership isn’t the pinnacle of geek cred it once was, at least there’s a silver lining: cheap motion platforms we can hack on. [squix] writes in to tell us about how he added a laser to his $200 USD Tevo Tarantula 3D printer, greatly expanding the machine’s capabilities without breaking the bank. The information in his write-up is pretty broadly applicable to most common 3D printer designs, so even if you don’t have a Tarantula it shouldn’t be too hard to adapt the concept.

The laser is a 2.5 W 445 nm module which is very popular with low-cost laser cutter setups. It’s a fully self-contained air cooled unit that just needs a source of 12 V to fire up. That makes it particularly well suited to retrofitting, as you don’t need to shoehorn in any extra support electronics. [squix] simply connected it to the existing power wires for the part cooling fan he added to the Tarantula previously.

You may want to check the specs for your 3D printer’s control board before attaching such a high current device to the fan connector. Best case it just overloads the board’s regulator and shuts down, worst case the magic smoke might escape. A wise precaution here might be to put a MOSFET between the board’s fan output the and the laser, but we won’t tell you how to live your life. As far as laser safety, this device should probably work inside an opaque box, or behind closed doors.

Once the laser is hanging off the fan port of your printer’s controller, you can turn it on with the normal GCode commands for fan control, M106 and M107 (to turn it on and off, respectively). You can even control the laser’s power level by adding an argument to the “on” command like: M106 S30.

Then you just need to mount the laser, and it’s more or less business as usual. Controlling a laser engraver/cutter isn’t really that different from controlling a 3D printer, so [squix] is still using OctoPrint to command the machine; the trick is giving it a “3D model” that’s just a 2D image with no Z changes to worry about. We’ve seen the process for doing that in Inkscape previously.

With this laser module going for as little as $60 USD (assuming you’ve got a 3D printer or two laying around to do the conversion on), this is a pretty cheap way to get into the subtractive manufacturing game. Next stop from there is getting one of those K40’s everyone’s talking about.

Continue reading “Turn A Cheap 3D Printer Into A Cheap Laser Cutter”

Faux Aircon Units, Made Entirely From 2D Cuts

2D design and part fabrication doesn’t limit one to a 2D finished product, and that’s well-demonstrated in these Faux Aircon Units [Martin Raynsford] created to help flesh out the cyberpunk-themed Null Sector at the recent 2018 Electromagnetic Field hacker camp in the UK. Null Sector is composed primarily of shipping containers and creative lighting and props, and these fake air conditioner units helped add to the utilitarian ambiance while also having the pleasant side effect of covering up the occasional shipping container logo. Adding to the effect was that the fan blades can spin freely in stray air currents; that plus a convincing rust effect made them a success.

Fan hubs, showing spots for fan blades to be glued. With the exception of embedded bearings, the entire hub (like the rest of the unit) is made from laser-cut MDF.

The units are made almost entirely from laser-cut MDF. The fan blades are cut from the waste pieces left over from the tri-pronged holes, and really showing off the “making 3D assemblies out of 2D materials” aspect are the fan hubs which are (with the exception of bearings) made from laser-cut pieces; a close-up of the hubs is shown here.

Capping off the project is some paint and the rusted appearance. How did [Martin] get such a convincing rust effect? By using real rust, as it turns out. Some cyanoacrylate glue force-cured with misted water for texture, followed by iron powder, then vinegar and hydrogen peroxide with a dash of salt provided the convincing effect. He was kind enough to document the fake rust process on his blog, complete with photos of each stage.

Null Sector showcased a range of creativity; it’s where this unusual headdress was spotted, a device that also showed off the benefits of careful assembly and design.

Laser Noob: Getting Started With The K40 Laser

Why spend thousands on a laser cutter/engraver when you can spend as little as $350 shipped to your door? Sure it’s not as nice as those fancy domestic machines, but the plucky K40 is the little laser that can. Just head on down to Al’s Laser Emporium and pick one up.  Yes, it sounds like a used car dealership ad, but how far is it from the truth? Read on to find out!

Laser cutting and engraving machines have been around for decades. Much like 3D printers, they were originally impossibly expensive for someone working at home. The closest you could get to a hobbyist laser was Epilog laser, which would still cost somewhere between $10,000 and $20,000 for a small laser system. A few companies made a go with the Epilog and did quite well – notably Adafruit used to offer laptop laser engraving services.

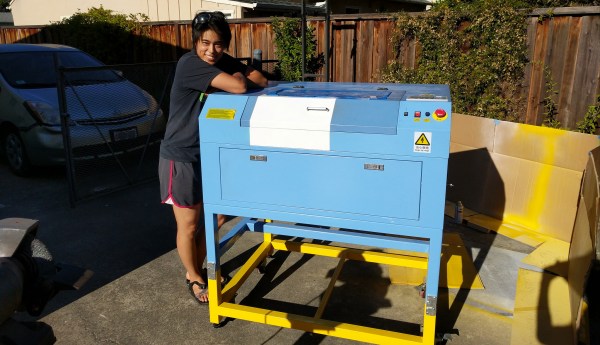
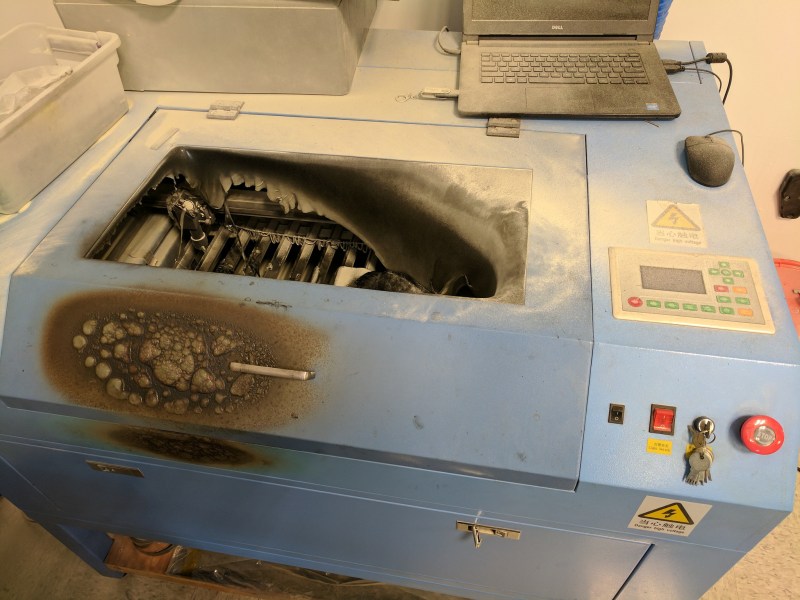
Over the last decade or so things have changed. China got involved, and suddenly there were cheap lasers on the market. Currently, there are several low-cost laser models available in various power levels. The most popular is the smallest – a 40-watt model, dubbed the K40. There are numerous manufacturers and there have been many versions over the years. They all look about the same though: A blue sheet metal box with the laser tube mounted along the back. The cutting compartment is on the left and the electronics are on the right. Earlier versions came with Moshidraw software and a parallel interface.

Continue reading “Laser Noob: Getting Started With The K40 Laser”

3D Printing In Metal: The Laser And Metal Powder Printers We Saw At IMTS

Last week I went to the International Manufacturing Technology Show (IMTS) and it was incredible. This is a toy store for machinists and showcases the best of industrial automation. But one of the coolest trends I found at the show are all the techniques used to 3D print in metal. The best part is that many of the huge machines on display are actually running!

It’s probably better to refer to this as additive manufacturing, because the actual methods can be significantly different from your 3D printer. Below you’ll find examples of three different approaches to this process. I had a great interview with a company doing actual 3D printing in metal using a nozzle-based delivery often called cladding. There’s a demo video of powder layer printing using lasers. And a technique that uses binders as an intermediary step toward the final metal part. Let’s take a look!

Continue reading “3D Printing In Metal: The Laser And Metal Powder Printers We Saw At IMTS”

Chemistry And Lasers Turn Any Plastic Surface Into A PCB

On the face of it, PCB production seems to pretty much have been reduced to practice. Hobbyists have been etching their own boards forever, and the custom PCB fabrication market is rich with vendors whose capabilities span the gamut from dead simple one-side through-hole boards to the finest pitch multilayer SMD boards imaginable.

So why on Earth would we need yet another way to make PCBs? Because as [Ben Krasnow] points out, the ability to turn almost any plastic surface into a PCB can be really handy, and is not necessarily something the fab houses handle right now. The video below shows how [Ben] came up with his method, which went down a non-obvious path that was part chemistry experiment, part materials science. The basic idea is to use electroless copper plating, a method of depositing copper onto a substrate without using electrolysis.

This allows non-conductive substrates — [Ben] used small parts printed with a Formlabs SLA printer — to be plated with enough copper to form solderable traces. The chemistry involved in this is not trivial; there are catalysts and surfactants and saturated solutions of copper sulfate to manage. And even once he dialed that in, he had to figure out how to make traces and vias with a laser cutter. It was eventually successful, but it took a lot of work. Check out the video below to see how he got there, and where he plans to go next.

You’ve got to hand it to [Ben]; when he decides to explore something, he goes all in. We appreciate his dedication, whether he’s using candles to explore magnetohydrodynamics or making plasma with a high-speed jet of water.

Continue reading “Chemistry And Lasers Turn Any Plastic Surface Into A PCB”

DIY laser rifle doing damage long distance

DIY Long Distance Laser Telescope Does Some Damage

Here’s a DIY laser rifle which can explode a balloon at around 150 feet (45 meters) as well as some angry chemicals at a similar distance. Since there are plenty of videos of lasers doing that at around a meter, why shouldn’t doing so farther away be easy? Despite what many expect, laser beams don’t remain as straight lines forever. All light diverges over a distance. This makes it hard to create a laser which can do damage from more than around a meter and is why most demonstrations on YouTube are that distance or less.

Galilean telescope and laser idea[Styropyro’s] handheld, DIY laser rifle, or Laser Telescope Blaster as he calls it, works for long distances. His solution lies in some surprising physics: the larger the diameter of the beam, the more slowly it will diverge. So he used the opposite of a Galilean telescope to take the small beam of his 405-nanometer laser and increase its diameter. His best result was to explode a balloon at 150 feet (45 meters).

He did run into another issue first though. Anyone who’s tried to keep a camera aimed at a target through a telephoto lens while holding the camera in their hands knows that even a tiny movement will throw the camera off target. For a laser beam to sufficiently heat up the balloon in order to make it explode, the beam has to stay on it for a short period of time. But at a long distance, small movements of his rifle made the beam wander. Putting the rifle on a tripod fixed that. In the video below you can see him work through his design and these issues to finally get his big success.

We can guess what spurred on this interest in long-distance laser rifles. Back in July, a Chinese company made bold claims to building one which could do damage at 800 meters.

Continue reading “DIY Long Distance Laser Telescope Does Some Damage”