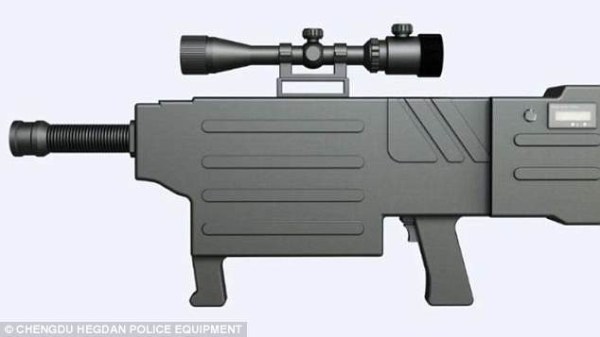
Chinese company ZKZM Laser has produced the ZKZM-500 laser assault rifle which people are calling the Chinese AK-47 because of its similar size, weighing in at three kilos (6.6 lbs). Claims of its capabilities, however, are being disputed.
The South China Morning Post writes that the company claims the laser to:
- be powered by a rechargeable lithium battery back,
- have a range of 800 meters (0.5 miles),
- have a beam that is invisible to the eye,
- be able to fire 1000 “shots”, each no longer than two seconds,
- be able to burn human flesh if held in place long enough,
- be able to set fire to clothes and hair, and
- be able to set fire to banners from a distance.
Burning things with lasers is nothing new but the disputes are mostly based around such a small laser being effective at an 800 meter range. To be fair, while the 800 meter range claim is everywhere, the Post writes that the company brochure says the range is 500 meters (0.3 miles), still quite a long distance.
[styropyro], a YouTuber with a lot of experience with lasers has done an analysis, starting by deducing a wavelength of around 2000 nanometers. He finds that at 800 meters the beam would have dispersed to a diameter of 26 cm (10 inches) and produce 53 W over that area. (EDIT: The 53 W is how much sunlight would produce for that area. In the video he carries the calculations further to work out the minimum power needed, ignoring losses, to light the cotton on fire, 645 W.) For 500 meters, using the same formula we calculate that the dispersion would be a diameter of 16 cm (6 inches) with 500 W spread over that area, which would get uncomfortable very fast, think of half a square meter of sunlight focused down to a circle of that diameter. (EDIT: Again, this it 500 W for sunlight, the laser produces more.) His video doesn’t include enough detail for us to replicate the remainder of the calculations so we’ll just have to go with the 800 meter claim. See the video below for his full analysis. If anyone else has any experience that’ll either support or dispute the claims then please share it with us in the comments.
After all the disputes against their claim, the Chinese company did produce a video firing the laser from a shorter distance. Check it out on this page by the post.
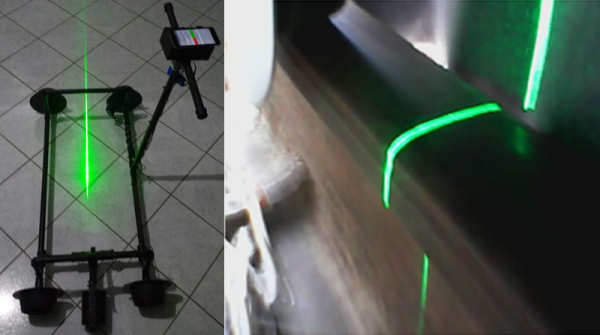
While waiting to see how much truth there is to the Chinese company’s claims we can sit back and enjoy [styropyro’s] home-brew high power ruby laser, both his build and him doing some serious damage with it.
Oh, and don’t try this at home. It’s probably in violation of the Geneva Convention on Certain Conventional Weapons in addition to common sense.
Continue reading “Chinese Laser AK-47: Myth Or Reality?” →