We Are Now At DEFCON 2

If you had a working DEFCON meter that reported on real data, would it be cool or distressing?

Before we get ahead of ourselves: no, not that DEF CON. Instructables user [ArthurGuy] is a fan of the 1983 movie  War Games, and following a recent viewing –hacker senses a-tingling — he set to work building his own real-time display.

Making use of some spare wood, [ArthurGuy] glued and nailed together a 10x10x50cm box for the sign. Having been painted white already at some point, the paint brilliantly acted as a reflector for the lights inside each section. The five DEF CON level panels were cut from 3mm pieces of coloured acrylic with the numbers slapped on after a bit of work from a vinyl cutter.

Deviating from a proper, screen-accurate replica, [ArthurGuy] cheated a little and used WS2812 NeoPixel LED strips — 12 per level — and used a Particle Photon to control them. A quick bit of code polls the MI5 terrorism RSS feed and displays its current level — sadly, it’s currently at DEFCON 2.

Continue reading “We Are Now At DEFCON 2”

Super Simple Controller For Motorcycle LED Lights

For automobiles, especially motorcycles, auxiliary lighting that augments the headlights can be quite useful, particularly when you need to drive/ride through foggy conditions and poorly lit or unlit roads and dirt tracks. Most primary lighting on vehicles still relies on tungsten filament lamps which have very poor efficiency. The availability of cheap, high-efficiency LED modules helps add additional lighting to the vehicle without adding a lot of burden on the electrical supply. If you want to add brightness control, you need to either buy a dimmer module, or roll your own. [PatH] from WhiskeyTangoHotel choose the latter route, and built a super simple LED controller for his KLR650 bike.

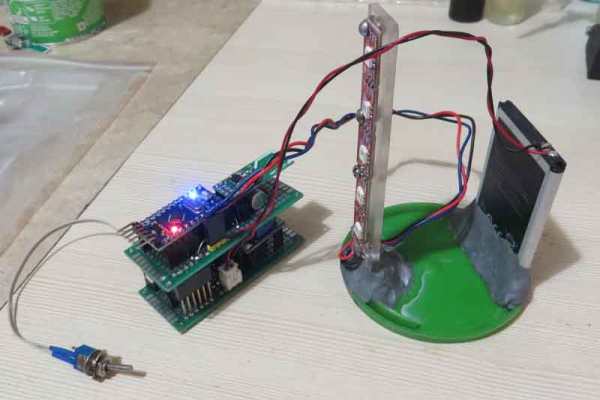
He chose a commonly available 18 W light bar module containing six 3 W LEDs. He then decided to build a microcontroller based dimmer to offer 33%, 50% and 100% intensities. And since more code wasn’t going to cost him anything extra, he added breathing and strobe modes. The hardware is as barebones as possible, consisting of an Arduino Nano, linear regulator, power MOSFET and control switch, with a few discretes thrown in. The handlebar mounted control switch is a generic motorcycle accessory that has two push buttons (horn, headlight) and a slide switch (turn indicators). One cycles through the various brightness modes on the pushbutton, while the slide switch activates the Strobe function. A status indicator LED is wired up to the Nano and installed on the handlebar control switch. It provides coded flashes to indicate the selected mode.

It’s a pity that the “breathing” effect is covered under a patent, at least for the next couple of years, so be careful if you plan to use that mode while on the road. And the Strobe mode — please don’t use it — like, Ever. It’s possible to induce a seizure which won’t be nice for everyone involved. Unless you are in a dire emergency and need to attract someone’s attention for help.

Continue reading “Super Simple Controller For Motorcycle LED Lights”

1.5 Million Dollars Buys 850,000 LEDs And 29 Raspberry Pis

You think you like RGB LEDs? Columbus, OH art professor [Matthew Mohr] has more blinkenlove than you! His airport– convention-center-scale installation piece is an incredible 850,000 RGB LEDs wrapped around a 14-foot tall face-shaped sculpture that projection-maps participants’ faces onto the display. To capture images, there is also a purpose-built room with even illumination and a slew of Raspberry Pi cameras to take pictures of the person’s face from many angles simultaneously.

Besides looking pretty snazzy, the scale of this is just crazy. For instance, if you figure that the usual strip of 60 WS2812s can draw just about 9.6 watts full on, that scales up to 136 kW(!) for the big head. And getting the control signals right? Forgeddaboutit. Prof. [Mohr], if you’re out there, leave us some details in the comments.

(Edit: He did! And his website is back up after being DOSed. And they’re custom LEDs that are even brighter to compete with daylight in the space.)

What is it with airports and iconic LED art pieces? Does anyone really plan their stopovers to see public art? How many of you will fly through Columbus on purpose now?

Coin-Sized LED Control

EE and firmware developer [Enrico] had played with LEDs as a kid, burning out his fair share of them by applying too much current. With the benefit of his firmware chops, he set about creating a board that drives LEDs properly.

[Enrico]’s project centers around a Texas Instruments LM3405 buck controller. It accepts input voltage from anywhere from 3V to 20V and outputs up to 20V/15W to one or more LEDs. He built a ton of safety features into it like short-circuit and open-circuit immunity, temperature control, and auto-off switching when idle. He also created a LED board to test the maximum efficiency of the driver. It consists of four Luxeon Rebel ES diodes, one each RGB and W. The entire back of the LED board is copper, with a monster heat sink attached.

You can follow along with the Glighter-S project on Hackaday.io, or you can buy one of his boards from his Tindie store.

We’ve covered LED drivers extensively in the past, with posts on a simple 10-watt LED driver and how to design your own LED driver.

Coca-Cola's 3D sign

Coca-Cola’s New 3D Times Square Sign Invokes Inceptionism

Coca-Cola has updated their sign in Times Square, and this one has a mesmerizing 3D aspect to it, giving the spooky feeling you get from watching buildings curl up into the sky in the movie, Inception. That 3D is created by breaking the sign up into a 68’x42′ matrix of 1760 LED screens that can be independently extended out toward the viewer and retracted again. Of course, we went hunting for implementation details.

Moving Cube Module
Moving Cube Module

On Coca-Cola’s webpage listing the partners involved in putting it together, Radius Displays is listed as responsible for sign design, fabrication, testing and installation support. Combing through their website was the first step. Sadly we found no detailed design documents or behind-the-scenes videos there. We did find one CAD drawing of a Moving Cube Module with a 28×28 matrix of LEDs. Assuming that’s accurate then overall there are 1,379,840 LEDs — try ordering that many off of eBay. EDIT: One behind-the-scenes video of the modules being tested was found and added below.

So the patent hunting came next, and that’s where we hit the jackpot. Read on to see the results and view the videos of the sign in action below.

Continue reading “Coca-Cola’s New 3D Times Square Sign Invokes Inceptionism”

An Environmentally Conscious, Solar-Powered Throwie

The basic throwie is a a type of street art/graffiti/vandalism — depending on where you stand — consisting of a coin cell, an led, and a magnet taped together. Seeking to be a slightly more eco-friendly troublemaker, [Alaric Loftus] has kindly put together an Instructable on how to build a solar-powered throwie!

In order to be the best maker of mischief possible, [Alaric Loftus] tried a number of different products to find one that was hackable,  supplied the right voltage, had the right form factor, and cheap enough to literally throw away. Turns out, garden path lights hit that sweet spot. Once [Alaric Loftus] has drilled a hole in the light and opened it up, de-soldering the stock LED, attaching some leads to the contacts and sticking it into the freshly-drilled hole is simply done. Hot-gluing a strong magnet on the bottom completes the throwie.

[Alaric Loftus] also advises that drilling the LED hole slightly smaller and sealing up any cracks with hot glue will strengthen its water resistance — because if it’s worth doing, it’s worth doing it right.

We’ve featured some really cooleven creepy — takes on the throwie concept, but please don’t contribute any further to e-waste buildup.

ESP8266 Adds Slick Touchscreen Controls To A Stretch Limo

The popularity of the ESP8266 WiFi module has a lot to do with its ability to inexpensively connect to the Internet. However, [hwhardsoft]’s stretch limousine environmental control system explores another use for these modules: a simple way to tie together disparate systems with a common user interface.

On a basic level, the problem is one we’ve all faced: multiple devices with multiple control interfaces create an awkward user experience. Have you ever worked in an office with 6 brands of air conditioner requiring 6 different remotes? Because of its low-cost, support for Wi-Fi, serial, and GPIO, ESP8266 boards are a reasonable candidate to create a unified control system for multiple devices. This is even more true for the ESP32, as it adds Bluetooth support.

[hwhardsoft]’s use case is fairly straightforward. The limousine (a Lincoln stretch) has multiple LED lighting controllers, climate control, and a laser projector. This was not exactly a smooth user experience, so [hwhardsoft] tied all the controls to two slick touchscreen interfaces (presumably one for the driver and one for the passengers).

Each touchscreen sends commands over Wi-Fi using UDP to a control board that switches relays to control the different devices, as we’ve seen previously.

While relays are arguably not the ideal solution here, these control boards already existed and were functional, so it would have been wasteful to throw them out. An easy improvement suitable for future projects would be to use NPN transistors to simulate button presses on the remote controls. This works quite well and lowers cost, power, and parts count, while being faster, more reliable, and quiet.

If you wanted to build something similar in your home or office, but want to use an Android smartphone instead of a touchscreen, the Kivy Python module allows you to do just that. It’s quite easy to set up a simple interface with buttons, dropdown lists, and text inputs that send data to an ESP8266 over UDP.