Inspired by a prank tweet, [Sam Ettinger] endeavored to create an SMD seven-segment display. The NanoRaptor NanoSegment implements a panel of seven-segment display modules sized at “0806” each or just a bit wider than a standard 0805 SMD footprint. Each of the seven segments is a single 0201 LED. Six I/O lines and three resistors are required to operate each module.
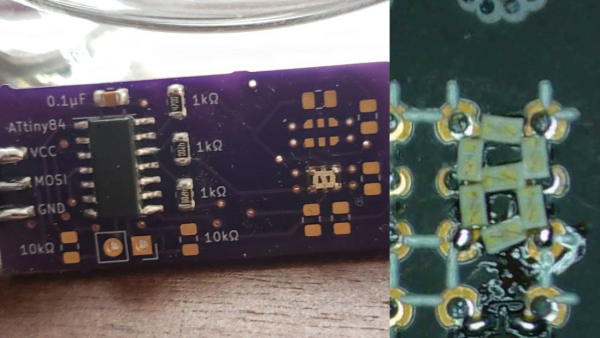
To demonstrate the operation of his tiny display modules, Sam also created the “6Pin 7Seg” development board featuring an ATtiny84 microcontroller coupled to PCB footprints sized to receive the NanoRaptor NanoSegment display modules. A demonstration of the board counts through digits displayed on one of the tiny seven-segment modules.
Hoping to reduce the module’s interface to two pins, Sam is now experimenting with a seven-segment display on a flex PCB that folds up into a 1208 footprint. He is attempting to fold the resistors and a ATtiny20 microcontroller into an “origami PCB” configuration.
If these hacks are getting a little too small for your tastes, we’ve got you covered with this giant seven-segment display.