Driving an LED and making it flash is probably the first project that most people will have attempted when learning about microprocessor control of hardware. The Arduino and similar boards have an LED fitted, and turning it on and off is a simple introduction to code. So it’s fair to say that many of us will think we have a pretty good handle on driving an LED; connect it to a I/O pin via a resistor and that’s it. If this describes you, then Mike Harrison’s talk at the recent Hackaday Superconference (embedded below) will be an education.
Mike has appeared on these pages multiple times as he pushes LEDs and PCB techniques to their limits, even designing our 2017 Superconference badge, and his many years of work in the upper echelons of professional LED installations have given him an unrivaled expertise. He has built gigantic art projects for airports, museums, and cities. A talk billed as covering everything he’s learned about LEDs them promises to be a special one.
If there’s a surprise in the talk, it’s that he’s talking very little about LEDs themselves. Instead we’re treated to a fundamental primer in how to drive a lot of LEDs, how to do so efficiently, with good brightness and colour resolution, and without falling into design traps. It’s obvious that some of his advice such at that of relying on DIP switches rather than software for configuration of multi-part installations has been learned the hard way.
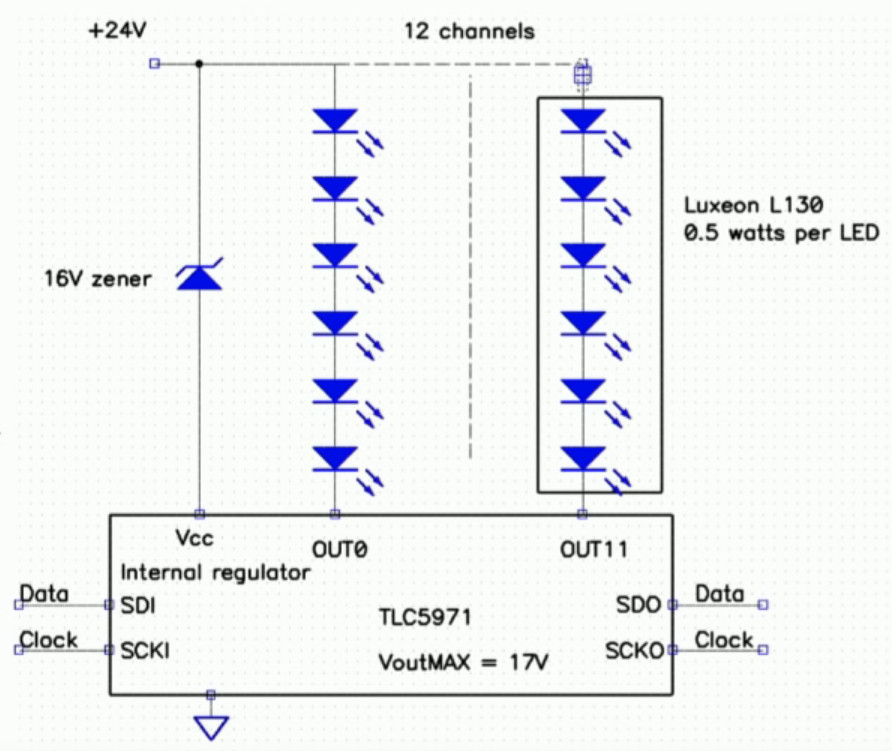
We are taken through a bit of the background to perceived intensity and gamma correction for the human eyesight. This segues neatly into the question of resolution, for brightness transitions to appear smooth it is necessary to have at least 12 bits, and to deliver that he reaches into his store of microcontroller and driver tips for how to generate PWM at the right bitrate. His favoured driver chip is the Texas TLC5971, so we’re treated to a primer on its operation. A useful tip is to use multiple smaller LEDs rather than a single big one in the quest for brightness, and he shows us how he drives series chains of LEDs from a higher voltage using just the TI chip.
Given the content of the talk this shouldn’t come as a shock, but at the end he reminds us that he doesn’t use all-in-one addressable LEDs such as the WS2932 or APA102. These are the staple of so many projects, but as he points out they are designed for toy type applications and lack the required reliability for a multi-thousand LED install.
Conference talks come in many forms and are always fascinating to hear, but it’s rare to see one that covers such a wide topic from a position of experience. He should write it into a book, we’d buy it!
Continue reading “Mike Harrison Knows Everything About LEDs”