Kill A Watt Teardown

killawatt

Come on, folks. If we keep tearing apart everything that’s handed to us, we’ll never get nice things. SparkFun got their mitts on two Kill A Watts and proceeded to plug them into everything and then dismantled them to see how they work. The Kill A Watt keeps track of how much power is used over time. The largest load they found was their soda machine using 500W (should probably add a motion sensor to that). They plugged a meter on either side of a UPS and found out that it uses 5W just to charge. On the inside of the meter, there isn’t anything too substantial. One unlabeled IC runs the whole show.

Weasure, A Scale That Weighs And Measures

weasure

[John Peterson] created this postal scale device for a Renesas design contest. The Weasure not only calculates the package’s total weight but the dimensions as well. He built it using a SKP16C62P evaluation board that had an LCD, pushbuttons, and indicator LEDs. The original DigiWeigh parcel scale was modified to provide PWM output and tare control. He embedded photoresistors every inch along each axis. They were angle slightly upward and the surroundings were painted black to minimize reflection. The Weasure outputs everything via a serial connection so it can be used with shipping software to generate postage.

LED Menorahs

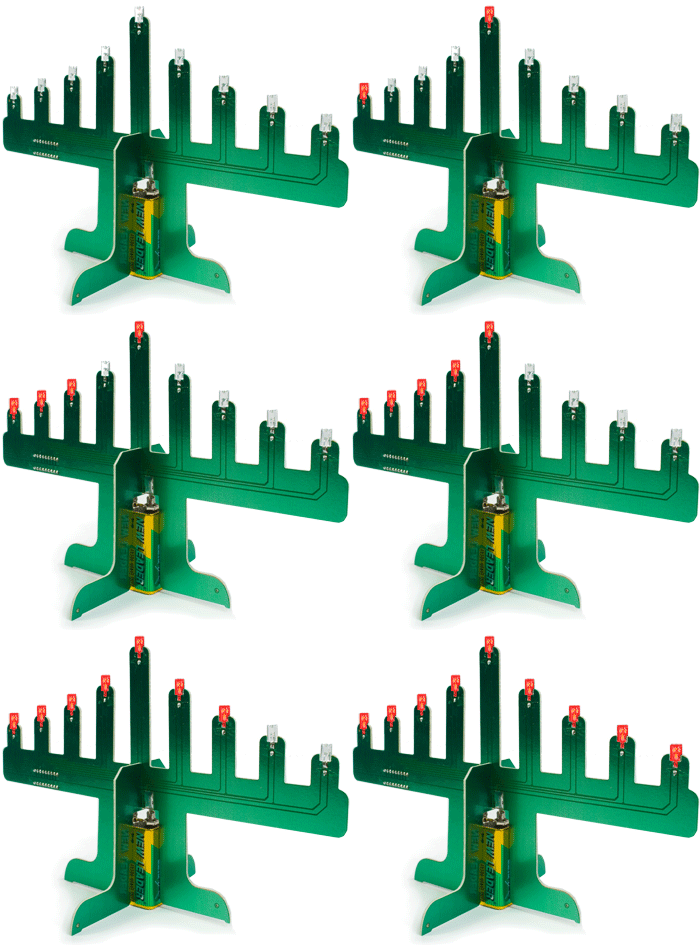
We’re barely past Halloween and people are already working on their next LED based holiday decorations. For Hanukkah, Gizmodo pointed out the PCB menorah pictured above. It uses a set of DIP switches to control which LEDs are lit. A couple years ago, Evil Mad Scientist Laboratories put together a tutorial for building a more minimal LED menorah. Each of the nine LEDs are soldered directly to the legs of an ATtiny2313 microcontroller. Every time you power up the device an additional LED is lit. [Ori] liked the project and decided to take a slightly different approach. He used an LM3914 DIP18 LED bar driver. A potentiometer controls how many of the LEDs are illuminated.

Adjustable Breadboard Power Supply

psboard

This looks like a great addition to your breadboard. [Nerdz] wanted a power supply that was easily portable and adjustable. He built a custom board that plugs directly into the breadboard’s power rails. It has a pot attached to the ground of a 7805 voltage regulator so the output can be adjusted from 5V to just under the supply voltage. Anything that makes a breadboard less of a rats nest is definitely a good thing.

Design For Manufacture

sparkfun

SparkFun has posted an excellent guide to the many different issues you could run into when you finally decide to get a circuit board professionally produced. We assume that most of you aren’t running a professional design firm and will appreciate these tips gleaned from years of experience. They provided a rule list, Eagle DRC, and CAM file to help you get it right the first time. The end goal is designing a board that won’t be prone to manufacturing errors. The tutorial starts by covering trace width and spacing. They recommend avoiding anything less than 10mil traces with 10mil spacing. For planes, they increase the isolation to 12mil to avoid the planes pouring onto a trace. They also talk about annular rings, tenting, labeling, and generating the appropriate gerber and drill files. SparkFun isn’t completely infallible though, and manages to produce a coaster from time to time.

SparkFun naturally followed up this strict tutorial with a guide to unorthodox header hole placement. If you want to learn more about Eagle, have a look at [Ian]’s overview of Eagle 5 and Ruin & Wesen’s layout videos.

3D Printer Uses Office Paper

3dhouse
Mcor Technologies recently launched a brand new rapid prototyping machine. The Mcor Matrix forgoes the standard of expensive and rare build materials by using A4 office paper. The machine selectively deposits glue on the sheet of paper: more glue on the cross-section, less on the waste. It then uses a blade to cut out the part profile. The vertical resolution is determined by the paper thickness. You can use either 20lb paper, which has a thickness of .1mm, or 40lb, which is twice as thick, so it will build twice as fast. The final part can be sanded and painted like wood. The idea is similar to LOM, but those machines require specialized paper. It’s nice to see a company intentionally target a low cost of ownership. If they had used a laser though, you’d only have to worry about sourcing the glue. Machine and material prices have yet to be announced.

[via Fabbaloo]

Official Arduino Ethernet Shield

ethernetshield
Arduino has just released an official ethernet shield. It’s based on the same WizNet W5100 chip that was used in the tiny ethernet board we covered earlier. The W5100 handles the full IP stack and can do TCP or UDP with four simultaneous sockets. The board has a power indicator plus six LEDs to debug the connection. It works with the standard ethernet library. The reset button resets the shield and the Arduino. The SD adapter is not currently supported by the Arduino software.