It’s fair to say that the groovebox market has exploded. Store shelves are overflowing with the umpteenth releases from KORG’s Volca line and the latest Pocket Operators. These devices often feature a wide array of tones in an enticingly compact and attractive package, but is it possible to build something similar at home? As [lonesoulsurfer] relates, it certainly is.
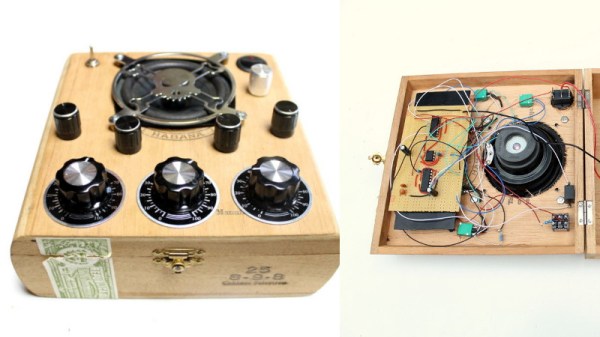
The Cigar Box Synth is, well… a synth, built in a cigar box. Based upon a 555 & 556 timer, and a 4017 decade counter, it provides a wealth of beepy goodness all crammed into a neat wooden package. We dig the cigar box form factor, as it’s a readily available wooden box often finished in an attractive way, and readily reworkable for all kinds of projects.
Sound is controlled with three master potentiometers, and there are four separate potentiometers to set the note for each of the four steps in the sequence. While its melodic abilities are limited to just four notes, it’s certainly something fun to play with and can act as a great jumping off point for further electronic experimentation in this area.
It takes us back to our guide on building DIY logic-based synthesizers – read on!