Wiping Your Windscreen To The Beat

Nothing spoils your mood quite like your windscreen wipers not feeling it when the beat drops. Every major car manufacturer is focused on trying to build the electric self driving vehicle for the masses, yet ignoring this very real problem. Well [Ian Charnas] is taking charge, and has successfully slaved his car’s wipers to beat of its stereo.

Starting with the basics, [Ian] first needed to control the speed of the wiper motor. This was done using a custom power supply adapted from another project. The brain of the system is a Raspberry Pi 3B+ which runs a phase locked loop algorithm to sync the music and the motor. Detecting the beat turned out to be the most difficult part of the project, and from the research [Ian] did, there is no standard solution. He ended up settling on “madmom“, a Python audio and music signal processing library, which runs a neural net to detect the beat in real time. The Raspi sends the required PWM and Enable signals to an Arduino over serial, which in turn controls the power supply. The entire system was neatly integrated in the car, with a switch in the dash that connects the motor to the new power supply on demand, to allow the wipers to still be used normally (and safely).

[Ian] filed a provisional patent application for the idea, and will be putting it on auction on eBay soon, with the hope that some major car manufacturer would be interested. For older cars, you can shove an Arduino into the stereo, or do a super cheap bluetooth upgrade. Check out the video after the break. Continue reading “Wiping Your Windscreen To The Beat”


DIY MIDI Looper Controller Looks Fantastic!

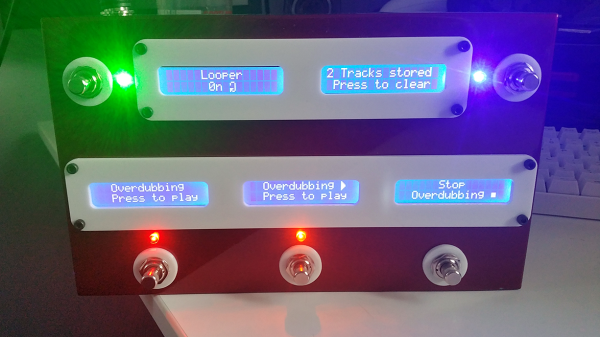
Due to pedalboard size, complicated guitar pedals sometimes reduce the number of buttons to the bare minimum. Many of these pedals are capable of being controlled with an external MIDI controller, however, and necessity being the mother of invention and all, this is a great opportunity to build something and learn some new skills at the same time. In need of a MIDI controller, Reddit user [Earthwin] built an Arduino powered one to control his Boss DD500 Looper pedal and the result is great looking.

Five 16×2 LCD screens, one for each button, show the functionality that that button currently has. They are attached (through some neat wiring) to a custom-built PCB which holds the Arduino that controls everything. The screens are mounted to an acrylic backplate which holds the screens in place while the laser-cut acrylic covers are mounted to the same plate through the chassis. The chassis is a standard Hammond aluminum box that was sanded down, primed and then filler was used to make the corners nice and smooth. Flat-top LEDs and custom 3D printed washers finish off the project.

[Earthwin] admits that this build might be overkill for the looper that he’s using, but he had fun building the controller and learning to use an Arduino. He’s already well on his way to building another, using the lessons learned in this build. If you want to build your own MIDI controller, this article should help you out. And then you’re ready to build your controller into a guitar if you want to.

[Via Reddit]

Everything Makes Sound If You Try Hard Enough

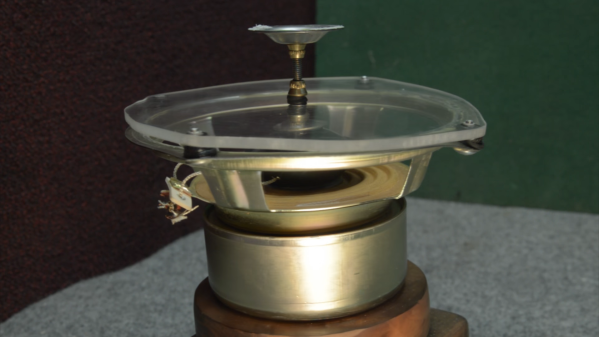
Speaker cone materials can be a deep rabbit hole ranging from inexpensive paper to kevlar. We’ve all cut apart, or blown out, the cheapies to see their inner workings, but the exotic material list does not stop at audiophile-quality models. It can include mirrors, microwave ovens, and a European hacker’s forehead. Video also after the break. In addition to the speakers with expensive elements, there are sound-generating transducers with no cones. These are sometimes called surface speakers, and they vibrate something, anything, to make a sound. At their cores, they have many of the same parts, and making a surface speaker from a traditional speaker is not difficult.

The first step is to find a raw speaker, one with no crossover components, possibly from a garage sale or from a set your spouse insists are outdated, ugly, and better off as firewood. Power specifications should not change since we will be using the same solenoid, and that means your amplifier can follow the speakers back from the dead. The video provides step-by-step instructions, and the goal is to create a module with a moving shaft, but the range must be limited so it cannot be pushed back into the speaker or pulled away, both could destroy it. Once you have that, go around and make everything noisy. Don’t use this on pets or children, but spouses are fair game.

We would love to see a chip bender experiment with different speaker mediums to add an extra layer of complexity, but for the rest of us, bone conduction is already a real thing, and if you enjoy impractical speakers, you are not the only one with your head in the clouds.

Continue reading “Everything Makes Sound If You Try Hard Enough”

Modular Music Synthesis On The Web

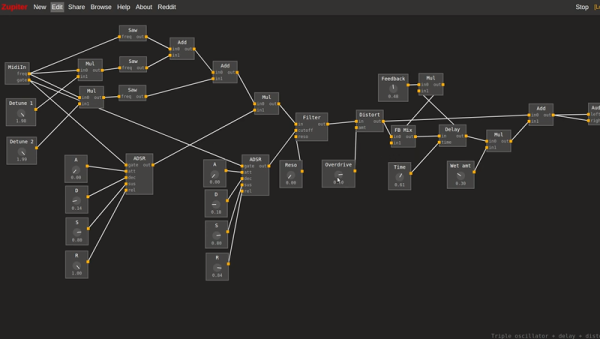
It is hard to imagine how the electronics hobby survived without the Internet. You found like-minded people and projects in magazines. And it is even harder to imagine what projects were in the magazines before the widespread availability of CPU chips. Think about it, there are only so many things you can build with a handful of tubes, transistors, and small ICs. But before the computer revolution took over the hobby, there were always a lot of articles about music synthesis. Coming full circle, you can now build a virtual synthesizer on the web using Zupiter, a modular synthesizer that runs in your browser.

That link is actually about Zupiter, but you can go straight to it if you just want to play. However, we had to do a little reading and try some of the examples, too. You can see a video about the synthesizer, below.

Continue reading “Modular Music Synthesis On The Web”

Making Music From Cardboard

Fans of MaKey MaKey may find this project similar, but there’s a lot more to the Mini Automat than making music from fruit.

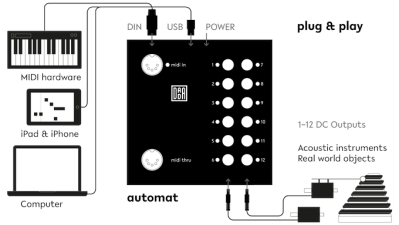
The idea for the Mini Automat (which is an off-shoot of the original Automat project by [Dada Machines]) is to make music accessible to anyone. The device functions as a plug and play MIDI-controller that connects to a computer, MIDI workstation (keyboards and sequencers), or DAW for input and triggers actuators on the output to create music.

The modifications make the originally Automat more hackable by making the board compatible with Arduino and Circuit Python, as well as adding in digital and analog pins for connecting to sensors, buttons, or light systems.

The team has released all schematics, firmware, and software, with only the board layouts unreleased to the public. From solenoids that push, pull, jiggle, smash, and bash at drums to surfaces that vibrate screws and beads, there’s a huge variety of household objects that can be used to make complex layered musical compositions, even for a one-person musician.


The Berlin-based team works on open source music tech hardware with the hopes of bringing environmentally and financially sustainable ideas to market.

Continue reading “Making Music From Cardboard”

Professional Audio On An ESP32

Audiophiles have worked diligently to alert the rest of the world to products with superior sound quality, and to warn us away from expensive gimmicks that have middling features at best. Unfortunately, the downside of most high quality audio equipment is the sticker price. But with some soldering skills and a bit of hardware, you can build your own professional-level audio equipment around an ESP32 and impress almost any dedicated audiophile.

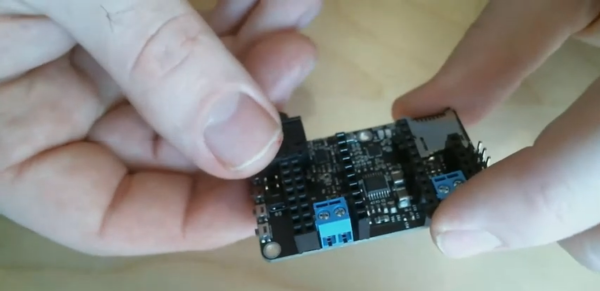
The list of features the tiny picoAUDIO board packs is impressive, starting with a 3.7 watt stereo amplifier and a second dedicated headphone amplifier. It also has all of the I/O you would expect something based on an ESP32 to have, such as I2S stereo DAC, an I2S microphone input, I2C GPIO extenders and, of course, a built-in MicroSD card reader. The audio quality is impressive too, and the project page has some MP3 files of audio recorded using this device that are worth listening to.

Whether you want the highest sound quality for your headphones while you listen to music, or you need a pocket-sized audio recording device, this might be the way to go. The project files are all available so you can build this from the ground up as well. Once you have that knocked out, you can move on to building your own speakers.

Continue reading “Professional Audio On An ESP32”

Upgrading A MIDI Controller With An FPGA

While the “M” in MIDI stands for “musical”, it’s possible to use this standard for other things as well. [s-ol] has been working on a VJ setup (mixing video instead of music) using various potentiometer-based hardware and MIDI to interface everything together. After becoming frustrated with drift in the potentiometers, he set out to outfit the entire rig with custom-built encoders.

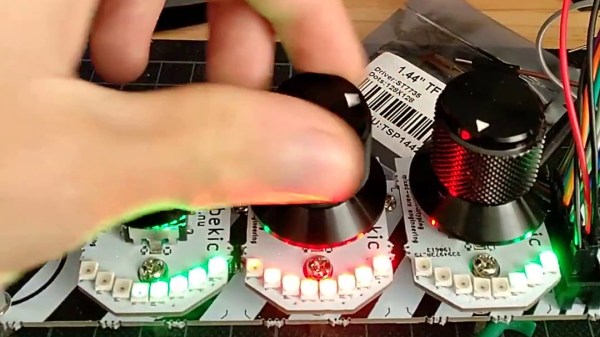
[s-ol] designed the rotary-encoder based boards around an FPGA. It monitors the encoder for changes, controls eight RGB LEDs per knob, and even does capacitive touch sensing on the aluminum knob itself. The FPGA communicates via SPI with an Arduino master controller which communicates to a PC using a serial interface. This is [s-ol]’s first time diving into an FPGA project and it looks like he hit it out of the park!.

Even if you’re not mixing video or music, these encoders might be useful to any project where a standard analog potentiometer isn’t accurate or precise enough, or if you just need something that can dial into a specific value quickly. Potentiometers fall short in many different ways, but if you don’t want to replace them you might modify potentiometers to suit your purposes.

Continue reading “Upgrading A MIDI Controller With An FPGA”