Build A Plate Reverb From Ikea

Back before we all pirated FruityLoops, before ProTools, and before VSTs and DAWs, audio recording was much, much cooler. Reverbs were entire rooms. Sometimes they were springs. Sometimes, in the high-end music studios, reverbs were plates. These plate reverbs were simply a gigantic sheet of metal mounted in a box about ten feet long, four feet high, and a foot thick. Inside, you had some transducers, some pickups, and not much else. Send a signal into the plate reverb and it will bounce around on this flexible membrane, and  emerge through the output in a suitably reverberant form.

Of course, very few places have a plate reverb anymore because they’re gigantic and expensive and software effects are small and cheap. That doesn’t mean a plate reverb is made of unobtanium. [Leo] just made his own plate reverb out of Ikea shelves and some simple electronics.

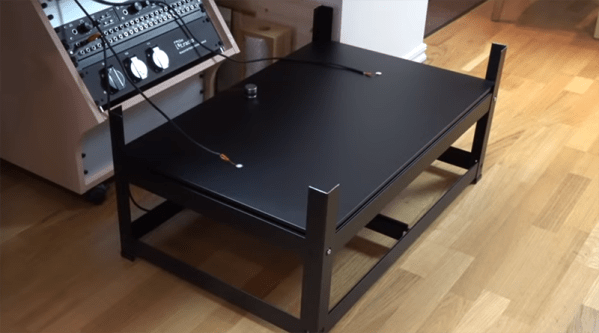
This build used an Ikea Bror shelving unit that cost about $50 sans meatballs. The electronics are a surface transducer and two piezo pickups. Total cost was about $100. That’s all that’s needed to put this plate reverb together, but the real trick is making it work as a reverb.

The plate is driven by the audio output of [Leo]’s computer, through a battery-powered amp, and into a transducer. The transducer is then simply placed on the metal shelf. The two piezo pickups are placed on either end of the shelf, with one going to the right channel of one input, the other going to the left channel of the same input. From there, it’s a simple matter of using this Ikea shelf in an effects loop.

From the video below, the setup absolutely works. [Leo] is playing a few drum loops through the reverb, and the results sound like they should. There’s also a neat trick in using a shelf as a reverb; by placing a rag or a cardboard box on the shelf, the reverb is dampened allowing you to ‘mix’ this reverb in real time.

Continue reading “Build A Plate Reverb From Ikea”

LED-ifying A Guitar, Part Two

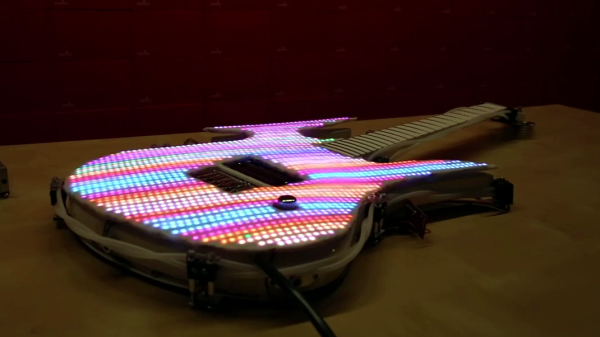
An electric guitar is all about stage presence. Need to be cooler than a single guitar? No problem — there are double neck guitars. Need to be cooler than that? No problem, the guy from Cheap Trick has a five-neck guitar. Need to be cooler than that? Robbie Robertson played a guitar with an extra mandolin neck on The Last Waltz. Where do you go from there? Obviously, the solution is putting a TV in your guitar with a boatload of individually addressable LEDs in a guitar. That’s what [Englandsaurus] is doing, and the build thread is now getting into how to turn a bunch of LEDs into a display.

In the first installment of this build thread, [Englandsaurus] went over the construction of the guitar itself and how a hundred individually addressable RGB LEDs were installed inside two pieces of plexiglass. When the guitar is displaying white at full brightness, the power draw is 500 W. This, in itself, is remarkable; no sane person would ever plug a guitar into a 500 W amp, and even 100 Watts is just too damn loud. There’s more power going to the lights here than the amplifier, and that’s awesome.

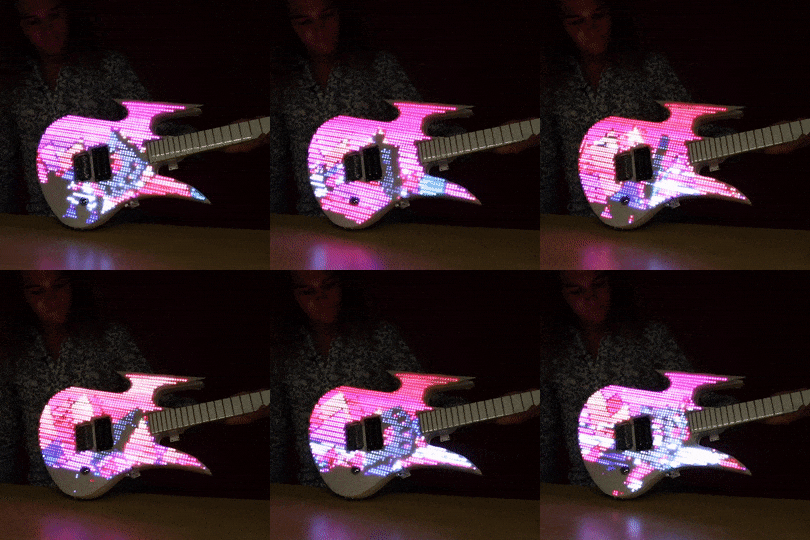
Simply sticking LEDs in a guitar does not a build log make, so how are these pixels addressed? How do you make a display out of a bunch of LEDs? This is a hell of a problem, but with Artnet and Resolume Arena 6 these pixels can be mapped into a cartesian grid, and from there it’s just putting video on the guitar.

While the first installment of this build is great and shows you how far you can take electronics in a guitar, this installment is a great demo of turning a bunch of LEDs into a display, something that applies to more than just a gigantic glowey guitar.

A Candle Powered Guitar Pedal

When it comes to guitar effects pedals, the industry looks both back and forward in time. Back to the 50’s and 60’s when vacuum tubes and germanium transistors started to define the sound of the modern guitar, and forward as the expense and rarity of parts from decades ago becomes too expensive, to digital reproductions and effects. Rarely does an effects company look back to the turn of the 19th century for its technological innovations, but Zvex Effects’ “Mad Scientist,” [Zachary Vex], did just that when he created the Candela Vibrophase.

At the heart of the Candela is the lowly tea light. Available for next to nothing in bags of a hundred at your local Scandinavian furniture store, the tea light powers the Zvex pedal in three ways: First, the light from the candle powers the circuit by way of solar cells, second, the heat from the candle powers a Stirling engine, a heat engine which powers a rotating disk. This disc has a pattern on it which, when rotated, modifies the amount of light that reaches the third part of the engine – photoelectric cells. These modulate the input signal to create the effects that give the pedal its name, vibrato and phase.

Controls on the engine adjust the amount of the each effect. At one end, the effect is full phasor, at the other, full vibrato. In between a blend of the two. A ball magnet on a pivot is used to control the speed of the rotating disk by slowing the Stirling engine’s flywheel as it is moved closer.

While more of a work of art than a practical guitar effect, if you happen to be part of a steam punk inspired band, this might be right up your alley. For more information on Stirling engines, take a look at this post. Also take a look at this horizontal Stirling engine.

Continue reading “A Candle Powered Guitar Pedal”

Delta Bot Plucks Out Tunes On A Mandolin

Is there no occupation safe from the scourge of robotic replacement? First it was the automobile assemblers, then fast food workers, and now it’s the — mandolin players?

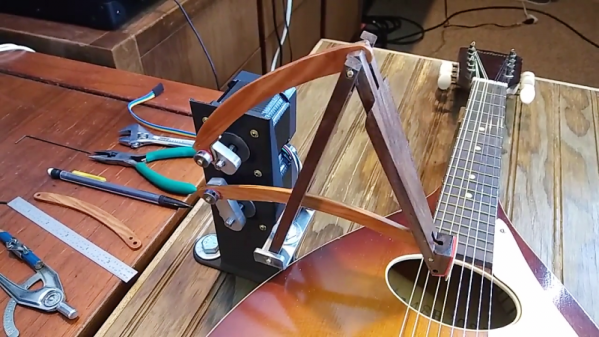
Probably not, unless [Clayton Darwin]’s mandolin playing pluck-bot has anything to say about it. The pick-wielding delta-ish robot can be seen in action in the video below, plucking out the iconic opening measures of that 70s prom-theme favorite, “Colour My World.” The robot consists of two stepper motors connected to a hinged wooden arm by two pushrods. We had to slow the video down to catch the motion, but it looks like [Clayton] has worked out the kinematics so that the pick can be positioned in front of any of the mandolin’s eight strings. A quick move of the lower stepper then flicks the pick across a string and plucks it. [Clayton] goes into some detail about how he built the motion-control part in an earlier video; he also proves that steppers are better musicians than we’ll ever be with a little “Axel F” break.

It’s only a beginning, of course, but the complexity of the kinematics just goes to show how simple playing an instrument isn’t. Unless, of course, you unleash an endless waterfall of marbles on the problem.

Continue reading “Delta Bot Plucks Out Tunes On A Mandolin”

Rock Out To The Written Word With BookSound

With his latest project, [Roni Bandini] has simultaneously given the world a new type of audiobook and music. Traditional audiobooks are basically the adult equivalent of having somebody read you a bedtime story, but BookSound actually turns the written word into electronic music. You won’t be able to boast to your friends that as a matter of fact, you have read that popular new novel, but at least you might be able to dance to it.

[Roni] says he’s still working on perfecting the word to music mapping, so the results shown in the video after the break are still a bit rough. But even in these early stages there’s no denying this is an exceptionally unique project, and we’re excited to see where it goes from here.

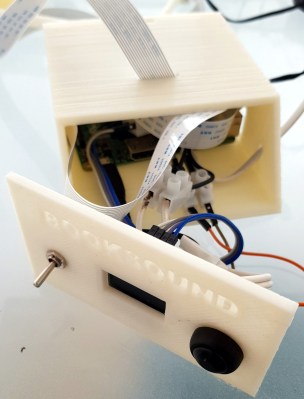
Inside the classy looking 3D printed enclosure is a Raspberry Pi, an OLED display, and the button and switch which make up the extent of the device’s controls. At the end of the arm is a standard Raspberry Pi Camera module, which gives the BookSound a bird’s eye view of the book to be songified.

To turn your favorite book into electronic beats, simply open it up, put it under the gaze of BookSound, and press the button on the front. Because the Raspberry Pi isn’t exactly a powerhouse, it takes about two minutes for it to scan the page, perform optical character recognition (OCR), and compose the track before you start to hear anything.

If you’re wondering what the secret sauce is to turn words into music, [Roni] isn’t ready to share his source code just yet. But he was able to give us a few high-level explanations of what’s going on inside BookSound. For example, to generate the song’s BPM, the software will count how many words per paragraph are on the page: so a book with shorter paragraphs will consequently have a faster tempo to match the speed at which the author is moving through ideas. Similarly, drum kicks are generated based on the number of syllables in each paragraph. In the future, he’s looking at adding “lyrics” by running commonly used words on the page through a text to speech engine and inserting them into the beat.

We’ve seen practical applications of OCR on the Raspberry Pi in the past and even similar looking book scanning arrangements. But nothing quite like BookSound before, which at this point, is really saying something.

Continue reading “Rock Out To The Written Word With BookSound”

A $4 Ultrasonic Theremin Looks Cheesy On Purpose

We don’t think [bleepbit] will take offense when we say the “poor man’s theremin” looks cheesy — after all, it was built in a cheese container. Actually, it isn’t a bad case for a simple device, as you can see in the picture and the video below. Unlike a traditional theremin, the device uses ultrasonics to detect how far away your hand is and modifies the sound based on that.

There are also two buttons — one to turn the sound off and another to cycle through some effects. We liked how it looked like a retro cassette, though. The device uses a cheap Arduino clone, but even with a real Arduino, the price wouldn’t be too bad. However, the price tag quoted doesn’t include a few connectors or the speaker that appears in the schematic. There’s a note that the model built uses a jack instead of a speaker, but it would be nice to include both and use the kind of jack that disconnects the speaker when you plug speakers or headphones in.

Continue reading “A $4 Ultrasonic Theremin Looks Cheesy On Purpose”

Quick And Dirty MIDI Interface With USBASP

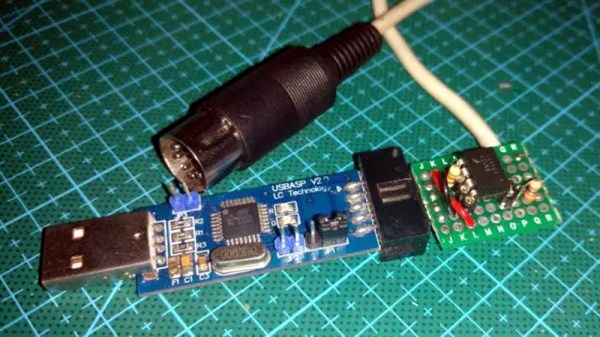
[Robson Couto] recently found himself in need of MIDI interface for a project he was working on, but didn’t want to buy one just to use it once; we’ve all been there. Being the creative fellow that he is, he decided to come up with something that not only used the parts he had on-hand but could be completed in one afternoon. Truly a hacker after our own hearts.

Searching around online, he found documentation for using an ATtiny microcontroller as a MIDI interface using V-USB. He figured it shouldn’t be too difficult to adapt that project to run on one of the many USBASP programmers he had laying around, and got to work updating the code.

Originally written for the ATtiny2313, [Robson] first had to change around the pin configuration so it would work on the ATmega8 in the USBASP, and also updated the USB-V implementation to the latest version. With the code updated, he programmed one of the USBASP adapters with a second one by connecting them together and putting a jumper on the J2 header.

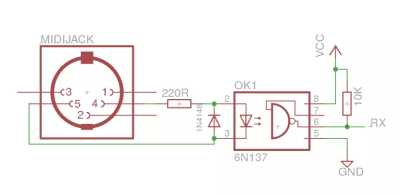
He had the software sorted, but there was still a bit of hardware work to do. To provide isolation for the MIDI device, he put together a small circuit utilizing a 6N137 optoisolator and a couple of passive components on a piece of perf board. It’s not pretty, but it does fit right into the programming connector on the USBASP. He could have fired up his PCB CNC but thought it was a bit overkill for such a simple board.

[Robson] notes that he hasn’t implemented MIDI output with his adapter, but that the code and the chip are perfectly capable of it if you need it for your project. Finding the schematic to hook up to the programmer’s TX pin is left as an exercise for the reader.

If you don’t have a USBASP in the parts bin, we’ve seen a very similar trick done with an Arduino clone in the past.