If Nintendo is known for anything outside of their characters and admittedly top-notch video games, it’s being merciless to fans when it comes to using their intellectual property. They take legal action against people just for showing non-Nintendo hardware emulating games of theirs, and have even attempted to shut down the competitive scene for games like Super Smash Bros. To get away from the prying eyes of the Nintendo legal team extreme measures need to be taken — like building your Nintendo console clone behind the Iron Curtain.
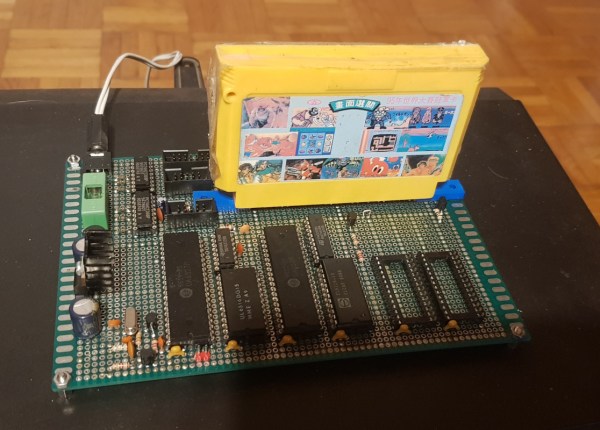
[Marek Więcek] grew up in just such a place, so the only way to play Famicom (a.k.a NES) games was to use a clone system like this one circulating in the Eastern Bloc at the time called the Pegasus which could get the job done with some tinkering. [Marek] recently came across CPU and GPU chips from this clone console and got to work building his own. Using perf board and wire he was able to test the chips and confirm they functioned properly, but had a problem with the video memory that took him a while to track down and fix.
After that, he has essentially a fully-functional Famicom that can play any cartridge around. While we hope that living in Eastern Europe still puts him far enough away to avoid getting hassled by Nintendo, we can never be too sure. Unless, of course, you use this device which lets you emulate SNES games legally.
Continue reading “Hackaday Prize 2022: An Eastern Bloc NES Clone”