Sometimes the best projects are the simple, quick hits. Easily designed, fast to build, and bonus points for working right the first time. Such projects very often lead to bigger and better things, which appears to be where this low-power temperature beacon is heading.
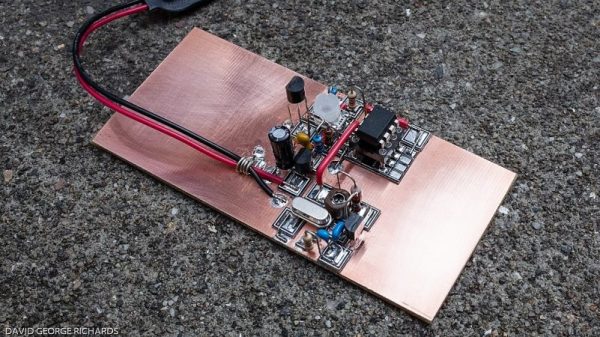
In the world of ham radio, beacon stations are transmitters that generally operate unattended from a known location, usually at limited power (QRP). Intended for use by other hams to determine propagation conditions, most beacons just transmit the operator’s call sign, sometimes at varying power levels. Any ham that can receive the signal will know there’s a propagation path between the beacon and the receiver, which helps in making contacts. The beacon that [Dave Richards (AA7EE)] built is not a ham beacon, at least not yet; operating at 13.56 MHz, it takes advantage of FCC Part 15 regulations regarding low-power transmissions rather than the Part 97 rules for amateur radio. The circuit is very simple — a one-transistor Colpitts oscillator with no power amplifier, and thus very limited range. But as an added twist, the oscillator is keyed by an ATtiny13 hooked to an LM335 temperature sensor, sending out the Celsius and Fahrenheit temperature in Morse every 30 seconds or so. The circuit is executed in Manhattan style, which looks great and leaves plenty of room for expansion. [Dave] mentions adding a power amp and a low-pass filter to get rid of harmonics and make it legal in the ham bands.
Beacons are just one of the ways for hams to get on the air without talking. Another fun way to analyze propagation is WSPR, which is little like an IoT beacon.
Continue reading “Temperature Sensor And Simple Oscillator Make A Value-Added HF Beacon”