The Raspberry Pi is an extremely versatile little computer, but even its most ardent fans would acknowledge that there are some areas in which its hardware is slightly lacking. One of these is in the field of timing, the little board has no real-time clock. Users must rely on the on-board crystal oscillator, which is good enough as a microprocessor clock but subject to the vagaries of temperature as it is, not so much as a long-term timepiece.
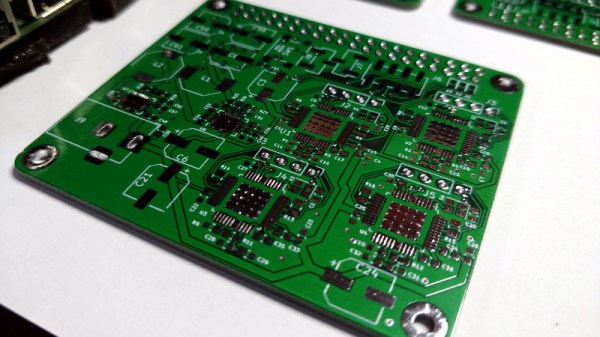
[Manawyrm] has tackled this problem in a rather unusual way, by dispensing entirely with the crystal oscillator on an older Pi model and instead using a clock derived from a GPS source. The source she’s used is a Leo Bodnar mini precision GPS reference clock, which includes a low-jitter synthesiser that can be set to the Pi’s 19.2 MHz required clock. Unexpectedly this also required a simple LC low-pass filter which was made on a sheet of PCB material, because the Pi at first appeared to be picking up a harmonic frequency. The Pi now has a clock that’s sufficiently stable for tasks such as WSPR transmission without constant referral to NTP or other timing sources to keep it on-track.
It’s a short write-up, but it brings with it a further link to a discussion of different time synchronisation techniques on a Pi including using a kernel module to synchronise with the more common GPS-derived 1PPS signal. We’ve not seen anyone else do this particular mod to a Pi before, but conversely we’ve seen a Pi provide an RF time reference to something else.
So you’ve rushed off to your favourite dealer in Raspberry Pi goodies and secured your shiny new Raspberry Pi 4. Maybe you’re anxiously waiting for the postie, or perhaps if you’re lucky enough to live near Cambridge you simply strolled into the Pi shop and bought one over the counter. You’ve got the best of the lot, the 4 GB model, and there’s nothing like the feeling of having the newest toy before everyone else does.
A scan of the Pi 4 user guide, with a tantalising 8GB at the bottom.
You open the box, pull out the Pi, and get busy. The instruction leaflet flutters to the floor, ignored and forgotten. If you’re our tipster [Eric van Zandvoort] though, you read it, notice something unexpected, and send a scan to your friends at Hackaday. Because there at the top, in the regulatory compliance information that nobody reads, is the following text:
Product name: Raspberry Pi 4 Model B 1 GB, 2 GB, 4 GB + 8 GB variants.
It’s not the lack of an Oxford comma that caught his eye, but the tantalising mention of an 8 GB Raspberry Pi 4. Could we one day see an extra model in the range with twice the memory? It would be nice to think so.
There are a couple of inevitable reactions when a new product comes out. First, everyone who has just bought the previous one will be upset, and second there will always be a group of people who say “Ah, don’t buy this one, wait for the super-duper upgrade model!” We’d like to suggest to anyone tempted into the latter group that this news should be no reason not to buy a Raspberry Pi 4 at the moment, because the prospect of an 8 GB variant should come as a shock to nobody.
It makes absolute sense that the Pi people will have equipped their SoC with as much address space as they can get into it, and equally as much sense that they will have fitted the final products with whatever memory chips keep it within their target price point. If you cast your mind back you’ll know that this isn’t the first time this has happened, early boards were shipped with 256 MB of RAM but later upgraded to 512 MB as the economics made it possible. Those with extreme knowledge of Pi trivia will also know that the original Model A was announced with 128 MB and released with 256 MB for the same reason.
There’s another question, would 8 GB make that much difference? The answer depends upon what you are doing with your Pi 4, but it’s worth remembering that this is no high-end workstation but a single-board computer with a stripped-down Linux distro for experimenters. You may be disappointed if you are pushing the limits of computational endeavour, but the majority of users will not be taxing Raspbian on the 4 GB model even if they install Chromium and open up all their favourite bloated social media sites. Perhaps we’ve become conditioned by the excessive demands of Windows on an x86 platform and forgotten just how powerful our computers really are. After all, as the apocryphal Bill Gates quote has it, “640k should be enough for anyone“, right?
We can look forward to an 8 GB Pi 4 then at some point in the future. We’d put our money on next year, since 2020 is a leap year and 2020-02-29 will be the Pi’s 2nd 8th birthday, it wouldn’t stretch the imagination to speculate around that date. But don’t bet on it, save your money for buying a 4 GB Pi 4 right now.
The Raspberry Pi 4 was just released. This is the newest version of the Raspberry Pi and offers a better CPU and more memory than the Raspberry Pi 3, dual HDMI outputs, better USB and Ethernet performance, and will remain in production until January, 2026.
The CPU on the new and improved Raspberry Pi 4 is a significant upgrade. While the Raspberry Pi 3 featured a Broadcom BCM2837 SoC (4× ARM Cortex-A53 running at 1.2GHz) the new board has a Broadcom BCM2711 SoC (a quad-core Cortex-A72 running at 1.5GHz). The press literature says this provides desktop performance comparable to entry-level x86 systems.
Of note, the new Raspberry Pi 4 features not one but two HDMI ports, albeit in a micro HDMI format. This allows for dual-display support at up to 4k60p. Graphics power includes H.265 4k60 decode, H.264 1080p60 decode, 1080p30 encode, with support for OpenGL ES, 3.0 graphics. As with all Raspberry Pis, there’s a component composite video port as well tucked inside the audio port. The 2-lane MIPI DSI display port and 2-lane MIPI CSI camera port remain from the Raspberry Pi 3.
Love ’em or hate ’em, you’ve got to hand it to Apple: they really know how to push people’s buttons with design. Their industrial designers can make a product so irresistible – and their marketing team can cannonball the hype train sufficiently – that people will stand in line for days to buy a new product, and shell out unfathomable amounts of money for the privilege.
But what if you’re a poor college student without the budget for such treasures of industrial design? Simple – you take matters into your own hands and stuff a Raspberry Pi into a cheese grater. That’s what a group of engineering students from the University of Aveiro in Portugal called [NeRD-AETTUA] did, in obvious homage to the world’s most expensive cheese grater. The video below for the aptly named RasPro is somewhat less slick that Apple’s promos for the Mac Pro, but it still gets the basics across. Like the painstakingly machined brushed aluminum housing on the Mac, the IKEA cheese grater on the RasPro is just a skin. It covers a 3D-printed chassis that houses a beefy power supply and fan to go along with the Raspberry Pi 3. There’s also a speaker for blasting the tunes, which seems to be the primary use for the RasPro.
All things considered, the cheese grater design isn’t really that bad a form factor for a Pi case. If that doesn’t appeal, though, take your pick: laser-cut plywood, an Altoids tin, or even inside your PC.
Fake security cameras are advertised as a cheap way to deter anyone who might be up to no good. This isn’t a crime and punishment blog, so we’re not really in a position to say how accurate that claim actually is, but we see enough of these things for sale that somebody out there must believe they’re worth having. Though if it were us, we’d take this tip from [Daniel Andrade] and convert our “fake” camera into a real one with the Raspberry Pi and WebRTC.
There are an untold number of makes and models of these fake cameras out there, but it seems that many of them share a fairly common design in that the enclosure they use is actually pretty useful for putting your own hardware in. They’re hollow, relatively well protected from the elements, and as most of them use a blinking LED or some other feature to make them look more authentic, they already have a functional battery compartment.
As it turns out, the one that [Daniel] picked up for $9 USD is pretty much perfect for the Raspberry Pi Zero and its camera module. He even wired the blinking LED up to the Pi’s GPIO pins so it will still look the part, though replacing it with an RGB LED and appropriate scripts to drive it would be a nice way to get some visual feedback on what the system is doing.
The software side of things is done with Balena, a suite of tools for setting up and managing Linux Internet of Things devices. They provide everything from the SD card image that runs on the Pi itself to the cloud infrastructure that pulls all the data together. [Daniel] dove a little deeper into the software stack when he created his Bitcoin traffic light last year.
For any readers who may feel a sense of déjà vu looking at this project, you aren’t going crazy. We recently saw a similar project that used an ESP8266 and a PIR sensor to add motion sensing capabilities to one of these fake cameras. Now all we need is somebody to put an Arduino in one of them, and we’ll have the Holy Trinity represented.
You may have noticed, we’re fans of the Raspberry Pi here at Hackaday. Hardly a day goes by that we don’t feature a hack that uses a Pi somewhere in the build. As useful as the Pis are, they aren’t entirely without fault. We’ve talked about the problems with the PoE hat, and multiple articles about keeping SD cards alive. But a new failure mode has popped that is sometimes, but not always, caused by shorting the two power rails on the board.
The Pi 3 B+ has a new PMIC (Power Management Integrated Circuit) made by MaxLinear. This chip, the MxL7704, is a big part of how the Raspberry Pi foundation managed to make the upgrades to the Pi 3 without raising the price over $35.
A quick look at the Raspberry Pi forum shows that some users have been experiencing a specific problem with their new Raspberry Pi 3 B+ units, where the power LED will illuminate but the unit will not boot. The giveaway is zero voltage on the 3v3 pin. It’s a common enough problem that it’s even mentioned in the official boot problems thread.
Make sure the probe you are measuring with does not slip, and simultaneously touches any of the other GPIO pins, as that might instantly destroy your PI, especially shorting the 3V3 pin to the 5V pin will prove to be fatal.
A common complaint about open hardware and software is that the aesthetic aspects of the projects often leave something to be desired. This isn’t wholly surprising, as the type of hackers who are building these things tend to be more concerned with how well they work than what they look like. But there’s certainly nothing wrong with putting a little polish on a well designed system, especially if you want “normal” people to get excited about it.
For a perfect example, look no further than the HestiaPi Touch. This entry into the 2019 Hackaday Prize promises to deliver all the home automation advantages of something like Google’s Nest “smart” thermostat without running the risk of your data being sold to the highest bidder. But even if we take our tinfoil hat out of the equation, it’s a very slick piece of hardware from a functional and visual standpoint.
As you probably guessed from the name, the thermostat is powered by the Raspberry Pi Zero, which is connected to a custom PCB that includes a couple of relays and a connector for a BME280 environmental sensor. The clever design of the 3D printed case means that the 3.5 inch touch screen LCD on the front can connect directly to the Pi’s GPIO header when everything is buttoned up.
Of course, the hardware is only half the equation. To get the HestiaPi Touch talking to all the other smart gadgets in your life, it leverages the wildly popular OpenHAB platform. As demonstrated in the video after the break, this allows you to use the HestiaPi and its mobile companion application to not only control your home’s heating and air conditioning systems, but pretty much anything else you can think of.
The HestiaPi Touch has already blown past its funding goal on Crowd Supply, and the team is hard at work refining the hardware and software elements of the product; including looking at ways to utilize the unique honeycomb shape of the 3D printed enclosure to link it to other add-on modules.